
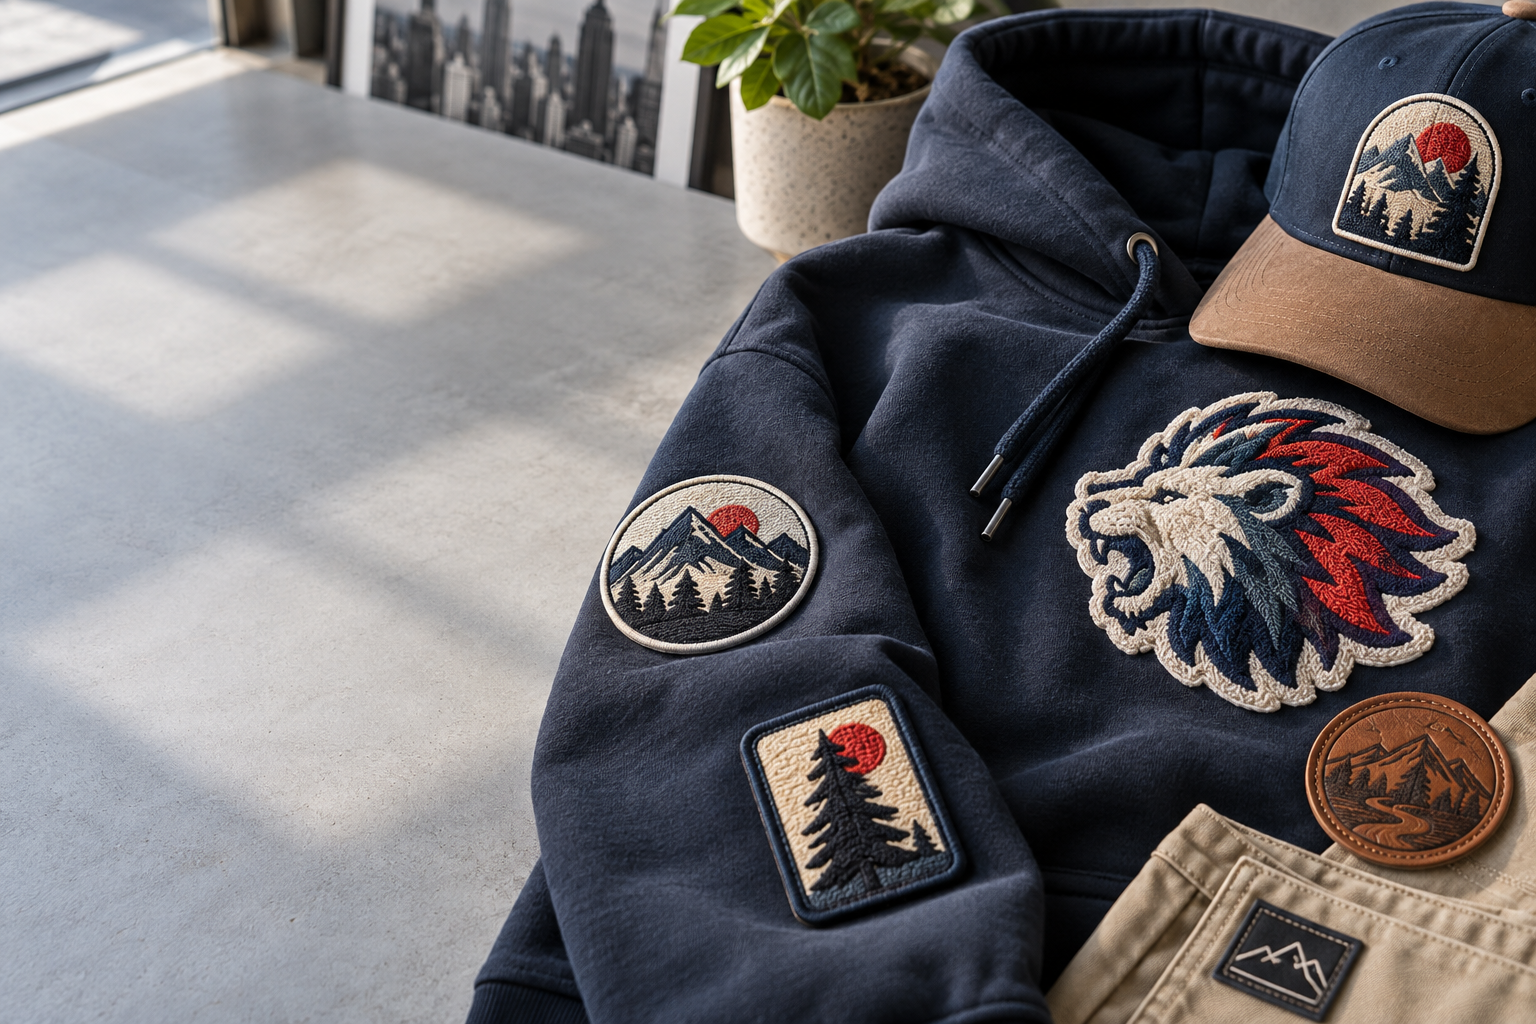
The best 3D embroidered patches New York streetwear brands can choose use raised thread for a bold logo and a backing suited to the actual garment. Block initials and simple symbols usually work better than tiny lettering, gradients, or crowded artwork. For a cap, hoodie, or jacket, the right choice starts with readable artwork and a patch that sits properly.
GetUSAPatches serves brands throughout the United States from Corona, CA, with a 10-piece minimum and a free digital mockup before production. We produce only after approval and ship to all 50 states, including New York. Here is how to turn a promising logo into a patch specification that your designer, production contact, and garment decorator can all understand.
What makes a 3D patch the best fit for a streetwear brand?
Best is a fit decision, not a trophy. A raised two-letter mark on a structured six-panel cap can look deliberate and hold its shape, while that same stiff patch may pull a lightweight T-shirt out of line. Start with where the patch will live, how much detail the logo needs, and how the garment will be worn.
True puff-style embroidery uses a raised construction, commonly embroidery over foam, to create dimensional strokes. An ordinary embroidered patch already has thread texture, but that does not automatically make it a puff patch. Ask which parts of the design will be raised and which will remain flat; a rendering with a drop shadow is not a construction specification.
The strongest streetwear applications often combine both. Raise the main monogram, keep the city name flat, and leave enough open background around the lettering that the logo still reads from across a shop floor. More raised coverage is not always better, especially if it closes the counters inside letters such as A, B, and R.
Start with the 3D embroidered patches hub for dimensional designs, or compare standard embroidered patches if the artwork relies on finer stitched detail. The construction walkthrough in 3D Puff Embroidery Explained: How Raised Patches Are Made is useful for separating visual texture from actual raised construction.
Match the patch to the cap, jacket, or hoodie first
A quote needs more than “patches for jackets.” Nylon shells, wool coaches jackets, fleece hoodies, and lined varsity jackets create different attachment problems. Send the garment model or a clear photo, and say if patches will arrive loose or need to go to a separate decorator for installation.
Structured caps and knit beanies
For an initial cap layout, a patch around 2.25 to 3 inches wide can be a useful paper-template range, not a universal size recommendation. Check its height against the crown and its width against the curve. A flat, stiff patch can lift at its sides or bridge the center seam if the shape and attachment do not suit the cap.
Beanies bring a different problem: the fabric stretches while the patch does not stretch in the same way. Test the folded cuff with the beanie on a head form or a person, not just lying on a table. The hat patches hub and Custom Hat Patches: How to Choose the Right Style for Caps and Beanies cover the broader material choices.
Nylon shells, wool coaches, and letterman jackets
Thin nylon shells need caution around heat and needle holes, especially if the fabric has a coating. Do not assume an iron-on backing is compatible because the patch itself tolerates pressing. For a lined shell, ask the garment decorator how attachment will affect the lining and any water-resistant construction.
Wool coaches and letterman jackets can visually support more substantial embroidery, but weight and placement still matter. A raised left-chest monogram may work well beside a flatter sleeve label. For a broad varsity letter with a fuzzy surface rather than a firm thread ridge, compare chenille patches instead of forcing puff embroidery to imitate chenille.
Fleece hoodies, denim overshirts, and canvas bags
Heavy fleece, denim, and canvas are sensible candidates for sew-on patches, subject to the decorator's equipment and access. Keep the patch clear of a hoodie pocket opening, zipper path, or thick seam intersection. A raised patch that catches a backpack strap every day has a different wear pattern from a patch on an unused sleeve area.
The same garment-first thinking applies to high-school sports teams, hospitality polos, fire and public-safety units, biker vests, and club runs. A crisp logo is only half the job. The other half is making sure its thickness, edge, and attachment suit the item that carries it.
Compare raised embroidery with the alternatives
Not every piece in a collection needs the same patch material. A streetwear brand might use raised embroidery on a cap, woven labels on a lightweight overshirt, and a printed patch for an illustrated collaboration. Keeping the logo proportions and colors consistent can tie those pieces together without forcing one construction onto every garment.
Use this table to shortlist a construction before asking for a price. These are practical selection guidelines, not promises that every design can be reproduced at every size. Artwork review still decides what survives at the finished dimensions.
| Patch type | Good streetwear use | Detail and surface | Main trade-off |
|---|---|---|---|
| 3D puff embroidery | Bold cap monograms, jacket initials, simple statement symbols | Raised thread strokes with smaller elements often stitched flat | Needs suitable stroke widths and spacing; tiny text and narrow gaps are poor candidates |
| Standard embroidery | Merrowed crests, chest badges, club and team-style graphics | Textured stitching without the same intentional puff height | Fine artwork still needs simplification, but more of the design can stay in one stitched treatment |
| Woven | Small wordmarks, detailed sleeve labels, lightweight branding | Lower-profile thread construction that generally handles fine detail better | Does not provide the pronounced raised surface of puff embroidery |
| Printed | Illustrations, gradients, photo-based graphics, event collaborations | Flat image reproduction without building the graphic from embroidery stitches | Printed is flatter; that is the point, but it will not feel like raised thread |
| Chenille | Oversized varsity letters and letterman-inspired jacket graphics | Soft, fuzzy pile with a different texture from embroidery | Small lettering and intricate artwork need another treatment or supporting embroidery |
| PVC | Removable bag badges and technical-looking outerwear details | Molded relief rather than stitched texture | Material feel and stiffness differ from textile patches; it is not a substitute for thread |
| Leather or faux leather | Workwear-style caps, denim details, restrained branding | Material-led appearance with artwork treatment depending on construction | Care, flexibility, color options, and heat tolerance require their own review |
If the logo includes a small address line or intricate linework, compare woven patches and printed patches before enlarging the entire badge. For removable technical details, consider PVC patches. The guide Embroidered vs. Woven vs. PVC Patches: Which Should You Choose? helps explain the differences to a design team.
A practical specification for 3D embroidered patches New York brands can quote
The specification should describe a physical patch, not just the mood of the collection. “Premium, chunky, vintage” can help communicate direction, but those words do not tell production the finished width, raised areas, border, or backing. Put the measurable decisions next to the artwork.
Consider a proposed 3-inch-wide by 2-inch-high rounded rectangle for a denim overshirt. A workable brief might call for a raised two-letter monogram, a flat stitched neighborhood name underneath, a contrasting ground, and sew-on attachment. That is an example to review, not a claim that every logo will fit those dimensions.
- Finished size: state width and height in inches, and specify whether those dimensions include the outer border. Avoid “about palm size” if two people need to approve the same layout.
- Raised areas: mark exactly which letters or symbols should use puff construction. Leave small supporting copy flat unless artwork review confirms another workable treatment.
- Thread and ground colors: identify the patch background separately from stitched colors. Include a brand reference and note if matching an existing garment matters more than matching a screen.
- Outline and border: specify the shape and intended edge treatment. A round crest, rounded rectangle, and pointed custom outline do not share the same border constraints.
- Backing and installation: identify sew-on, iron-on, or hook-and-loop, and say who will attach the patches. Do not assume garment application is included in a loose-patch quote.
- Quantity and variants: break out each design, size, and colorway. GetUSAPatches has a 10-piece minimum; ask how that minimum applies to any proposed assortment.
Specify readable geometry, not a universal puff height
A single minimum letter height or foam thickness is not a reliable answer for every logo. Stitch direction, stroke shape, spacing, foam, and final dimensions interact. Ask for an artwork-specific review rather than copying a millimeter measurement from another brand's patch and assuming the result will match.
Also separate digital approval from physical verification. A mockup can show the intended raised zones, dimensions, colors, and placement, but it cannot prove the finished loft or how a patch bends around a cap. If those features are critical, ask about physical sampling, its cost, and its schedule before committing to the full run.
Print a full-size paper outline and place it on the smallest garment size in the release. Then check a larger size, because a chest badge that looks balanced on one size may look undersized on another. The Custom Patch Size Guide: How Big Should Your Patch Be? can help frame that placement check.
Design details that prevent a muddy or crowded patch
The most common design problem is trying to keep everything. A logo may look sharp on a laptop while losing its smallest spaces once it becomes thread. Review the artwork at actual patch size, and decide which two or three features must survive before defending every decorative line.
Open the lettering and protect the negative space
Heavy block lettering is a useful starting point for raised embroidery, but tightly spaced heavy letters can still crowd together. Open the gaps, simplify sharp internal corners, and check letter counters. A small change to spacing can preserve the identity better than adding another outline around everything.
Thin script tails, distressed speckles, and hairline serifs deserve special attention. Some may work as flat stitched accents, while others are better removed or translated into a woven or printed version. Keep the original brand artwork intact and label the simplified file as the production adaptation.
Choose a border that belongs to the shape
Merrowed crests have a familiar rounded stitched edge that suits many badge shapes. Deep inside corners and narrow projections may call for a different cut-edge treatment. The border also consumes visual space, so include it while sizing the lettering rather than adding it after the layout feels finished.
Use Merrowed vs. Hot-Cut vs. Laser-Cut Borders: What’s the Difference? to compare edge options. A clean outline with breathing room often looks more considered than an elaborate contour that leaves tiny slivers of material around the artwork.
Treat color approval as a material decision
Thread reflects light differently from a printed brand guide, and raised strokes can show highlights and shadows even within one color. Black-on-black embroidery may be intentionally subtle, but it should not be approved from a bright screen alone if fast recognition matters. Check contrast against the real garment color.
Send available vector artwork, plus a reference image showing the intended appearance. A clear raster file can still help with review, but renaming a JPG as an SVG does not make it vector artwork. Follow the Artwork File Guide for Custom Patches: Vector, PNG, JPG and More and flag color concerns using Thread Color Matching for Custom Patches: Getting Brand Colors Right.
Sew-on, iron-on, or hook-and-loop: pick the attachment honestly
Backing is not an afterthought. It changes how the patch attaches, what equipment the decorator needs, and which care instructions make sense. A good-looking face does not rescue an iron-on that peels after a dryer cycle because the adhesive, garment, and application settings were never checked together.
Sew-on for a permanent garment attachment
Sew-on is often a practical starting point for denim overshirts, substantial hoodies, and jacket applications where stitching is acceptable. Ask the decorator where the stitch line should run, especially around raised elements. The patch must be secure without a needle path crushing or interrupting the main puff detail.
Check access on lined jackets and small cap panels before ordering. Sewing through every layer can catch a lining or close off a pocket, while opening and restoring a lining adds work. The How to Sew On a Patch: A Step-by-Step Guide is useful for basic technique, but a finished garment may need a professional installer.
Iron-on only after fabric and heat checks
Iron-on can be useful on compatible fabrics, but there is no responsible universal pressing recipe for every patch and garment. Follow the backing supplier's application instructions and the garment's heat limits. Test a representative item before pressing the full release, particularly on synthetics, coatings, or fabrics prone to shine.
Pressure and heat can also affect raised embroidery, so ask how the puff face should be protected during application. Supplemental perimeter stitching may be sensible for frequently worn garments if the construction permits it. Review How to Iron On a Patch the Right Way (and Make It Last) rather than treating household ironing as automatic production approval.
Hook-and-loop for removable badges
A hook-backed patch needs a compatible loop surface. If the bag or jacket already has Velcro panels, measure the usable panel area and confirm which mating components the patch quote includes. Exposed hooks can snag nearby knit fabric, so the patch should fit the intended receiving area.
Removable patches can support interchangeable graphics across a collection, but the receiving panel still needs sound attachment to the garment. Compare the full system in Velcro® Patches: How to Attach and Use Hook-and-Loop Backing. For a broader decision, use Patch Backing Options Explained: Sew-On, Iron-On, Velcro® & More.
Price the installed patch, not just the loose piece
There is no single useful dollar price for a custom 3D patch without artwork, size, quantity, and construction details. Raised coverage, stitch work, border shape, backing, color variants, and packaging can affect the quote. A low loose-piece number is not a complete cost if another shop still has to attach and inspect every patch.
Compare quotes against the same specification. One quote may describe standard embroidery with a dimensional-looking drawing, while another includes actual puff construction in named areas. Differences in shipping, sampling, garment installation, and finishing should be visible before you compare the unit prices.
- Ask for the patch quantity and unit cost in USD, with the exact size and construction stated beside them.
- Confirm any artwork, setup, sampling, or packaging charges instead of assuming they are included or excluded.
- Separate shipping and any applicable tax from garment application, which may be handled by another business.
- Request quantity options that match realistic sell-through, not just the lowest unit-price bracket.
- Ask how a change in size, design, or colorway affects the quote and whether it creates a separate production setup.
For arithmetic only, suppose 100 loose patches cost $400, inbound shipping costs $25, and installation costs $150. That makes the patch-related total $575, or $5.75 per finished garment before the blank, tax, packaging, and other costs. Those are hypothetical numbers, not GetUSAPatches prices; the point is to compare the finished result.
A 10-piece minimum makes a small project possible, but it does not mean ten pieces will have the same unit economics as a larger run. Order quantities should reflect confirmed demand and sensible spare stock. Read How Much Do Custom Patches Cost? What Drives the Price and Ordering Custom Patches in Bulk: Minimums, Pricing and Planning before stretching a budget for a volume break.
Build a New York collection without using the same patch everywhere
A New York streetwear release might include a structured cap, a heavyweight hoodie, and a lightweight shell sold at the same pop-up. Those items can share a mark without sharing identical patch construction. Use the raised version where its shape and texture help, then adapt the smaller or lighter applications on purpose.
For a hypothetical capsule, put a bold raised monogram on the cap, a restrained flat embroidered crest on the hoodie, and a low-profile woven badge on the shell if the attachment review supports it. The aim is a coherent family, not a material rule. A second colorway should also be checked for contrast rather than assumed to work because the first one did.
Workwear-inspired denim may call for leather patches instead, while club-style vest layouts need the spacing and proportion checks familiar from biker and motorcycle club patches. If the release is really built around varsity texture, Why Cheer Squads in New York Choose Chenille Patches offers another material perspective.
New York is the destination and design context here, not a claim that the order ships from a local workshop. GetUSAPatches ships nationwide from Corona, CA. For sourcing questions, see Where to Order Custom Embroidered Patches in New York, NY: Buyer's Guide; for collection planning, use Custom Patches for Fashion and Streetwear Brands: Trends and Ideas.
Ordering and lead time: work backward from the release date
An event date is not the patch delivery date. If a New York decorator needs to install the patches, inspect the garments, and pack the release, the loose patches must arrive earlier. Give the required in-hand date and destination ZIP code at the quote stage, along with the date the finished garments need to be ready.
GetUSAPatches provides a free digital mockup before production, and we produce only after approval. That approval is a real schedule checkpoint. If a partner changes the lettering or garment choice after the first proof, the layout or specification may need another review before manufacturing starts.
- Send the brief: include the artwork, finished dimensions in inches, garment details, intended raised areas, backing, quantities, and delivery ZIP code. Mention physical sampling needs before the schedule is set.
- Review the quote: confirm what is included, how the 10-piece minimum applies to the requested designs, and whether the order covers loose patches only. Identify the person responsible for garment installation.
- Check the digital mockup: verify spelling, proportions, border, colors, raised-versus-flat treatment, and backing notes. Compare it with the full-size paper placement test rather than judging only a large screen preview.
- Approve the final specification: have one authorized person send a clear approval so an old proof does not accidentally become the reference. Production begins only after approval.
- Confirm the current schedule: request the production estimate and shipping option for the approved specification. Treat manufacturing and carrier transit as separate stages, and ask what any rush option actually changes.
- Receive and inspect: allow time to count the patches, check them against the approved proof, and test garment attachment before installing the entire run. Keep the final artwork and order details for a reorder.
We ship to all 50 states from Corona, CA, but nationwide shipping is not a promise of identical transit time to every address. A Manhattan business address, a Brooklyn decorator, and a temporary event receiving location can have different delivery requirements. Confirm the recipient, suite or floor, and receiving arrangements before dispatch.
No fixed turnaround should be assumed from a general guide. Artwork revisions, construction requirements, quantity, physical sampling, and the current production schedule can change the estimate. The Custom Patch Production Timeline: From Artwork to Delivery explains the stages to put into a launch calendar.
Inspect the first delivery and give the garment realistic care instructions
Open the shipment before the decorator is ready to start the entire run. Count the pieces, separate the variants, and compare representative patches with the approved specification. Check finished dimensions, spelling, thread colors, borders, and the location of the raised areas.
Look closely for exposed foam, loose loops, irregular edges, and lettering that has lost its intended open spaces. Some surface variation is part of stitched construction, but the design should remain consistent and readable. Photograph any concern clearly and resolve it before attaching the affected pieces.
- Fit check: place a patch on the actual garment and confirm that it sits inside the available area without bridging a pocket, seam, or cap curve awkwardly.
- Attachment check: have the installer test the planned method on a representative item, following garment and backing instructions. Inspect the face and underside afterward.
- Care check: test a finished garment using the proposed care routine before publishing instructions for the release. One good-looking application straight off the press is not a wash test.
- Reorder record: retain the approved proof, dimensions, colors, backing specification, and a reference patch so the next order is not rebuilt from memory.
Avoid giving every patched garment the same laundry advice. The shell fabric, lining, adhesive, thread construction, and other trims all matter; follow the most restrictive applicable care requirements. Do not recommend direct ironing over the raised face, and check any pressing method with the installer.
The guide How to Wash and Care for Patches (Embroidered, PVC, Leather & More) is a useful starting point for care planning. For the final decision, return to the garment and the approved specification: readable artwork, appropriate attachment, and enough schedule to verify the result are what make a patch work in a real release.


