
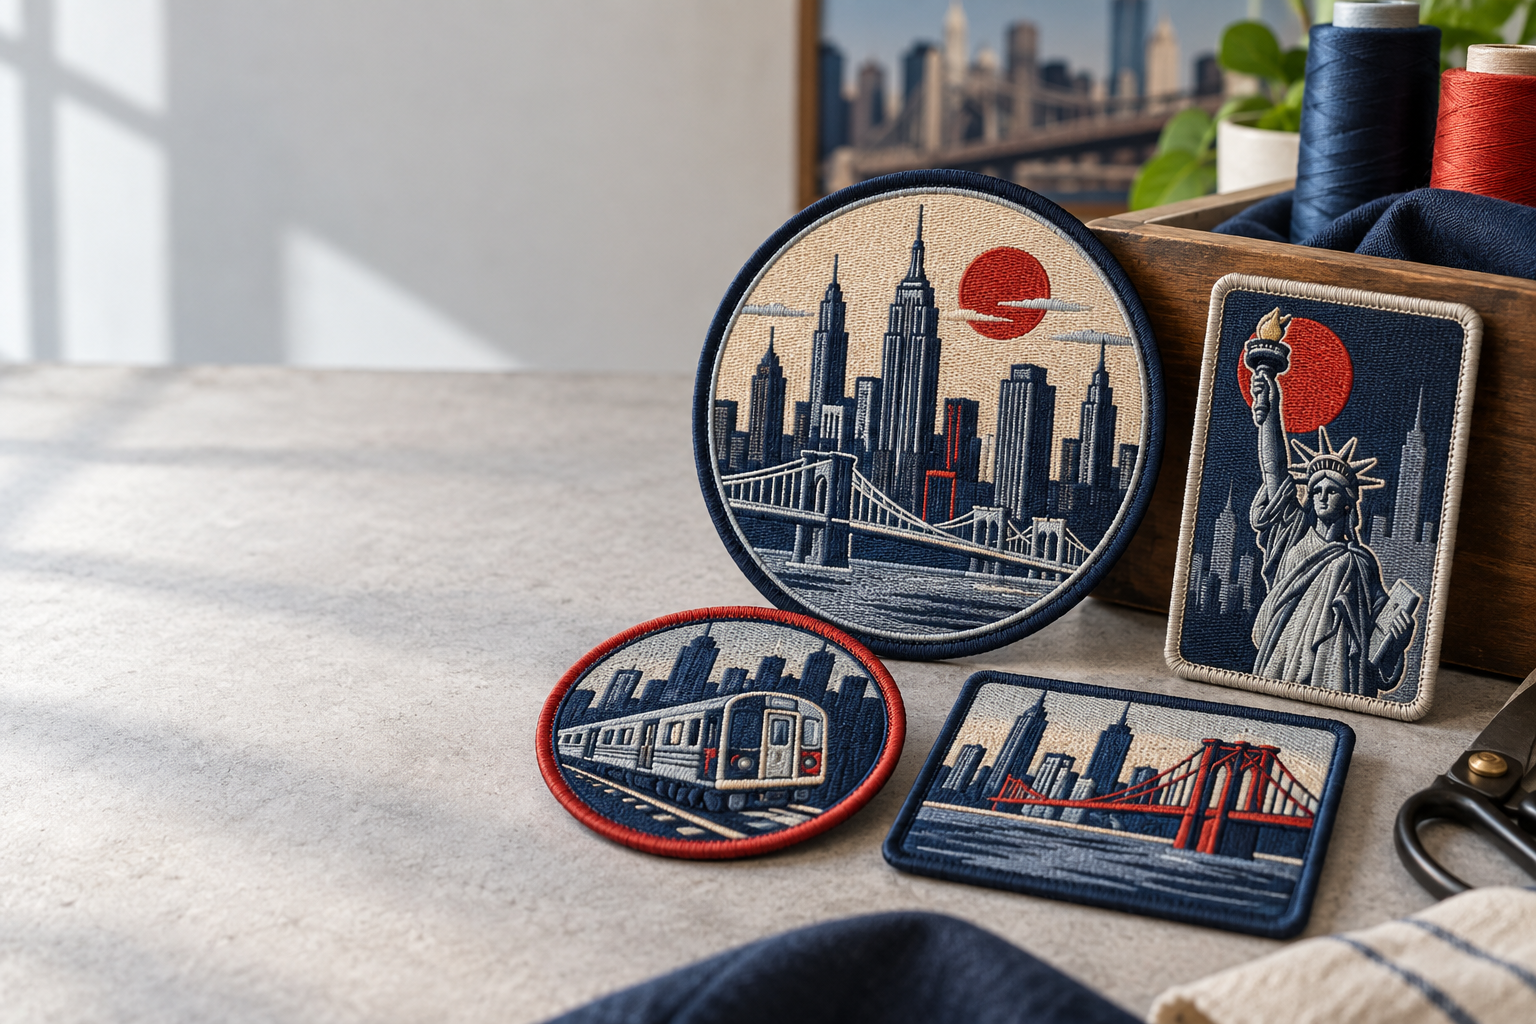
GetUSAPatches accepts orders for custom embroidered patches New York teams, clubs, and businesses can have shipped directly to their address. We have a 10-piece minimum, provide a free digital mockup before production, and produce only after approval. Orders ship from Corona, CA, to all 50 states, including New York.
A local embroidery shop is another option, especially if you need someone to inspect a garment or sew patches onto finished jackets. The useful comparison is not simply local versus online: it is who can make the design readable, specify the right backing, and meet your receiving deadline. A Manhattan hospitality polo and a Brooklyn club vest may carry the same artwork, but they should not automatically get the same patch construction.
Where to order custom embroidered patches New York buyers can compare
Start with the job you actually need completed. Some buyers need loose patches in a box; others need 40 patches sewn onto customer-supplied coats and sorted by employee name. Those are different services, and a low patch quote tells you little about the second job.
For a New York order, you can compare neighborhood embroidery shops, apparel decorators, and online patch specialists serving the United States. Ask each supplier the same questions before comparing totals. GetUSAPatches is a shipped-order option based in Corona, CA, not a New York walk-in counter.
| Ordering route | Useful for | What to confirm | Main trade-off |
|---|---|---|---|
| Local embroidery or alterations shop | In-person garment inspection and possible patch attachment | Whether the shop makes loose patches, handles installation, or sends patch production elsewhere | Convenient garment access does not automatically mean faster patch production or a wider construction selection |
| Apparel decorator supplying uniforms | A coordinated order of polos, caps, work shirts, and decoration | Whether the quote includes garments, loose patches, sewing, and individual sorting | One purchasing contact can help, but decoration and garment costs may be bundled |
| Online patch specialist such as GetUSAPatches | Loose custom patches for teams, brands, clubs, and repeat orders | Finished specifications, approval process, delivered cost, and shipment timing | You can review the design remotely, but must plan garment attachment separately unless explicitly included |
| Marketplace seller | Comparing a broad range of advertised options | Who makes the order, who handles revisions, and what happens if the specifications are wrong | An attractive listing price may describe a different quantity, size, or backing from your project |
Ask separately about manufacturing origin if domestic production is a purchasing requirement. A USA business address or shipment from California does not, by itself, establish where every manufacturing step occurs. Put any origin or documentation requirement in the brief before approving the order.
Make the quote specific enough to compare
“How much for a logo patch?” is a starting point, not a production specification. A 2.5-inch cap badge and a 4-inch shoulder crest can use the same logo but need different lettering, borders, and stitch coverage. Send the intended garment along with the artwork so the quote reflects the real use.
On the production desk, the useful information is often mundane: the jacket has a lining, the polo stretches, the cap has a center seam, or the staff changes departments each season. Those details can matter more than another screenshot of the logo. Our embroidered patches hub is the starting product category, but the specifications below make the estimate useful.
- Quantity: state the count for each design, not only the combined total. Ask how name changes, color variations, or separate sizes affect the 10-piece minimum and pricing.
- Finished size: give width and height in inches, including the outer border. A measurement across the artwork alone can leave the finished patch larger than expected.
- Artwork: attach the best file available and type out all wording, including punctuation, dates, borough names, and unit numbers.
- Garment: identify the fabric and placement. A photo of the care label and the attachment area helps with heat and sewing questions.
- Construction: name the preferred backing, edge finish, and any removable-panel requirement. Say if you are unsure rather than guessing.
- Delivery: include the New York ZIP code, receiving contact, and in-hand date. Distinguish a requested ship date from the day you need the patches ready to use.
Separate loose-patch production from installation and packaging. Individual bags, attachment to supplied garments, multiple shipping destinations, or sorting by player number should never be assumed to be included. A complete brief reduces the chance that a seemingly better quote is simply missing part of the job.
Choose thread for the design, not just the familiar look
Embroidery gives a patch visible thread texture and a traditional uniform finish. It suits bold department crests, school mascots, simple brand marks, and club lettering. It is less forgiving of tiny type, closely spaced lines, photographic shading, and detailed street scenes squeezed into a small badge.
Thread occupies physical space. A logo that looks sharp on a monitor may close up around a small letter e or turn several fine lines into one heavy shape after conversion to stitches. Enlarging the patch, simplifying the artwork, or switching construction are all legitimate solutions.
Embroidered, woven, printed, or raised?
Choose woven patches when a flatter textile surface and finer design detail matter more than raised embroidery texture. Consider printed patches for gradients, photographic artwork, and multicolor illustrations that should not be redrawn into thread-friendly shapes. Printed is flatter; that is the point.
3D embroidered patches can give a broad letter or simple symbol more height, but puff is not a repair for tiny text. Chenille patches suit large varsity letters and letterman jackets, where the fuzzy surface is part of the design. For muddy outdoor use, PVC patches offer a different surface and feel, although the garment and attachment still need their own care plan.
Coverage changes appearance and flexibility
A patch does not need thread across every square inch to look finished. Leaving suitable background fabric visible can produce a lighter-feeling badge and a clean contrast with the stitched artwork. Heavy stitch coverage creates a different face and can make a small patch feel more substantial on a thin shirt.
Ask the supplier to describe the proposed coverage rather than treating a higher percentage as an automatic quality upgrade. The useful comparison is the finished result on your garment. For a broader material check, use Embroidered vs. Woven vs. PVC Patches: Which Should You Choose?.
Set the size, lettering, and border before choosing backing
Measure the available area, then make a paper test. A patch that is 3 inches wide on a flat desk can feel large on a fitted polo chest and surprisingly small on the back of a work jacket. Cut the intended shape from paper and place it on the actual garment, not a similar item pulled from a catalog.
For an initial discussion, a roughly 2- to 2.5-inch-wide cap badge or a roughly 3- to 4-inch shoulder crest can be a useful starting point. These are planning examples, not fit guarantees. Crown height, sleeve shape, border width, and the amount of text can all force a different size.
Small text needs a stitchability review
Lettering around 0.25 inch tall is a useful starting point for discussing straightforward embroidered text, not a universal production threshold. Thin serifs, tight spacing, curved wording, and a textured background can need more room. Ask for a readability check at the actual finished dimensions, especially for a long school name or a two-line public-safety unit title.
Keep essential wording large and remove optional wording first. If a 2.5-inch cap patch needs a mascot, full organization name, founding date, borough, and motto, the problem may be the amount of information rather than the embroidery. A separate jacket version can carry details the cap version cannot.
Merrowed crests versus shaped edges
A merrowed border creates the familiar wrapped edge seen on many round, oval, and straightforward shield patches. It adds a distinct frame, but that frame takes space away from the interior artwork. Merrowed crests work well when the outline is simple and the border is part of the intended look.
An intricately shaped logo may need a cut edge rather than a bulky wrapped outline. Specify the desired finish and ask what the material supports; hot-cut and laser-cut are not interchangeable labels for every construction. The Custom Patch Size Guide and border comparison guide help explain these decisions before the artwork gets crowded.
Match the backing to the garment and its laundry routine
Backing is not an afterthought. The same embroidered front can be sewn permanently onto a denim vest, attached with heat to a compatible fabric, or made removable for an existing hook-and-loop panel. Choose based on the garment, cleaning method, and how often the patch needs to come off.
A request for “Velcro backing” needs one more question: does the garment already have the mating loop panel? Confirm which side is supplied on the patch and whether you need a separate mating piece. A hook-backed patch will not attach securely to an ordinary polo just because the shirt feels textured.
| Garment or use | Backing to discuss | Reason | Failure to prevent |
|---|---|---|---|
| Cotton or cotton-blend work shirt | Sew-on; iron-on only if garment and adhesive instructions allow it | Stitching provides mechanical attachment through regular handling | Assuming an adhesive bond will tolerate every commercial wash process |
| Nylon shell or coated rain jacket | Garment-specific attachment plan; assess sewing and heat limits | Heat can damage some fabrics or finishes, while needle holes can affect weather resistance | Scorching the shell or compromising a waterproof barrier |
| Wool coach's coat or letterman jacket | Usually a sewing assessment, with attention to lining access | Weight, nap, lining, and mixed materials affect installation | Catching the lining or puckering a visible panel |
| Uniform with an existing loop panel | Compatible hook backing in the correct panel dimensions | Allows removal and replacement without resewing each patch | Ordering the wrong mating surface or a patch larger than the panel |
| Denim or leather biker vest | Sew-on, using an installer familiar with the material | Placement and stitch holes need deliberate planning | Sewing through pockets or making avoidable holes in leather |
| Stretch hospitality polo | Small, appropriately weighted patch with an attachment test | A stiff badge and a stretchy knit move differently | Pulling, sagging, or rippling around the patch |
Iron-on that peels after a dryer cycle is a real attachment failure, but the cause is not always the patch itself. The fabric finish, application temperature, pressure, dwell time, adhesive compatibility, and laundering can all matter. Follow the supplied application instructions and garment care label; do not use one generic iron setting for every fabric.
For frequently worn uniforms, discuss whether sewing is the better long-term plan. Use Patch Backing Options Explained for selection, How to Iron On a Patch the Right Way for heat-application preparation, and the hook-and-loop attachment guide for removable patches. Protective or certified workwear needs its manufacturer's attachment guidance rather than a guess.
What changes the price of a New York patch order?
Quantity matters, but it is not the whole estimate. Finished dimensions, stitched area, construction, backing, edge finish, artwork preparation, and order variations can affect the price. A 10-piece run spreads preparation across fewer patches than a larger repeat-design order.
GetUSAPatches has a 10-piece minimum. Ask for pricing at the quantities you could realistically use rather than ordering far more just to reduce the unit figure. A small business with stable branding may use spare patches over time; an event patch with a printed year can become leftover inventory quickly.
- Compare identical specifications. A 3-inch sew-on patch and a 4-inch hook-backed patch are not competing prices for the same product.
- Ask what the quoted total includes. Identify artwork preparation, any physical sample, packaging, shipping, and applicable tax rather than assuming they disappear into the unit price.
- Separate different designs. A set of individualized names can require different preparation from one crest repeated across the entire run.
- Check rush and delivery costs before approval. A shorter production request and faster carrier service are different expenses.
- Include attachment in the project budget. A local installer may charge separately for lined coats, awkward sleeve positions, or access around pockets.
For a math-only example, suppose one quote is $240 for 40 patches plus $20 shipping. Its delivered patch cost is $6.50 each before tax and installation, not the advertised $6 unit figure. Those numbers are hypothetical, not a GetUSAPatches price list; the point is to compare the amount required to receive usable patches.
You can also ask for one simplified version and one full-detail version if the design is driving the budget. Removing a tiny motto may improve both readability and construction options, while changing the patch size can alter the entire layout. How Much Do Custom Patches Cost? What Drives the Price explains the variables without treating every patch as the same item.
Production notes for teams, uniforms, clubs, and brands
The best specification changes with the job. For a high-school sports team, count coaches, managers, replacement garments, and late roster additions before finalizing quantity. A varsity letter for a letterman jacket and a compact team crest for a cap are often better treated as separate designs.
For fire and public-safety units, confirm the authorized artwork, exact unit wording, and placement requirements with the organization. Station wear and protective clothing are not interchangeable applications. Do not assume an ordinary patch or attachment method is suitable for specialized protective equipment.
- Hospitality polos: keep the badge proportionate to the chest area and test the combination on the actual knit. Ask how the garments are washed, not just how they look on opening day.
- Biker vests: lay out the entire set before sewing. A center emblem, top rocker, bottom rocker, and smaller identifiers compete with seams, pockets, and existing patches.
- Streetwear jackets: decide whether the patch is a quiet brand marker or the main graphic. Heavy embroidery on a lightweight panel can change how the garment hangs.
- Caps and beanies: measure the usable attachment area on the specific model. A tall badge may work on a structured cap but crowd a shallow crown or a folded cuff.
- Wool coaches' coats and lined jackets: discuss access with the installer before ordering. A patch can be easy to make yet difficult to sew cleanly in the selected position.
For club sets, start with biker and motorcycle club patches and check the dimensions as a complete layout. For headwear, use hat patches and the cap and beanie selection guide rather than shrinking a jacket crest without review. Reusing artwork is sensible; assuming every garment can use the same physical patch is where trouble starts.
Order, approve, and plan the delivery date backward
Start with the date the finished garments or loose patches must be ready for use. A shipment arriving the afternoon before a fundraiser is not much help if someone still has to sew 60 jackets. Separate artwork time, approval time, production, carrier transit, receiving, and attachment in your plan.
GetUSAPatches provides a free digital mockup before production, and we produce only after approval. That approval is the production checkpoint, not a formality. If artwork changes after approval, ask how the change affects cost and timing rather than assuming the original schedule still applies.
- Send the complete brief: artwork, typed wording, quantity, dimensions, garment details, backing, delivery ZIP code, and required in-hand date.
- Review the proposed specifications and quote. Resolve questions about border, coverage, tiny text, separate designs, and shipping before approving.
- Inspect the digital mockup at the stated finished size. Check spelling, numbers, layout, color references, and the written backing and border specifications.
- Ask whether a physical sample is appropriate for the project. If available, confirm its cost and timing; a free digital mockup is not the same thing as a stitched sample.
- Approve the final version and confirm the production and shipping plan. Save the approved proof and written specifications for receiving checks and reorders.
- Allow time after delivery to count, inspect, and attach the patches. Keep the event or uniform rollout date separate from the carrier's estimated arrival.
What a digital mockup can and cannot prove
A digital mockup is useful for layout, wording, placement, dimensions, and communicating the intended design. It cannot physically demonstrate thread sheen, stiffness, exact hand feel, or how the finished patch bends around a cap. Screen colors also vary, so identify critical brand colors and discuss thread references rather than approving by an uncalibrated phone display alone.
A vector file can help clarify shapes, but supplying one does not eliminate embroidery preparation. A clear PNG or JPG can still start the discussion if that is what you have. The Artwork File Guide for Custom Patches and thread color matching guide explain what to send and what needs separate confirmation.
Production time is not transit time
Ask for the current schedule on the actual order; there is no useful universal arrival promise for every size, quantity, and construction. Faster shipping cannot recover days spent waiting for artwork approval, and quick production does not remove a carrier delay. The Custom Patch Production Timeline lays out the stages to discuss.
For New York receiving, include the company name, suite or floor, and any loading-dock or mailroom instructions the carrier needs. A Midtown office, a Queens school, and a Brooklyn studio may have different receiving hours. Confirm who will accept the package, particularly during school breaks, weekend events, or a venue setup.
Inspect the shipment before attaching the whole run
Open the shipment early enough to inspect it before handing everything to an installer. Count the pieces and compare the received patches with the approved specifications. Check spelling, finished dimensions, border style, and backing before focusing on small cosmetic details.
Look for consistent lettering, clean edges, obvious loose threads, and coverage that matches the intended construction. A fabric background showing through an intentionally open design is not the same thing as an unintended gap. Use the approved design as the reference rather than a magnified screen image with no size context.
- Test one patch on one representative garment before attaching the entire order. Check placement while the garment is worn, not only while it lies flat.
- Keep patches clear of functioning pockets, zippers, and intended garment movement. Pinning a sample position can reveal a problem before permanent attachment.
- For iron-on applications, follow the supplied adhesive instructions and the garment's heat limits. Stop if the garment cannot tolerate the required process.
- For hook-and-loop patches, check that the patch fits within the panel and mates securely without exposed hook edges rubbing nearby fabric.
- If something differs from the approved specification, photograph it and contact the supplier before altering or installing the affected pieces.
Use How to Sew On a Patch: A Step-by-Step Guide for basic attachment planning, or use a qualified installer for leather, lined garments, and difficult access. For care, follow the more restrictive instructions of the patch and garment. The patch washing and care guide helps distinguish the materials rather than treating every badge as dryer-safe.
Keep a reorder record, not just an old photo
A useful reorder record includes the approved artwork, finished width and height, thread references, background fabric, border, backing, and original order reference. Keep one unused patch as a physical comparison if possible. A phone picture taken under warm restaurant lighting is a poor substitute for the original specifications.
Recheck the garment even if the logo has not changed. A uniform supplier may replace a polo fabric, a cap model may have a shallower crown, or a new jacket may come with a different loop-panel size. “Same as last time” should describe a verified specification, not an assumption that every part of the job stayed the same.
For larger repeat programs, Ordering Custom Patches in Bulk helps with quantity planning, while Custom Patches for Uniforms and Workwear covers garment-focused decisions. The practical next step is a complete brief: the artwork, the garment, the size, the quantity, and the date you need the order in hand. That gives a production desk enough information to quote the patch you can actually use.


