
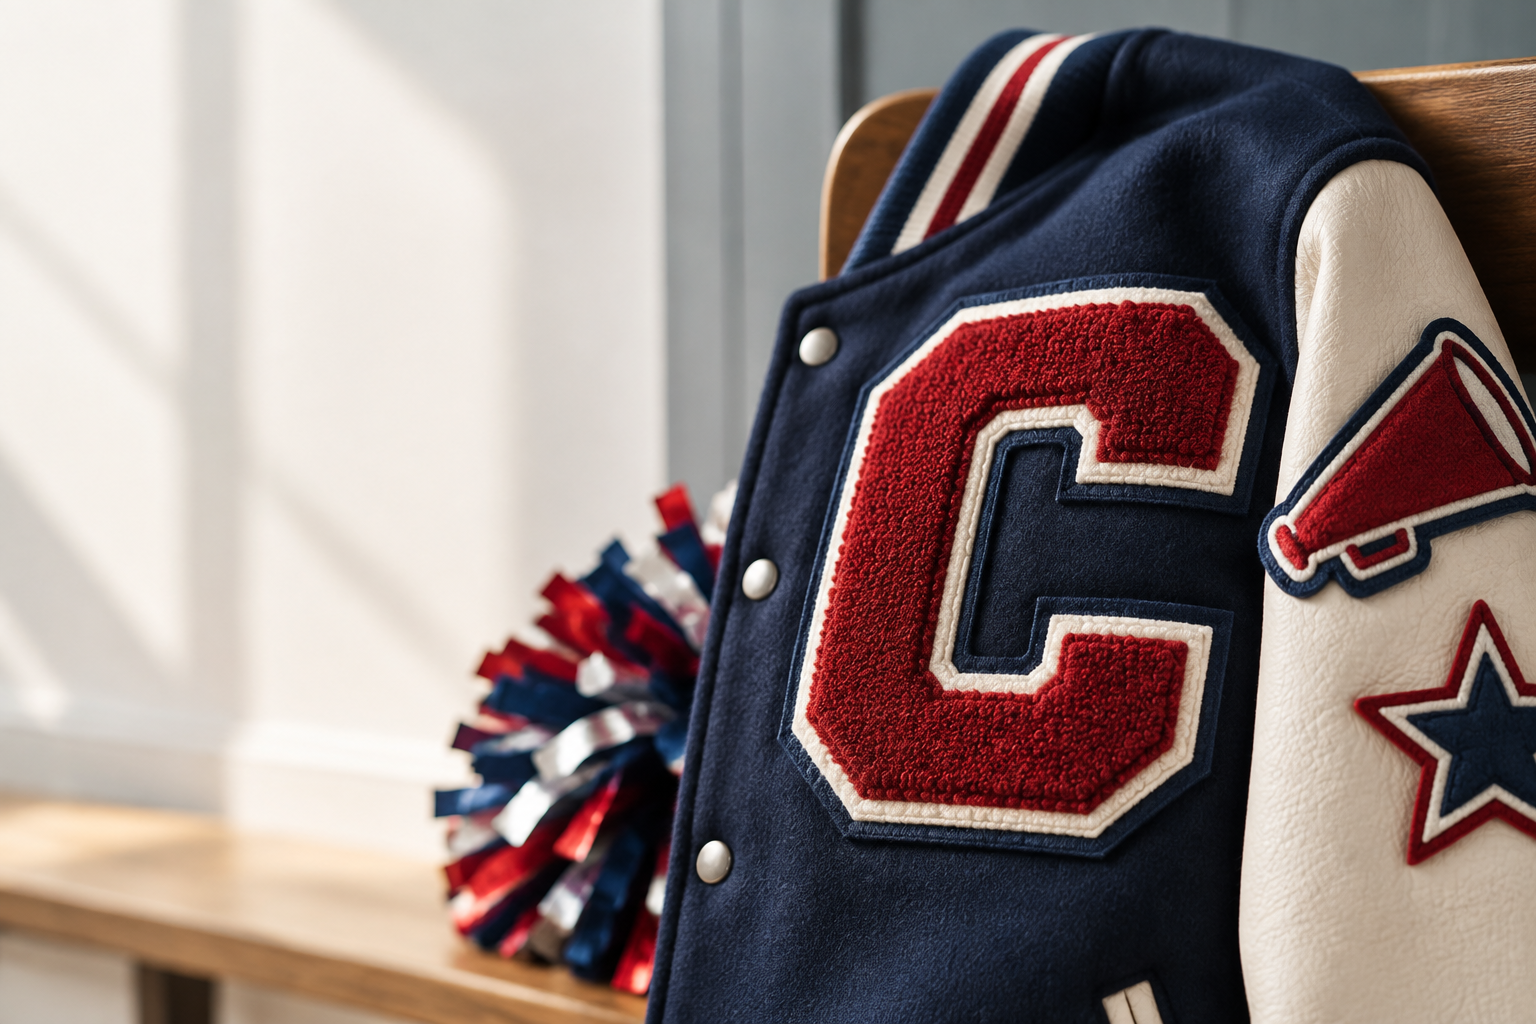
New York cheer squads choose chenille patches for bold varsity lettering, raised texture, and a team identity that belongs on a letterman jacket. If you are comparing chenille patches New York teams can wear on jackets and warm-ups, start with the garment: stable fabrics support that raised construction better than thin, stretchy competition tops.
At GetUSAPatches in Corona, CA, the useful quote conversation starts with the logo, finished size, attachment method, and date the team needs its gear. We have a 10-piece minimum and provide a free digital mockup before production. We produce only after approval and ship to all 50 states, including schools, clubs, and businesses throughout New York.
Why the varsity look makes sense for cheer apparel
Chenille uses raised yarn to create the soft, visibly textured areas associated with varsity letters. That construction gives a large initial more presence than a flat print without requiring a complicated graphic. On a wool-body letterman jacket, a simple school letter can do more useful work than a miniature version of the entire athletic department logo.
Cheer apparel also has more than one job. A competition uniform needs movement and careful placement; a travel jacket needs recognition in a crowded lobby; an award jacket marks a season or achievement. Chenille is especially suited to the second and third jobs, where texture and tradition matter more than keeping every panel light and flexible.
A team mark that reads without a paragraph
A block letter, short team name, or simplified mascot silhouette stays recognizable when viewed across a gym. Tiny mottos do not gain readability just because the patch is raised. The practical choice is often one clear chenille feature with secondary information moved to a separate sleeve emblem or a smaller embroidered line.
This does not mean every New York squad needs chenille, or that the material performs better on every garment. It means the construction matches a familiar school-sports style. The Chenille Patches and Letterman Style: A Complete Guide explains that connection in more detail, including where traditional lettering helps and where another construction makes sense.
Choosing chenille patches New York squads can wear beyond game day
Think about the actual clothing rotation before approving a patch. A squad may have a wool varsity jacket, a polyester travel warm-up, a fleece hoodie, and a fitted performance top, all carrying the same school identity. Those four garments should not automatically receive the same patch and backing.
For a team moving between a chilly outdoor arrival and a heated gym, a jacket patch is visible when the outer layer is on and irrelevant when it comes off. That is fine. Put recognition on the outerwear, then use a lighter treatment where athletes need unrestricted movement.
- Wool-body letterman jackets: A strong starting point for substantial chenille letters. Check the lining and pocket construction before choosing the stitch path.
- Heavy fleece hoodies: Often suitable for moderate patch sizes, but a large rigid emblem can change how the chest or pocket drapes.
- Nylon shells: Lightweight fabric can pucker under dense attachment stitching, and some coatings or fibers are sensitive to application heat.
- Polyester warm-up jackets: Review stretch, finish, and manufacturer care instructions. A stable woven panel behaves differently from a stretchy knit panel.
- Competition tops and skirts: Raised patches can interfere with flexibility or contact areas. Confirm placement with the coach and applicable event requirements.
- Duffle bags: A useful location if the panel is accessible for sewing and clear of zipper tracks, straps, and folds.
A structured wool coach's jacket may accept a patch much like a letterman jacket, while a thin nylon coach's jacket presents a different attachment problem. The garment name alone is not a specification. Send the fabric information and a photo of the inside as well as the outside.
The same distinction matters on hospitality polos, fire and public-safety uniforms, and biker vests: first match the patch to the fabric and use, then work on appearance. For cheer, keep raised decoration away from areas that rub during stunts or repeated movement. A placement that looks fine on a hanger still needs a wear check.
Specify the lettering, size, and felt before choosing a backing
Start with finished dimensions in inches, including the visible felt or border. A request for a 4-inch letter can mean the chenille letter itself or the complete patch from outside edge to outside edge. Those are different objects, and the difference becomes obvious beside a zipper or pocket.
For an initial layout, a single chest letter around 3–4 inches tall is worth testing on paper; a larger back design might begin around 8–10 inches wide. These are mockup starting points, not universal recommendations or production limits. A youth jacket can run out of usable space quickly, especially around the armhole.
Give the yarn enough room
Broad strokes, open letter counters, and generous spaces are friendly to chenille. Narrow script, fine whiskers on a mascot, or several lines of tiny lettering are not. If the artwork depends on those details, simplify the chenille portion or ask whether embroidered accents can carry the smaller elements.
A useful design split is a raised school initial with the graduation year or short team name handled in embroidery, subject to artwork review. Do not assume every element needs the same texture. The Custom Patch Size Guide can help establish a realistic footprint before the artwork gets crowded.
The felt is part of the design
On a traditional felt-based chenille patch, the exposed felt creates separation between the yarn and the garment. Navy yarn on a navy jacket can disappear without a contrasting edge; a white or gold felt reveal can make the same letter readable. Ask the mockup to distinguish the yarn color, felt color, and any embroidered outline.
Color approval deserves more than a screenshot from a phone. Provide the school's reference colors, then review the available material matches because yarn, felt, and embroidery thread can reflect light differently. The Thread Color Matching for Custom Patches guide explains why a digital proof is useful but not a physical color sample.
Chenille vs. embroidery, woven, printed, and PVC patches
Choose the construction that preserves the important part of the design. If the job is a bold varsity initial, chenille patches belong near the top of the shortlist. If the job is fitting a readable school name and detailed crest into a small sleeve area, another method may be the better answer.
The comparison below is a selection aid, not a promise that every design can be produced at every size. Finished thickness, flexibility, detail, and cost depend on the actual specification. Garment attachment still needs its own review.
| Patch construction | Best cheer application | Detail and feel | Main trade-off |
|---|---|---|---|
| Chenille | Varsity chest letters, award emblems, bold jacket-back designs | Raised yarn texture with broad shapes and substantial visual presence | Fine lettering is difficult; bulk can work against thin or stretchy garments |
| Standard embroidery | Sleeve crests, compact team emblems, names, warm-up jacket patches | Visible stitched texture with more scope for moderate detail | Very small text can still close up; dense stitching can make a patch firm |
| Woven | Small school crests, detailed mascots, compact lettering | Finer woven detail and a generally flatter profile | Does not reproduce the fuzzy varsity character of chenille |
| Printed | Gradients, complex artwork, detailed commemorative graphics | Flat surface that can carry image detail without raised yarn | Printed is flatter; that is the point, but it will not look like a traditional varsity letter |
| PVC | Team bags or compatible removable patch panels | Molded surfaces rather than textile yarn | Different visual character and feel; not a natural substitute for classic letterman texture |
| 3D embroidery | Selected bold raised lettering where the artwork supports the method | Raised embroidered forms rather than chenille's soft yarn surface | Narrow shapes and fine details need construction review; the raised effect is not the same |
A mixed order can be more sensible than forcing one construction across all team apparel. Use chenille on award jackets, embroidered patches on warm-ups, and woven patches where a smaller mascot needs definition. The school identity stays consistent through color and layout, not identical surface texture.
For a full-color anniversary graphic, printed patches deserve a look before anyone removes half the artwork to make it stitchable. For raised embroidered lettering, compare 3D embroidered patches separately. Raised does not automatically mean chenille, and those two constructions should not be quoted as interchangeable.
Backing choices: sew-on, iron-on, and removable attachment
The front gets most of the attention, but the back determines how the patch joins the garment. Do not choose iron-on just because it sounds easier, or hook-and-loop because the team owns one bag with a patch panel. State the garment and intended use, then confirm which backing options are available for the specific chenille design.
Sew-on is often the most straightforward starting point for traditional varsity jackets because it creates a mechanical attachment without applying adhesive heat. That does not make installation automatic. A tailor may need access through the lining, and stitching through the wrong area can close a pocket or leave an uncomfortable ridge.
Iron-on needs a compatible garment, not a guess
An iron-on that peels after a dryer cycle is not fixed by assuming more heat was needed. The issue could be fabric compatibility, application pressure, incomplete bonding, or care conditions. Follow the supplied adhesive instructions and garment limits; do not reuse a temperature from a different patch order.
Nylon shells, coated fabrics, and stretch blends deserve particular care before heat application. If the garment cannot tolerate the required conditions, choose another attachment method or another decoration location. The How to Iron On a Patch the Right Way guide is a preparation reference, not a substitute for the instructions supplied with the patch and garment.
Hook-and-loop is useful only with the right panel
Hook-and-loop attachment needs both sides: a hook-backed patch and a compatible loop receiving panel. Existing Velcro panels on bags or outerwear can make removable identification practical, but ordinary jacket fabric is not the receiving side. Confirm the panel dimensions, attachment strength, and patch construction before ordering.
Removable does not necessarily mean suitable for every cheer activity. Exposed hooks can catch adjacent clothing, and a raised patch may be awkward where athletes make contact. Review the Patch Backing Options Explained guide, then keep the final backing specification on the written order rather than buried in a message thread.
What changes the quote, and how to budget the whole job
A usable quote needs dimensions, quantity, artwork, construction, backing, and delivery requirements. Larger patches use more material, while complicated shapes, multiple material treatments, and personalized versions can change the work involved. There is no responsible universal dollar price for all cheer chenille patches without those details.
GetUSAPatches has a 10-piece minimum. If a squad needs several different names, graduation years, or award versions, ask how the minimum applies to that configuration rather than assuming ten unrelated designs count as one identical run. The same question matters when splitting a purchase between varsity and junior varsity artwork.
- Compare written quotes in USD using the same finished size, material construction, backing, and quantity.
- Ask whether artwork preparation, personalization, freight, and any applicable tax are included or listed separately.
- Budget garment attachment separately if the patch order does not include installation.
- Check whether names or numbers create separate versions and whether those versions affect minimums or pricing.
- Ask for the cost difference between the exact roster quantity and a modest reserve of matching patches.
- Keep a record of the approved specification so a later reorder can be compared accurately.
Here is a planning example, not a GetUSAPatches price quote: 24 athletes, two coaches, and four spare patches would make a 30-piece requirement. That count is more useful than ordering for the current athletes alone and discovering the coaches need matching jackets later. Whether four spares make sense depends on roster turnover and the design's likely life.
For another illustrative calculation, a $450 total decoration budget divided across 30 garments allows $15 per garment for patches, attachment, and related costs. It does not establish the patch unit price. Use the How Much Do Custom Patches Cost? guide to identify the variables before treating any online starting price as a complete budget.
Ordering from Corona, CA, for a New York event date
Give us the required in-hand date, not just the date of the competition. If jackets need local sewing, sorting, and distribution first, the patches must arrive earlier. A Friday delivery is not enough for a Saturday event if the garments still need attachment on Friday afternoon.
GetUSAPatches ships nationwide from Corona, CA, to all 50 states. For a New York order, the delivery ZIP code and address type help define the shipping plan; a school receiving office may have different availability from a staffed business. Confirm the actual service and schedule on the quote instead of assuming a general delivery window.
Send one complete brief
- Artwork: Send the best available logo file and identify any wording that must remain unchanged.
- Garment: Include the brand or model if known, fabric content, care label, and front-and-back placement photos.
- Size: State finished width and height in inches, including the felt or outer border.
- Construction: Identify the chenille areas, proposed embroidered details, felt colors, and preferred backing.
- Quantity: List each version separately, including personalized names, years, coach patches, and reserves.
- Schedule: Provide the delivery ZIP code, required in-hand date, event date, and installation allowance.
- Approval contact: Name one person who will consolidate corrections and give final authorization.
A vector file is helpful when available, but do not redraw the logo badly just to send a file with a particular extension. A clear image and accurate instructions can be a better starting point than an unusable vector conversion. The Artwork File Guide for Custom Patches explains what to send and what information a small screenshot may lose.
Approval is a real production checkpoint
We provide a free digital mockup before production and produce only after approval. Check spelling, finished dimensions, color references, visible felt, construction notes, backing, and quantities together. The mockup shows the proposed layout, but it cannot reproduce physical yarn texture or guarantee that every screen displays color identically.
If tactile feel or an exact physical color decision is critical, ask what sample or material-review options are available and how they affect cost and timing. Do not treat a digital mockup as a physical sample. Any approved changes should be captured in the final production specification, not left as an informal side conversation.
Production and shipping are separate stages, and artwork revisions can move the schedule before either stage begins. Confirm the expected production window after the design and order details are settled, along with the transit allowance and any deadline limitations. The Custom Patch Production Timeline provides a useful planning framework without replacing an order-specific schedule.
A practical fitting and installation process
A few minutes with paper can prevent a season of awkward placement. Print or draw the proposed patch at finished size and check it on real garments, not only a flat product photo. Start with the smallest jacket because that is where pockets, armholes, and front closures compete hardest for space.
This check is useful even when the team has ordered patches before. A new apparel brand may move the pocket, change the shoulder seam, or use a thinner fabric. Keep the approved placement reference with the installation instructions so the person sewing is not expected to reconstruct the coach's intent.
- Lay out representative garments. Include a small youth size, a middle size, and the largest size in the run when those are part of the order.
- Position a full-size paper template. Measure from stable reference points such as the center zipper and a horizontal seam, not a loose sleeve edge.
- Check movement and access. Look for pocket interference, zipper clearance, armhole overlap, and areas that flex or contact another athlete.
- Confirm the stitch path or approved attachment method. Inspect the garment interior before any needle or heat touches it.
- Install one patch first. Examine the result for puckering, trapped lining, uneven alignment, and garment distortion before completing the batch.
- Record the placement. Photograph and measure the finished example so the remaining garments follow the same agreed layout.
Do not sew through the raised face randomly just to make the patch feel secure. The attachment path should suit the patch construction and garment, usually using the intended border or suitable felt area as directed. For basic technique, see How to Sew On a Patch; lined jackets may still warrant an experienced alterations shop.
Traditional merrowed crests often have a compact overlocked edge, while felt-based chenille letters can have a wider visible surround and a different attachment area. An installer should not assume the same stitch placement works for both. Confirm the actual edge treatment before preparing the whole jacket batch.
Care, storage, and the failures worth preventing
Follow the most restrictive applicable instructions for the garment, patch, and attachment method. A wool varsity jacket with leather sleeves may need different care from a washable fleece hoodie, even if both carry similar chenille letters. There is no single wash setting that safely covers every combination.
Where laundering is allowed, reduce unnecessary abrasion and avoid washing the raised face against exposed hook fasteners or rough hardware. Do not assume high dryer heat is acceptable because the stitching remains intact. Heat can affect the garment or adhesive before the patch face shows an obvious problem.
- Inspect lifting edges early. A small loose section is easier to address before it catches on bags or adjacent clothing.
- Do not pull loose yarn. Photograph the area and ask the supplier or installer how to handle it without enlarging the damage.
- Keep hooks covered during storage. Exposed hook-and-loop fasteners can snag textured surfaces.
- Avoid improvised heat repairs. More heat can damage a sensitive shell without solving the original bonding problem.
- Store jackets clean and dry according to the garment instructions. Avoid crushing raised areas under heavy equipment for long periods.
- Retain care information with spare patches. Next season's volunteer may not know which backing was selected.
For garment combinations that require professional cleaning, tell the cleaner about the applied patch and its attachment method. Keep the How to Wash and Care for Patches guide with the team apparel notes. The goal is a repeatable routine, not relying on every family to guess.
Three sensible ways to build a cheer patch program
A good patch program does not need to put chenille everywhere. It needs a clear role for each piece, an affordable replacement plan, and artwork that works at its actual size. These are planning examples, not claims about a particular school or customer.
For a high-school award jacket, start with a bold chenille chest initial and keep season-specific information separate. A graduation year or achievement emblem can be reviewed as its own design rather than squeezing every detail into the varsity letter. That also makes future award additions easier to organize.
For an all-star club with lightweight travel apparel, reserve chenille for a suitable sweatshirt or structured jacket and review a flatter construction for the travel shell. On bags with removable panels, a separate compatible patch can provide identification without changing the apparel specification. One brand identity can support several sensible constructions.
For a youth squad buying across several garment sizes, test one shared patch size first, then decide whether separate size versions are necessary. Multiple versions add sorting work and may affect the quote, so do not create them without a placement reason. Keep names, sizes, and patch versions on one roster rather than in separate parent messages.
The Custom Patches for Sports Teams and Clubs: A Buyer’s Guide is useful for the wider apparel plan. For the chenille portion, the decision stays simple: choose a readable design, give it enough space, attach it to a suitable garment, and approve the complete specification before production.


