
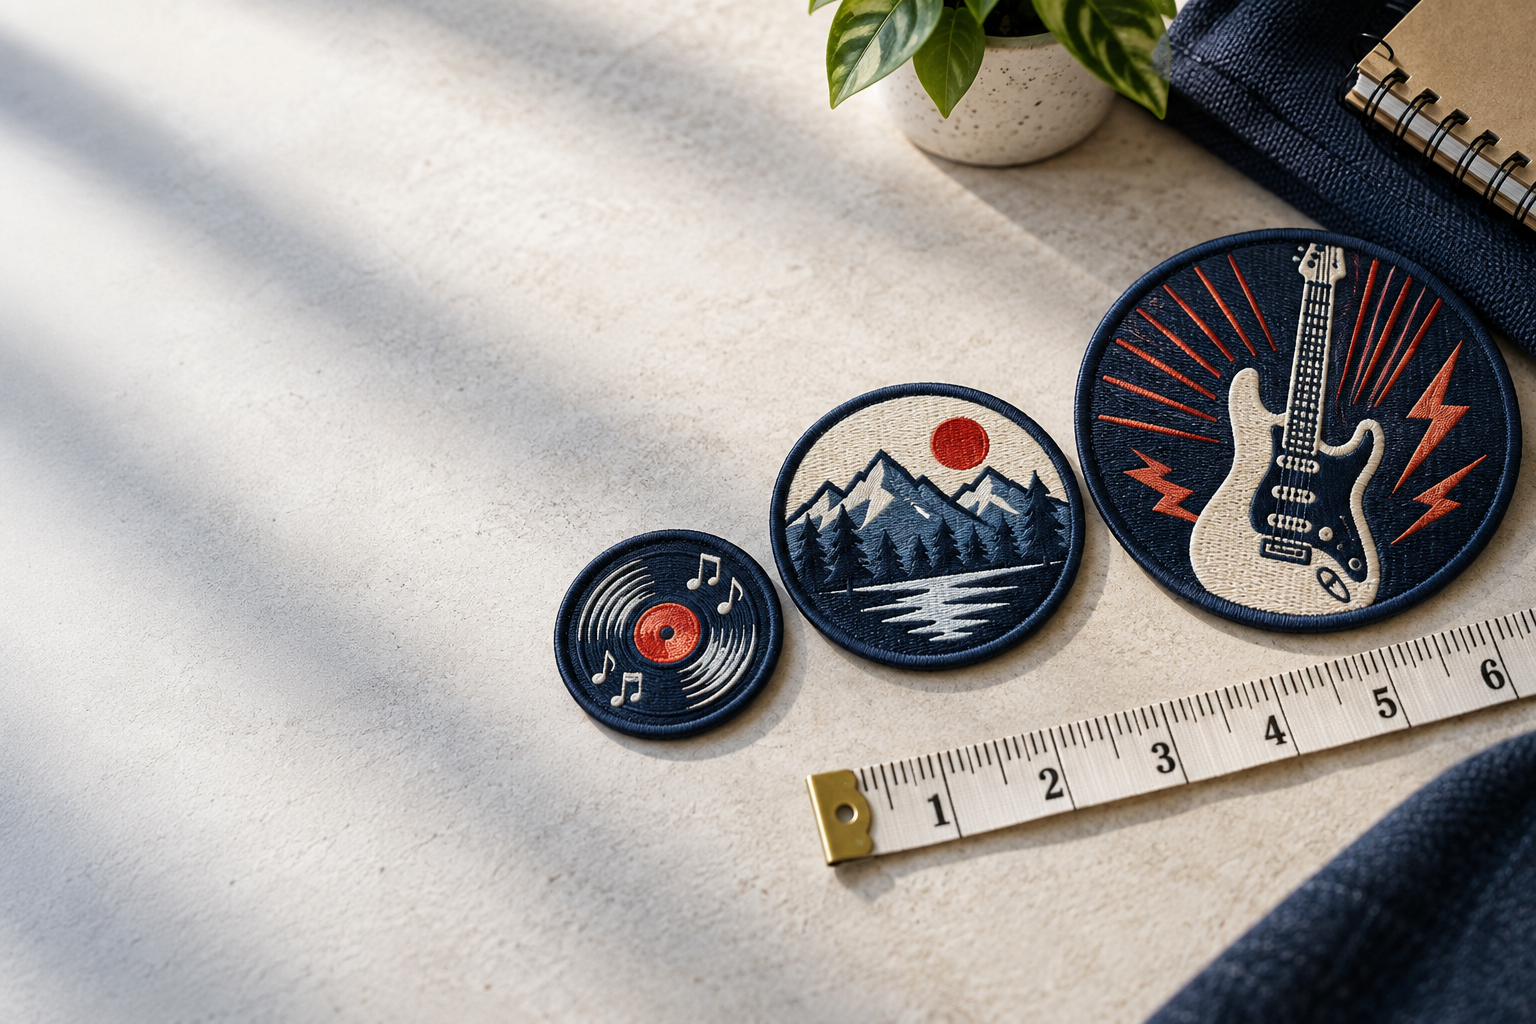
The custom printed patches Los Angeles bands order for merch tables work best when the artwork includes gradients, album illustrations, or detail that would become crowded in thread. GetUSAPatches offers a 10-piece minimum and a free digital mockup before production, with pricing based on the actual size, quantity, border, and backing. We produce only after approval and ship from Corona, CA, to all 50 states.
For a denim vest, a flat printed face with a stitched border can be a sensible starting point; for a cap, the usable front panel may decide the shape before the artwork does. The same practical questions apply to high-school sports teams, fire and public-safety units, hospitality polos, biker vests, and letterman jackets: what needs to read, where will it sit, and how will it stay attached? Start there, not with a patch style picked from a tiny screen image.
Which Custom Printed Patches in Los Angeles Make Sense for Bands?
A printed patch carries its main image in ink on a fabric surface, rather than constructing every part of that image with embroidery stitches. That makes printed patches a useful option for a painted album cover, a photographic treatment, or a poster design with several color transitions. Printed is flatter; that is the point.
The flat face gives the illustration room to work without thread direction changing its appearance. It does not make every tiny detail readable, and it does not turn low-resolution artwork into a clean production file. A paragraph of tour dates can still become an unreadable gray block on a 3-inch patch.
Choose the job before choosing the decoration
- Merch-table patch: Keep the band name recognizable at a glance. Buyers need to understand the design before they pick up the patch, especially under dim venue lighting.
- Stage-jacket patch: Favor a strong silhouette and larger lettering. Detail that looks good in a hand-held product photo may disappear from the audience.
- Crew identifier: Make the role readable first. A production crew patch and a collectible fan patch can share artwork without carrying the same information.
- Marching-band keepsake: Decide whether the patch commemorates a season, a competition, or membership. That choice determines which date, school name, or instrument detail deserves space.
A small club run does not need three backings and five versions to feel considered. One well-sized design is easier to quote, approve, count, and reorder. If the first run is testing demand, spend the design effort on a patch people can actually place on their clothes.
Printed Patch Styles: Album Squares, Tour Badges, and Cut Shapes
A square album patch is the obvious choice, but the cover art usually needs editing. Remove distributor marks, tiny credits, and lettering that only worked on a record sleeve. Keep the recognizable image and give the band name enough contrast to survive the reduction.
Round tour badges suit a central symbol with a short outer line of text. Rectangles work for condensed wordmarks, and shield shapes can give a school or marching-band design the structure of a uniform crest. The border needs space of its own; it should not crowd the first and last letters.
Six band patch ideas worth putting on a quote
- Album-art square: Start by testing roughly 3 × 3 inches. Keep one dominant image and a short title rather than shrinking the entire retail cover unchanged.
- Los Angeles hometown badge: Pair an original city-inspired illustration with the band name. Avoid filling half the patch with a long location line that competes with the logo.
- Tour-year rectangle: Use a bold year and tour title, then move the full city list onto the backing card. The patch remains readable after the tour is over.
- Instrument mascot: A stylized drum, trumpet, or guitar can work as a shaped patch. Simplify thin projecting parts that could bend, catch, or complicate attachment.
- Crew-only color version: Keep the shape consistent but change a clearly visible field or role line. Confirm how a separate artwork version affects minimums and pricing.
- Release-night collectible: Use the release artwork with an event date, but order against a confirmed deadline. A date-specific patch has less flexibility if delivery planning slips.
For school groups, the visual language may be different from a club-show merch table. A traditional varsity letter can make more sense in chenille patches, while a detailed competition illustration may suit print. The guide to How to Order Chenille Patches for Marching Bands in Los Angeles helps separate those two jobs.
Printed vs. Embroidered vs. Woven: Compare the Actual Result
The useful comparison is not which patch is best in general. It is which construction preserves the part of your design that matters: tonal artwork, fine lettering, raised texture, or a molded surface. A one-color band wordmark may gain nothing from printing if the whole appeal is a heavy stitched finish.
Bring the garment into this decision. A flexible denim vest, a structured trucker cap, and a wool letterman jacket do not present the same surface or visual expectations. This table is a construction comparison, not a claim that one material always costs less.
| Patch style | Good band applications | Main advantage | Trade-off to check |
|---|---|---|---|
| Printed | Album illustrations, gradients, multicolor tour art | Keeps tonal changes and image detail on a relatively flat face | No raised thread texture across the image; tiny text still needs a readability check |
| Embroidered | Bold wordmarks, traditional crests, jacket badges | Visible thread texture and familiar stitched character | Dense miniature artwork may need simplifying; gradients do not translate literally |
| Woven | Detailed line art, compact logos, smaller lettering | Fine yarn construction can retain detail that bulky embroidery struggles with | Less dimensional than embroidery; photographic shading needs evaluation |
| PVC | Molded crew identifiers and selected removable gear patches | Defined molded shapes and a distinct rubber-like feel | Different weight and stiffness; not a direct substitute for printed album art |
| Chenille | Marching-band letters and varsity-style keepsakes | Lofty texture suited to large, simple letterforms | Not the practical choice for tiny dates or a detailed photographic image |
Compare embroidered patches when the logo uses broad lettering and simple fills. Compare woven patches when line detail matters but you still want a thread-built face. For more context, Embroidered vs. Woven vs. PVC Patches: Which Should You Choose? explains the construction differences without treating them as interchangeable products.
A printed center and stitched edge can share the work
A printed image with a stitched border can give illustrated artwork a defined jacket-patch edge. The border supplies the frame; the printed center carries the shading and color. Confirm the proposed construction on the quote rather than assuming every printed patch comes with the same edge treatment.
Likewise, do not assume a printed patch will look like a miniature embroidered crest. Merrowed crests have a rounded, overlocked perimeter that reads differently from a close-cut illustrated shape. A mockup should make that difference clear enough to choose intentionally.
Specify Size, Border, and Backing Before Comparing Prices
Measure the usable placement, not the entire garment panel. A cap front includes curvature, seams, and often a stiff internal structure; a jacket chest may include a pocket flap right where the patch looked good in a flat drawing. Cut a paper rectangle to the proposed dimensions and hold it against the real item.
For planning, a 3-inch square is a manageable starting point for a collectible, while a narrow wordmark might begin around 3.5 × 1.5 inches. Those are layout starting points, not universal production limits or promises of fit. The Custom Patch Size Guide: How Big Should Your Patch Be? is useful before committing to a cap or jacket placement.
Match the backing to what people will actually wear
- Sew-on: Often a practical choice for denim jackets, canvas totes, and non-stretch vests. Check access behind the panel so attachment does not accidentally close a pocket or catch the lining.
- Iron-on: Convenient only when the garment and adhesive application requirements agree. Check the care label, coating, heat tolerance, and supplier instructions before applying heat.
- Hook-and-loop: Useful for a removable patch on an existing compatible panel. Specify hook backing, loop material, or both; a patch cannot attach to plain fabric just because the quote says Velcro.
- Garment-specific installation: Wool coats, satin jackets, leather vests, and lightweight hospitality polos may need different handling. Patch weight, needle marks, lining access, and fabric movement all matter.
Nylon shells deserve particular caution because heat can damage the fabric or its finish, and sewing can compromise a weather-resistant construction. Wool coaches' coats and letterman jackets bring a different problem: thick layers and linings can make a neat attachment harder than the outer face suggests. An iron-on that peels after a dryer cycle is often an application or garment-compatibility problem, not proof that the printed artwork failed.
Choose an edge the artwork can support
A merrowed border usually makes the most visual sense on uncomplicated shapes with room for a defined rim. Close-cut options can suit more intricate outlines, but deep notches and narrow projections still need a production review. Read Merrowed vs. Hot-Cut vs. Laser-Cut Borders: What’s the Difference? before using the border as a decorative afterthought.
Put dimensions, shape, border, and backing on the same quote request. Otherwise, two prices may describe two different patches, and the lower number tells you very little. The Patch Backing Options Explained: Sew-On, Iron-On, Velcro® & More guide is a useful check if several garment types are involved.
Printed Patch Prices: Build a Budget Without Guessing
There is no useful single price for a printed band patch without a specification. A 3-inch sew-on square and a large shaped patch with removable backing are different jobs, even if they use the same artwork. GetUSAPatches has a 10-piece minimum; request the current price for the exact construction rather than treating a planning example as a posted rate.
Quantity often changes the per-piece calculation because preparation costs can be spread across more pieces, but the actual price break needs a quote. Ask about 10, 25, 50, and 100 pieces if those quantities fit your plans. Do not buy 100 only because the unit price is lower if you realistically need 20.
What belongs in an itemized quote
- Finished dimensions and shape: Larger surfaces use more material, and intricate outlines can change finishing requirements. Keep measurements in inches so there is no scale ambiguity.
- Printed construction and edge: Ask what face material and printing approach are proposed. Confirm the border treatment and whether the illustrated quote shows the actual construction.
- Backing and attachment supplies: Hook backing, separate loop pieces, and adhesive options are not the same specification. Identify which parts are included.
- Quantity and versions: Separate band-member names, artwork changes, or distinct color versions may affect how the order is grouped and priced.
- Additional services and delivery: Ask whether setup, physical sampling, individual packaging, shipping, applicable taxes, or expedited service are included or quoted separately.
The free digital mockup is part of planning before production; it should not be confused with a free physical sample. If a physical sample is needed, ask about availability, cost, and its effect on the schedule. That distinction matters when a color-sensitive release has only one approval window.
An illustrative merch budget in dollars
Suppose a band sets a hypothetical delivered patch budget of $240 for 60 pieces. That works out to $4 per patch before any separate packaging or installation expense; it is an arithmetic example, not a GetUSAPatches price offer. If backing cards add a hypothetical $0.40 each, the planned cost becomes $4.40 per packaged piece.
At a hypothetical $10 selling price, that leaves $5.60 before payment fees, venue merchandise commissions, labor, taxes, and unsold inventory. The patch can still make sense, but gross difference is not take-home profit. Use How Much Do Custom Patches Cost? What Drives the Price to organize the quote rather than selecting a retail price from material cost alone.
Keep the comparison consistent when checking suppliers: identical dimensions, similar face construction, the same backing, and the same delivery requirement. A lower quoted unit price can lose its advantage after separate shipping or packaging charges. A clear specification is more valuable than a vague promise of premium quality.
Prepare Band Artwork That Survives the Smaller Format
The first artwork check is actual-size readability. Open the design at the intended dimensions, print it on paper if possible, and step away from the desk. If the band name only reads while zoomed to 400 percent, more printing detail will not solve the composition.
Vector artwork is useful for clean logos and editable lettering, but a printed illustration can also begin with a suitable raster file. As a starting reference, a 3-inch image at 300 pixels per inch is 900 pixels across, before any required bleed or layout allowances. Ask for the actual file specification; simply changing a low-resolution file's resolution setting does not add detail.
Check these details before approving the proof
- Band-name contrast: Dark red over black may fit the album mood but lose definition in a small patch. Consider a lighter outline or a separate text field.
- Small lettering: Shorten venue lists, credits, and legal lines where possible. There is no single readable letter height for every typeface and printed construction.
- Safe area: Keep essential letters and faces away from the finished edge. Use the production layout's specified margin rather than inventing a universal allowance.
- Image source: Supply the original illustration or highest-quality export available. Screenshots, compressed social-media downloads, and enlarged thumbnails are poor starting files.
- Color expectations: Ordinary printing does not automatically reproduce metallic, fluorescent, or reflective effects. Identify those expectations before pricing and ask what is actually available.
- Artwork rights: Confirm permission for band photography, commissioned illustration, venue logos, and any borrowed marks. A production-ready file is not itself proof of permission.
A digital mockup communicates layout and specifications, but it is not a physical color standard. Screen brightness, display settings, fabric, and ink can all affect how a color appears. Flag a critical brand color and ask how it will be evaluated rather than relying only on the image on a phone.
Keep one clearly named final file and one person responsible for approval. A last-minute replacement sent by another band member can create uncertainty about which version controls the order. The Artwork File Guide for Custom Patches: Vector, PNG, JPG and More helps sort the file types before that exchange gets messy.
Ordering and Lead Times: Work Backward From the Show
Give the date the patches must be ready to use, not just the date printed on the concert poster. A Friday show may require the merchandise to be counted, carded, and packed by Wednesday. If a tailor is attaching patches to stage jackets, add that work before the final wardrobe check.
GetUSAPatches ships nationwide from Corona, CA, throughout the United States, including all 50 states. Being near Los Angeles does not by itself establish a delivery date, local pickup arrangement, or same-day service. Ask for the current production estimate and transit options for the destination ZIP code.
A clean ordering sequence
- Send artwork and use details. Include the garment, intended placement, width and height in inches, quantity, backing preference, and any specific color concerns.
- Get the construction and price in writing. Confirm the printed face, edge, included backing components, packaging, delivery charges, and any other quoted services.
- Review the free digital mockup. Read every word, inspect the layout at actual size, and match the drawing to the written specifications.
- Assign one approver. Consolidate band-member or committee feedback before returning revisions so the production file does not split into competing versions.
- Approve the final version. GetUSAPatches produces only after approval; an unapproved mockup is not a released production order.
- Confirm the schedule and shipping details. Check the delivery address, contact information, current production estimate, transit method, and the plan for receiving the package.
- Inspect and prepare the run. Count the patches, check them against the approved specifications, and allow time for application or merch-table packaging.
Do not translate an estimated shipping date into a guaranteed arrival date. Artwork revisions, construction changes, sample review, and transit are separate parts of the calendar. If the deadline is tight, ask which specification can realistically meet it rather than approving an unsuitable backing merely to move faster.
For touring bands, choose a delivery address with a reliable receiver and enough time before departure. Sending merchandise toward a moving tour route adds avoidable handoff problems. Custom Patch Production Timeline: From Artwork to Delivery explains the stages to account for, while Ordering Custom Patches in Bulk: Minimums, Pricing and Planning helps with larger follow-up runs.
Attachment and Care: Avoid the Failure People Remember
A good patch can still be installed badly. Sewing through a jacket pocket closes it, an overly stiff patch can pull at a lightweight polo, and a large flat patch can pucker on a sharply curved cap. Test placement and attachment on the actual garment instead of assuming a successful denim sample proves every fabric will work.
For sew-on work, choose thread and stitching appropriate to the garment and keep the patch flat during attachment. Check the lining and any hidden pockets before the first stitch. The How to Sew On a Patch: A Step-by-Step Guide is a practical reference for straightforward applications; specialty garments may need an experienced alterations shop.
Heat and hook-and-loop both need specific instructions
For iron-on application, use the supplied instructions for temperature, pressure, dwell time, and cooling, provided the garment can tolerate them. Do not guess from a generic social-media demonstration. If the fabric cannot safely accept the required heat, change the attachment method or garment rather than hoping a cooler, shorter press will bond adequately.
Existing Velcro panels also need measuring, including usable corners and any surrounding seam. Identify which side of the hook-and-loop pair is already on the garment so the patch receives the mating side. The guide to Velcro® Patches: How to Attach and Use Hook-and-Loop Backing explains that arrangement.
Care instructions should respect both the patch and the garment; follow the more restrictive requirement. Avoid promising buyers that every decorated jacket can handle hot washing or a high-heat dryer. Include accurate care information with loose patches, and consult How to Wash and Care for Patches before writing the backing card.
Plan the Merch Run So Reordering Is Straightforward
Separate sellable stock from member copies, promotional pieces, and any samples reserved for photos or attachment tests. A 50-piece order is not 50 pieces available at the table if ten are already promised elsewhere. Put those allocations in the budget before choosing the quantity.
A backing card can carry information that would clutter the patch: release title, full tour dates, attachment instructions, and care notes. Keep the patch itself focused on the image buyers want to wear. If packaging is part of the order, specify it rather than assuming loose patches arrive individually carded.
Save a simple reorder record
- Approved artwork and mockup version, with the final band-name spelling and any date-specific wording.
- Finished width and height, shape, printed construction, border treatment, and border color.
- Backing type and exactly which hook-and-loop components or other supplies were included.
- Previous order quantity, packaging arrangement, and actual sales by show or online release.
- A physical reference patch if color or finish consistency will matter on the next run.
Ask for a fresh quote and current timing on a reorder, even when the artwork has not changed. Material availability, quantity, and delivery requirements can differ from the first run. Keeping the specifications organized makes that conversation shorter and reduces accidental changes.
The strongest first order is usually the one with a clear purpose: a readable band mark, a size people can place, and a backing suited to the garment. You can add alternate artwork after you know what sells. For a wider merchandise collection, Custom Patches for Fashion and Streetwear Brands: Trends and Ideas offers ways to connect patches with caps, jackets, and other apparel without forcing one construction onto every item.


