
To order chenille patches for a Los Angeles marching band, send the band artwork, garment details, finished patch dimensions, quantity, backing preference, and required delivery date. GetUSAPatches has a 10-piece minimum and provides a free digital mockup before production. We produce only after approval and ship from Corona, CA, to all 50 states.
Start with the jacket, not just the mascot file. A large varsity letter on a wool letterman jacket is a different job from a small crest on a nylon warm-up shell, even if both use the same school colors. For bands across the United States, the useful quote is the one that spells out those differences before the booster club commits its budget.
Start With the Patch’s Job: Recognition, Uniform Identity, or Fundraising
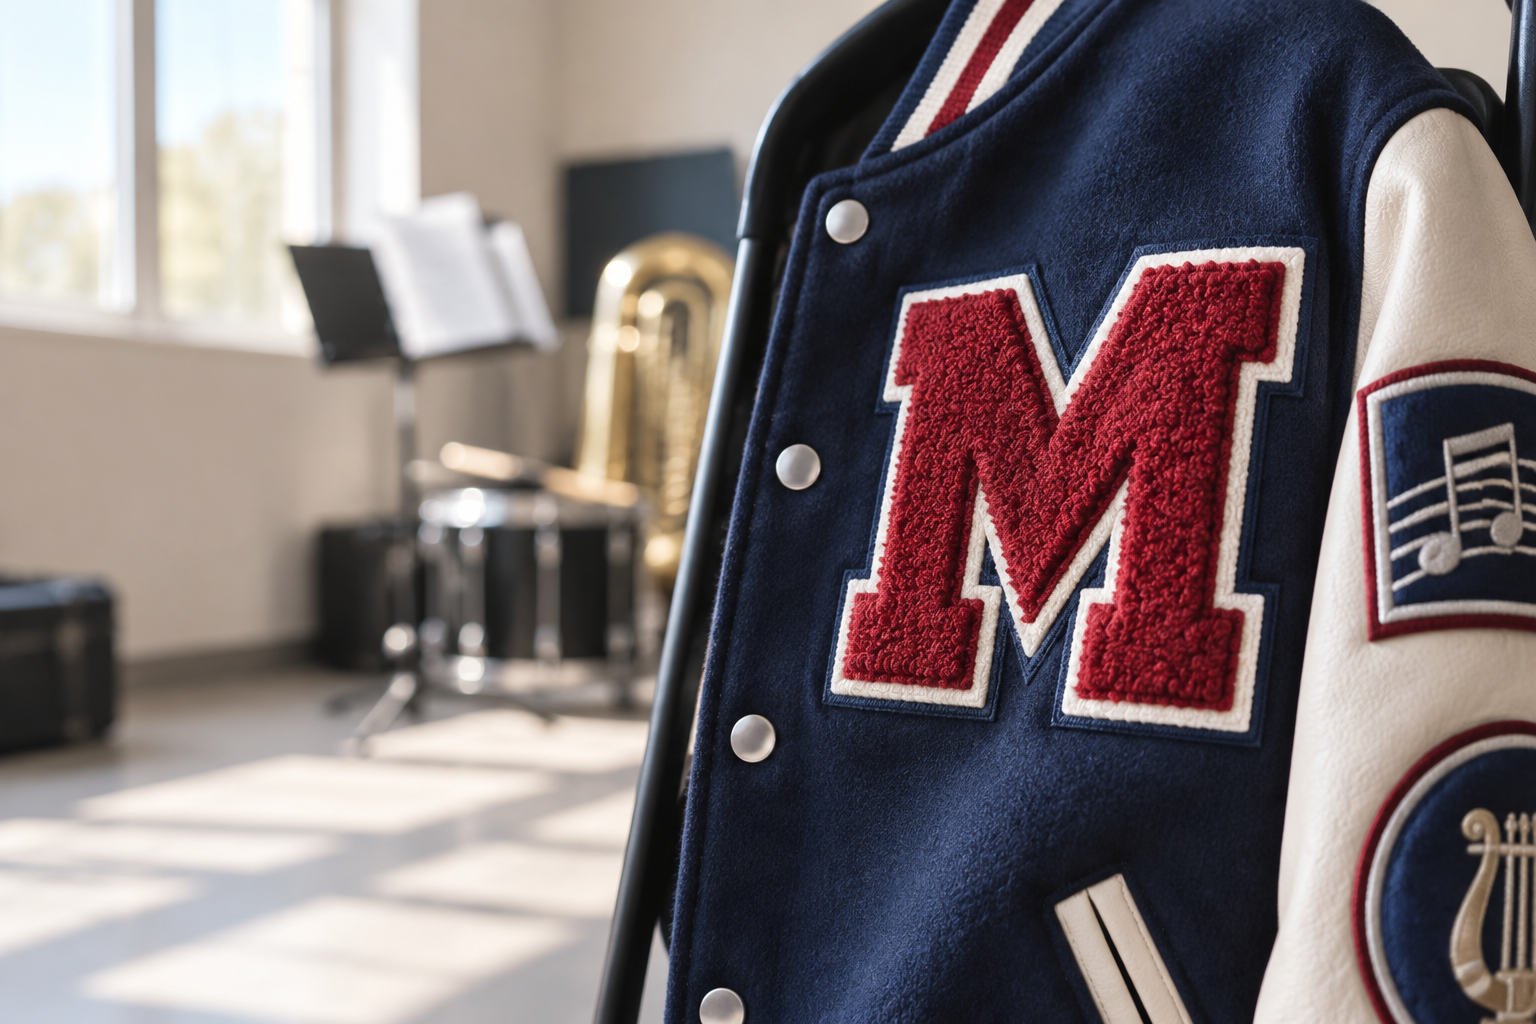
Chenille is the fuzzy, raised yarn construction associated with varsity letters and letterman awards. It gives broad shapes a soft, substantial surface, usually supported by a felt base. That makes chenille patches a sensible choice for a school initial, a bold band monogram, or an achievement patch that students will keep.
It is not automatically the right answer for every piece of band apparel. A formal marching coat may have strict placement rules, a fitted chest, or decorative braid that leaves little usable room. A patch that looks balanced on a loose jacket can crowd the same area on a performance uniform.
- Letterman recognition: prioritize a recognizable school letter, a readable year, and a shape that fits the jacket without covering a pocket.
- Section awards: keep the main design consistent and decide whether instrument names belong inside the patch or on separate tabs.
- Band travel apparel: check weight, wash frequency, and attachment before choosing a thick patch for a lightweight garment.
- Booster merchandise: confirm the garment and selling price before ordering patches that buyers will be expected to attach themselves.
- Competition or parade keepsakes: decide whether the patch is intended for daily wear, a display blanket, or a framed collection.
Ask the band director or uniform manager to approve the intended location before artwork begins. Rented uniforms and district-owned garments may have attachment restrictions that a parent volunteer cannot waive. Keep the award patch separate from the official uniform if permission is uncertain.
The same production question applies to high-school team jackets, fire and public-safety units, hospitality polos, and biker vests: what must the patch do on this particular garment? Soft varsity texture can be right for recognition and wrong for a shirt that needs frequent washing. Our chenille and letterman guide explains the construction in more detail.
Build Artwork That Chenille Can Actually Hold
A marching-band logo often contains more detail than it first appears to have. Trumpet valves, flute keys, musical staff lines, mascot whiskers, and a long school name may all compete inside one small crest. Chenille yarn does not describe those tiny elements the way a flat printed image does.
Give chenille the broad areas: the school initial, a large music note, or the body of a simplified mascot. Put smaller lettering and sharper outlines into embroidery if the construction and size support them. Some artwork still needs simplification; combining techniques does not make every tiny feature practical.
Separate the Main Read From the Close-Up Detail
For example, a band letter could use chenille for a large block initial and embroidery for a short graduation year beneath it. The initial should remain recognizable from several feet away, while the year can be a close-up detail. Trying to give both equal visual weight usually makes the layout crowded.
Check the design at actual size on paper, not only enlarged on a laptop. If a line of text is difficult to read on the printout, adding raised yarn around it will not help. There is no useful universal minimum letter size for every font and construction, so ask for a review at the quoted dimensions.
- Send a vector file if available, or the largest clean PNG or JPG you have; do not enlarge a tiny screenshot and assume the detail has returned.
- Write every word in the order brief, including punctuation, school initials, instrument names, and the intended graduation year.
- Identify official school colors and provide a physical reference or established color specification when available.
- Mark any mascot features that must stay intact, then identify background details that can be simplified.
- State whether the felt border counts as part of the school-color layout rather than treating it as an afterthought.
Screen color is a reference, not a physical yarn sample. Yarn, embroidery thread, and felt can reflect light differently even when they are intended to represent the same school color. Use the artwork file guide for file preparation and the thread color matching guide when matching existing jackets matters.
Compare Chenille With Embroidered, Woven, and Printed Patches
Do not force one patch construction across the whole band wardrobe. The letterman award, travel polo, and cap can share a design family without using identical materials. That is often the cleaner result, especially when the same crest must appear at several different sizes.
At the quote desk, the useful comparison is not which patch is best in general. It is which one preserves the artwork, fits the garment, and survives the intended care routine. Printed is flatter; that is the point when the design depends on fine artwork rather than raised texture.
| Construction | Useful marching-band application | What it handles well | Main trade-off |
|---|---|---|---|
| Chenille with a felt base | Letterman letters, bold award shapes, large school monograms | Soft raised texture and broad color areas with a traditional varsity appearance | Fine lettering and detailed instruments may need embroidery or simplification; the patch adds bulk. |
| Chenille with embroidered details | School letter with a graduation year, short band name, or simplified instrument detail | A fuzzy main shape paired with sharper secondary information | The design needs clear construction notes, and small details still require enough room. |
| Standard embroidery | Travel-jacket crests, band polos, uniform identifiers, and caps | Defined stitched outlines, moderate detail, and a familiar uniform appearance | Very small text can fill in, while dense stitching may feel stiff on a thin garment. |
| Woven | Smaller crests with longer school names or detailed linework | Fine detail in a relatively flat textile construction | It does not provide the thick, fuzzy varsity surface associated with chenille. |
| Printed | Illustrated event artwork, gradients, and multicolor commemorative designs | Image detail that would be difficult to reproduce with broad yarn areas | The result is flatter and depends on the selected material and print method rather than raised stitching. |
| 3D embroidery | Bold raised lettering for selected caps and streetwear-style band merchandise | Raised stitched forms in artwork designed for the process | It is not chenille; narrow gaps and delicate shapes may need redesign. |
If the uniform manager wants one readable crest for several garments, compare embroidered patches with woven patches before choosing chenille by habit. If the artwork is a detailed event illustration, printed patches may preserve more of it. Reserve 3D embroidered patches for designs that suit raised stitching rather than using them as a substitute name for chenille.
A practical split might be chenille letters for senior jackets and a smaller embroidered crest for staff outerwear. Those are separate specifications and should be quoted that way. Do not assume the same file can simply shrink from a jacket letter to a cap patch without changes.
Specify Chenille Patches for Los Angeles Bands by Garment, Size, and Backing
Measure the available garment area before settling on patch dimensions. As a layout example, test a 4-inch-tall paper letter on a jacket chest and a 3-inch-wide paper crest on a sleeve; these are starting templates, not standard sizes that fit every uniform. Measure the finished outer edge, including exposed felt, rather than only the central letter.
Try the template on the smallest garment size in the order. A design that clears the pocket on an adult XL may overlap it on a smaller student jacket. Leave room for seams, pocket openings, snaps, and the way the fabric bends when a musician carries an instrument.
Choose the Backing From the Fabric and Care Label
For many wool-body letterman jackets, sew-on attachment is the practical starting point because it does not depend on applying adhesive with heat. A tailor still needs to consider the lining, pocket bags, and any leather or vinyl sleeves. Older wool coaches and lined marching coats deserve the same inspection rather than a quick stitch through every layer.
Nylon shells need a different conversation. Heat can damage some shell fabrics, coatings, and trims, so do not assume an iron-on backing is safe because the patch itself accepts heat. Sewing also punctures the shell and may affect weather resistance, which matters on rain gear.
Iron-on that peels after a dryer cycle is a familiar failure, but the cause is not always the same. The fabric, adhesive compatibility, application pressure, heat, and later laundering all matter. Follow garment and patch-specific instructions, and ask whether perimeter stitching is appropriate when the garment permits it.
- Sew-on: specify this for a tailor-installed patch when the fabric and construction allow stitching; confirm whether the lining must be opened.
- Iron-on: request it only after checking fabric compatibility and the garment care label; ask for the correct application instructions.
- Hook-and-loop: confirm chenille construction compatibility, patch thickness, and both mating sides if removable attachment is required.
- Existing Velcro panels: measure the usable panel itself, not the surrounding sleeve, and account for any border that could extend beyond it.
- Display use: tell the quote desk if the patch will go into a frame or onto a keepsake blanket rather than a performance garment.
Also name the edge finish. Merrowed crests have a wrapped stitched border, while a chenille letter may use visible cut felt around its outline; those finishes should not be treated as interchangeable. The patch size guide and backing options guide can help you turn a garment photo into a clear specification.
Build a Booster Budget Around the Whole Job
A patch price is not the same thing as a finished-jacket cost. Your budget may also need shipping, applicable tax, garment attachment, and separate artwork versions for sections or graduation years. Ask the quote to state what is included so the booster treasurer is not comparing two different scopes.
Size, quantity, construction complexity, felt layers, embroidery detail, and backing can all affect the quote. Personalization needs its own line of discussion because 60 identical patches are not the same production job as 60 different student names. The 10-piece minimum does not automatically mean every mix of designs qualifies as one combined run.
Use Budget Math, Not an Assumed Unit Price
Suppose a booster club has $900 available for 60 finished jacket awards. That gives it a planning ceiling of $15 per finished award before deciding how much must cover patches, freight, tax, and sewing. This is budget arithmetic, not a GetUSAPatches price quote.
Get the attachment estimate early. Sewing a simple patch onto an accessible jacket panel can be a different job from opening a lining, protecting a pocket bag, and closing the garment afterward. The less visible work can be the part that changes the total.
- Request separate prices for genuinely useful quantity options, such as the confirmed roster count and that count plus a modest spare supply.
- Ask how changing dimensions or simplifying detail affects the quote instead of assuming fewer colors always creates the largest saving.
- Separate student names, section titles, and years in the quantity sheet so customization is priced accurately.
- Confirm whether shipping and any setup or other applicable charges are included, excluded, or listed separately.
- Avoid ordering more than the band can use merely to reach a lower unit price; unused dated awards still cost money.
A stable school letter with a separate year element may make future ordering easier, but it also creates another component to manage and attach. Compare the complete cost of both approaches. For broader pricing context, see what drives custom patch cost and the bulk ordering guide.
Order in Six Steps and Plan Backward From the In-Hand Date
The date that matters is when the band needs usable patches or finished garments, not when someone sends the first email. A football halftime debut, an awards banquet, and a parade departure can each require a different handoff plan. Write down the event date and the earlier date needed by the person attaching the patches.
Then assign one approval owner. A director, booster treasurer, and uniform manager may all need input, but production needs one final, documented specification. Conflicting replies about gold shades or graduation years create delays that shipping cannot repair.
- Identify the garment and placement. Record the jacket or garment model, shell material, lining, care instructions, and proposed patch location. Photograph the placement area beside a ruler so seams, pockets, and usable space are visible.
- Set finished dimensions and construction. Measure the full patch width and height, including the outer felt border. Identify which areas should be chenille, which details need embroidery, and which backing suits the garment.
- Prepare artwork and quantities. Send the clearest authorized artwork available, school color references, exact wording, and quantities by design. List names, graduation years, and instrument sections separately rather than treating them as one unchanged design.
- Request an itemized quote and schedule. Provide the delivery ZIP code, required in-hand date, attachment plan, and any school purchasing requirements. Ask the quote to identify patch construction, backing, shipping, applicable charges, and the proposed approval-to-delivery schedule.
- Review and approve the digital mockup. Check spelling, dimensions, colors, border, backing, quantities, and the distinction between chenille and embroidered areas. GetUSAPatches provides a free digital mockup before production and produces only after approval.
- Inspect and attach the delivered patches. Count the patches and compare them with the approved specification before attaching them. Have one garment finished and inspected first, then complete the remaining jackets and retain the order details for reorders.
Keep Artwork, Production, Transit, and Sewing as Separate Schedule Items
Ask for the current production estimate for the exact construction and quantity under review. Do not substitute a turnaround mentioned for another patch type or a previous season. Revisions, personalization, purchasing paperwork, and approval timing can all change the practical schedule.
For a Los Angeles order, shipping from Corona, CA, still needs to be planned as shipping. Nearby geography is not a promise of same-day delivery, pickup availability, or a specific carrier service. Confirm the destination, service, and estimated arrival on the order rather than relying on the distance between cities.
Use a staffed delivery address and check school office closures, holiday breaks, and campus receiving hours. A box arriving after the last uniform-fitting session may technically beat the event date but still miss the useful deadline. Include time to inspect the shipment and resolve any discrepancy before attachment.
The digital mockup should show layout and written specifications, but it cannot reproduce the feel of yarn or prove garment adhesion. If a physical sample is necessary, ask about availability, cost, and schedule before approving the run. The production timeline guide explains why approval and transit should be tracked separately.
Attach One Test Patch Before Finishing the Entire Band Run
Bulk attachment is where a small placement mistake becomes expensive. Have one patch positioned and attached on a representative garment first, then inspect it with the garment hanging naturally. Check the visual angle, the distance from seams, and the inside of the jacket.
A flat table can hide problems. The patch may tilt when the jacket is worn, pull across a curved chest panel, or sit directly where a strap rubs. On marching-band apparel, check instrument harnesses, percussion carriers, and other equipment that contact the proposed location.
Give the Tailor a Placement Standard
Use clear reference points, such as the patch edge’s distance from a finished seam, rather than saying to center it somewhere on the chest. Record whether placement changes across garment sizes. A photo of the approved first garment is useful, but it should accompany measurements rather than replace them.
- Check that stitching has not closed a pocket or caught an inner layer that should remain free.
- Inspect for puckering, especially on lightweight shells or thin sweatshirt fabric.
- Keep stitches out of the chenille face where possible and follow the construction’s recommended attachment area.
- Confirm that any heat application is permitted by both the garment and patch instructions; do not improvise a temperature.
- Review the first finished jacket from the front, side, and inside before releasing the remaining garments for sewing.
For home attachment, the sew-on patch guide provides a basic process, while the iron-on guide explains why fabric compatibility matters. A lined letterman jacket may still be better handled by a tailor who can access the proper layer. That is a garment decision, not a judgment about anyone’s sewing ability.
Inspect Delivery, Explain Care, and Make Next Year’s Reorder Easier
Open the shipment before handing individual patches to students. Count by design and compare the pieces with the approved artwork and written specification. Check the year, school spelling, overall dimensions, backing, and intended chenille-versus-embroidery areas.
Normal textile texture should not be confused with a specification error, but a wrong word or wrong backing needs prompt attention. Photograph any suspected issue and keep the packaging and order details together. Do that before patches are sewn onto dozens of jackets.
- Keep the approved digital mockup, finished dimensions, color references, backing description, and final quantity in one shared school folder.
- Store spare patches flat, clean, and dry rather than loose under heavy equipment in a band-room cabinet.
- Record how many spares remain after awards night so the next booster committee does not reorder blindly.
- Share garment-compatible care instructions with students and parents instead of assuming the patch determines the whole jacket’s wash method.
- For a reorder, send the prior order reference and ask to confirm specifications again, especially if the garment or supplier materials have changed.
Follow the jacket’s care label and any patch-specific care guidance together. Wool, leather trim, adhesive backing, and raised yarn may impose different restrictions, and the most suitable cleaning method must account for the complete garment. Avoid assuming a patch that looks durable can tolerate high dryer heat.
The patch care guide is a useful starting point for that handoff. For exact repeat colors, retain a physical reference where practical and discuss acceptable variation before a later order. A saved screen image alone is not a reliable physical color standard.
A Quote Brief Your Director and Booster Treasurer Can Both Use
The fastest useful brief is not the longest one. It names the garment, shows the design, counts the versions, and states the deadline without leaving the quote desk to guess. Put uncertain items in a short question list rather than making silent assumptions.
Here is an illustrative brief for a fictional band order. The dimensions and quantity are examples, not a recommended specification for every school. Replace each item with measurements and approvals from your own program.
- Project: 48 identical marching-band recognition letters for student-owned letterman jackets; quote 52 as a separate option for spares.
- Garment: wool-body jackets with leather sleeves and lined interiors; patch goes on the left chest, not the sleeve.
- Finished size: proposed 4 inches tall by 3.5 inches wide, including the felt border, subject to checking the smallest jacket.
- Construction: chenille block initial, embroidered graduation year, and a visible contrasting felt edge; identify these areas on the mockup.
- Colors: school navy and gold, with official references attached; advise if the available materials need a different matching approach.
- Backing and attachment: sew-on, with a local tailor handling installation; patch quote and attachment cost remain separate.
- Artwork and authority: authorized school artwork attached; the band director approves design and the booster treasurer approves spending.
- Schedule and delivery: provide the actual in-hand date, Los Angeles delivery ZIP code, office receiving hours, and the tailor’s required handoff date.
For a small leadership group, the same brief works with the 10-piece minimum, provided the proposed design mix is confirmed in the quote. For a larger band, add a quantity sheet instead of burying student names in email replies. Consistent information keeps the mockup, approval, and production specification aligned.
If the school is planning caps, polos, or club apparel alongside the jackets, treat those as related but separate garment jobs. The sports teams and clubs buyer’s guide helps organize a mixed order. A clear specification now is what makes the next season’s reorder less work.


