
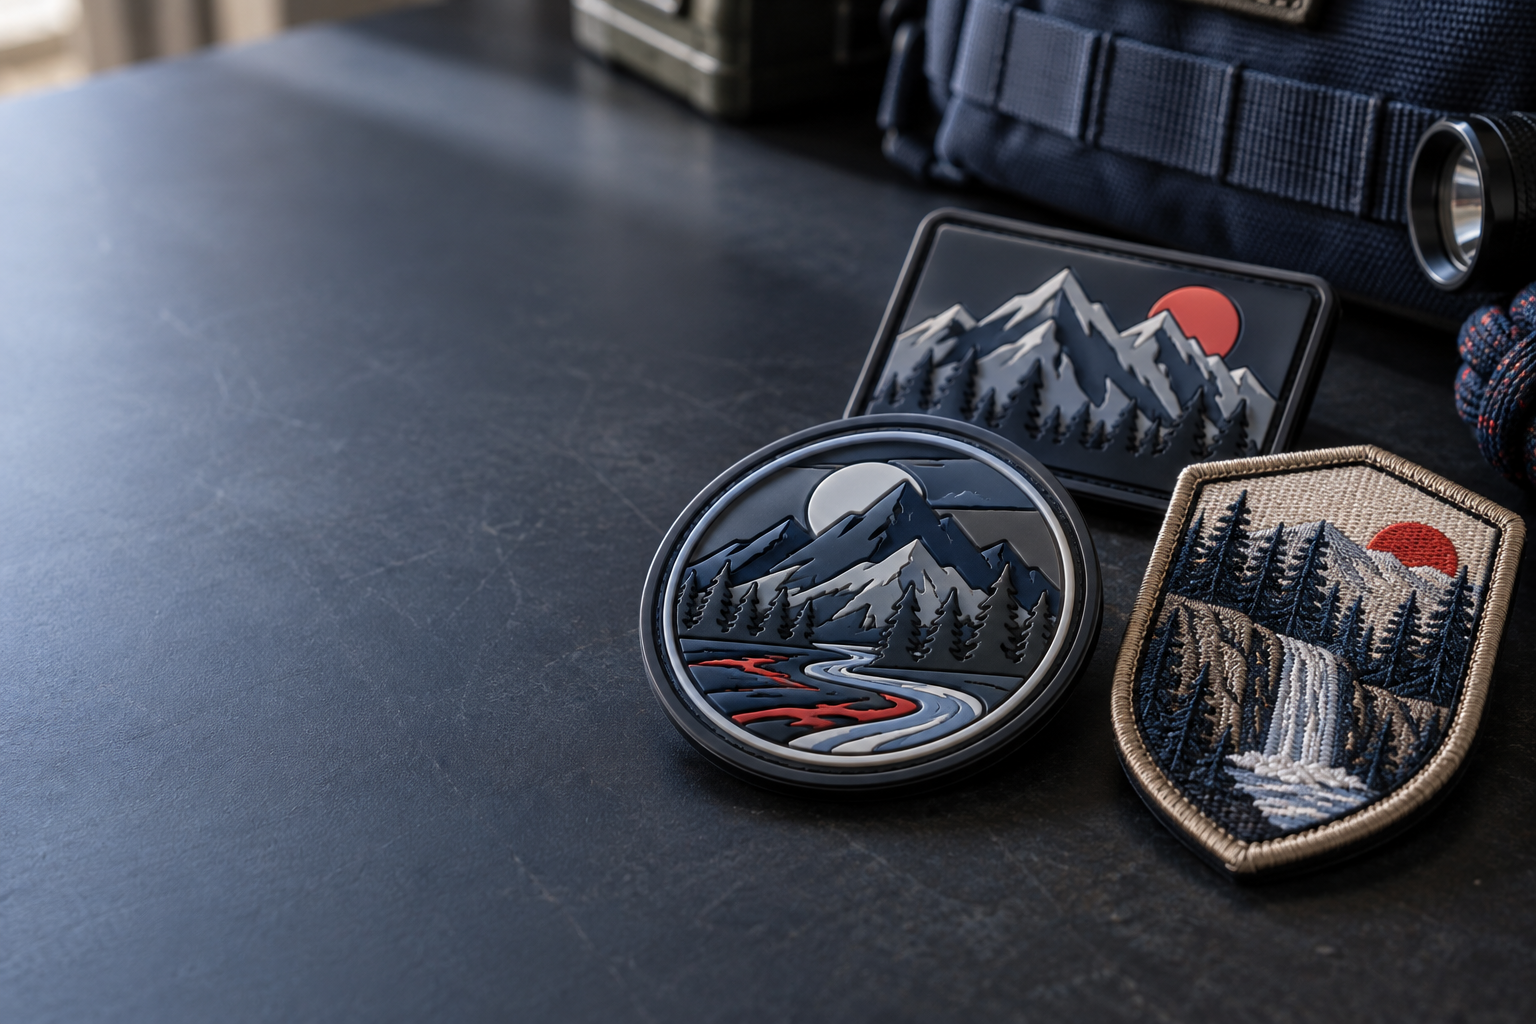
For custom PVC patches New York tactical teams can use on uniforms and gear, start with a molded design sized to the actual attachment panel. PVC works well for bold identification, raised symbols, and wipe-clean surfaces; hook backing makes sense when the garment already has a compatible loop panel. GetUSAPatches has a 10-piece minimum and provides a free digital mockup before production.
We produce only after approval and ship from Corona, CA, to all 50 states in the United States, including New York. The useful first question is not how much detail a logo contains. It is where the patch will sit, what needs to be readable, and how the team will attach and clean it.
What New York tactical teams should settle before requesting a quote
A quote for a removable shoulder identifier is different from a quote for a training bag emblem, even if both use the same artwork. The shoulder piece has to fit an existing panel and stay readable on a moving person. The bag patch may have more room, but exposed corners can catch on straps, lockers, and vehicle interiors.
New York adds a practical shipping question, too: where does the order actually need to arrive? A staffed business address in Manhattan, a receiving desk in Queens, and a training location outside the city are different delivery arrangements. Give the receiving address and required in-hand date instead of assuming that an event date is enough.
- Define the purpose: team identification, training designation, morale artwork, brand merchandise, or equipment labeling.
- Name the exact placement: sleeve loop panel, chest panel, cap front, backpack, nylon shell, or sewn uniform pocket.
- Count the wear locations, not just the people. One person may need two uniform patches plus one for a bag.
- Identify who can approve the artwork and who will receive the shipment. Those are often different people.
- Confirm any department or organization requirements before choosing colors, insignia, dimensions, or attachment.
For public-safety units, department purchasing and uniform rules should drive the specification. A patch is an identifier, not protective equipment, and ordinary PVC construction does not establish flame resistance, infrared performance, or approval for duty use. Our custom military and morale patch guide covers additional planning questions without treating a decorative patch as certified gear.
Choose PVC for the job, not just for the raised look
PVC patches use molded material rather than stitched thread to form the face. That gives broad lettering and simple symbols a defined, dimensional appearance, and the face generally wipes clean more easily than an open thread surface. The trade-off is thickness: a patch that feels right on a gear bag may feel bulky on a lightweight shirt.
The garment changes the answer. On a structured cap with a suitable front panel, a compact PVC badge can work; on a soft, unstructured cap, a wide badge may resist the crown's curve. A nylon shell needs an attachment plan that respects its coating, while wool coaches' jackets often suit the softer, familiar appearance of thread.
Where thread, woven detail, or print makes more sense
On the quote desk, a high-school sports team, a hospitality group ordering polos, and a fire unit should not receive the same material recommendation. Embroidered patches give jacket crests and workwear a recognizable stitched texture. Woven patches are worth comparing when small lettering is doing most of the work.
Printed patches are better candidates for gradients, photos, or artwork that depends on subtle shading. Printed is flatter; that is the point. Trying to rebuild a shaded skyline as several tiny PVC ridges can produce a busy patch that loses the original image.
Biker vests and letterman jackets bring different expectations again. Large stitched club layouts and merrowed crests have a visual language that molded PVC does not automatically replace, while chenille patches provide the pile associated with varsity lettering. Choose the construction that fits the garment instead of forcing every piece in a uniform program into one material.
How to specify custom PVC patches New York teams can use
A usable specification records finished width, finished height, shape, colors, relief, backing, and quantity. Inches matter here. Calling a design a standard shoulder patch does not tell production whether it must fit a narrow sleeve panel or a broad rectangular space on a bag.
Measure the clear attachment area, excluding seams and curved transitions. Then cut a paper version of the proposed patch and place it on the actual garment. That simple check catches oversized lettering panels and corner overhang before a digital drawing makes everything look deceptively tidy.
Finished size and panel clearance
A 3-inch-wide by 2-inch-high rectangle is a useful starting example, not a universal tactical size. If the usable panel is exactly those dimensions, verify how the patch edge and backing will sit rather than assuming a perfect fit. Leave enough clearance that normal garment movement does not push a corner beyond the receiving panel.
For a round emblem, check the diameter against both panel dimensions. For a shield, check the widest shoulders and the lowest point; the apparent size of the central symbol is not the finished footprint. The custom patch size guide is a useful companion when one logo needs separate sleeve, cap, and bag versions.
Flat levels, sculpted relief, and edge shape
A 2D PVC design commonly uses distinct raised and recessed levels, while a 3D design can use more sculpted contours. More relief is not automatically better. Broad stepped lettering often reads more clearly than a rounded letter face, and deeper recessed areas can take more effort to clean.
Ask for the proposed thickness and relief arrangement in the specification because these are design-dependent. A molded PVC edge is not a merrowed thread border. Rounded corners usually make handling easier, while long points and narrow projecting details deserve a closer fit and snag check.
Color and readability
Start with the contrast needed for the actual use. Black lettering on a dark gray field may suit a subdued emblem but will not read like white lettering on black. A bright screen preview can hide that difference, so review the design at its intended physical size rather than zoomed across a monitor.
Provide color references when matching existing uniforms or branding. A digital mockup shows the layout and intended colors, but it is not a physical color standard. If an exact match is critical, ask what physical sample or color verification options are available and how they affect the quote and schedule.
| Specification | Practical starting point | What to verify before approval |
|---|---|---|
| Sleeve identifier | Measure the actual loop panel; a 3 by 2-inch rectangle is only an example. | No corner overhang, readable team name, and compatibility with issued garments. |
| Bag emblem | Use a simple outline and broad artwork that tolerates handling. | Clearance from zippers, straps, handles, and surfaces that rub. |
| Cap patch | Keep the footprint proportional to the front panel and crown curve. | Patch flexibility, attachment method, and how the edges sit on the cap. |
| 2D molded face | Use raised lettering with a recessed field for a clear hierarchy. | Minimum detail feasibility and the proposed height difference between elements. |
| 3D molded face | Reserve sculpted contours for artwork that benefits from rounded relief. | Added bulk, cleaning access, and whether the shape still reads at finished size. |
| Hook backing | Use with an existing compatible loop panel. | Whether the quote includes hook only or also includes a loose mating loop piece. |
| Sew-on construction | Request a stitch channel or other appropriate sewing provision. | Garment suitability, stitch placement, and access behind the attachment area. |
The best specification is one another person can read without guessing what you meant. Include a ruler photo of the panel and name the uniform or bag model if you have it. A complete reference is more useful than asking for a patch that looks about the same size as a photo online.
Simplify tactical artwork without losing the team's identity
The most common artwork problem is trying to fit the entire organization into one small patch. A unit name, founding date, motto, city skyline, flag, shield, and secondary badge can look fine on a presentation slide. At 3 inches wide, the smallest features may disappear or compete with the name people actually need to read.
Set an order of importance before adjusting the drawing. Usually the main identifier comes first, the symbol comes second, and the supporting wording comes third. If the motto is meaningful but not readable, move it to a larger companion patch or remove it from the duty-sized version.
- Open up tight spaces inside letters such as A, B, and R so they do not become solid-looking shapes.
- Replace hairline outlines with simpler separations that can be reviewed for molding feasibility.
- Keep small words away from a thick perimeter border, where they can look squeezed.
- Use an intentional solid-color version of shaded artwork instead of asking production to guess which shadows matter.
- Check directional artwork and flag orientation for each intended placement before approving a left- or right-side version.
There is no honest universal minimum letter size that applies to every PVC design. Typeface, stroke width, color separation, relief, and the surrounding shapes all affect the result. Ask for an artwork review rather than treating one online dimension as a promise.
Original vector artwork is helpful, but send the best file you actually have. A screenshot can communicate the idea without necessarily being production-ready artwork. The artwork file guide explains the difference, and the patch design guide helps identify details worth simplifying before the first proof.
Match the backing to the uniform, not to a habit
Hook-and-loop is the practical starting point for removable patches on compatible tactical panels. The hook side is the rough, gripping surface; the loop side is the softer receiving surface. Velcro® is a brand name, so specify the functional requirement and say if a particular branded system is required.
Do not assume a backing description includes both halves. A team whose uniforms already have loop panels may need hook-backed patches only. A team adding identifiers to plain bags may need separate loop pieces installed first, and those pieces do not attach themselves to fabric.
Sew-on construction and coated outerwear
Sew-on PVC can be appropriate for permanent placement if the patch is made with a suitable sewing provision. Request that feature rather than planning to force a needle through an arbitrary part of the molded face. The sew-on patch guide covers positioning and garment access, but the actual needle and stitching setup must suit both the garment and the patch.
Nylon shells, coated rainwear, and technical jackets need more caution. Needle holes can affect the garment's weather barrier, while uncontrolled heat can damage fabric or coatings. For issued equipment or protective garments, follow the garment manufacturer's and organization's attachment instructions instead of improvising.
Why iron-on should not be the default PVC request
An iron-on that peels after a dryer cycle is often an attachment-system problem rather than a logo problem. PVC, the adhesive, the receiving fabric, and the application temperature all have to work together. Do not assume that a household iron or a heat setting used for an embroidered crest is suitable for a molded patch.
Confirm whether a suitable heat-applied construction is available for the intended material before putting it on the order. For removable equipment identifiers, hook backing usually avoids that heat question altogether. Compare the backing options and hook-and-loop attachment guide before finalizing a mixed-garment program.
Compare materials and costs on the same specification
PVC is not automatically the lowest-cost answer, especially for a small run that needs new mold work. Quantity, dimensions, artwork complexity, relief, backing, and any required tooling all affect the quote. Shipping and sample requirements can change the delivered total even when the patch price looks similar.
Ask for pricing in USD and compare the same finished size and backing across quotes. A hook-backed piece and a sew-on piece are not equivalent offers. Neither are a complete hook-and-loop set and a patch supplied with hook only.
| Material | Good fit | Main trade-off | Quote detail to compare |
|---|---|---|---|
| PVC | Bold tactical identifiers, molded emblems, and gear patches. | Dimensional face can add bulk; tiny art may need simplification. | Tooling, relief, finished thickness, and backing. |
| Embroidered | Uniform crests, work jackets, and traditional club styling. | Thread texture can limit very small lettering. | Stitch coverage, border construction, and backing. |
| Woven | Fine linework and text-heavy designs with a fabric appearance. | Less raised texture than embroidery or molded PVC. | Text readability, edge finish, and attachment. |
| Printed | Gradients, photographic artwork, and complex color transitions. | Flatter surface rather than a sculpted face. | Print construction, color expectations, and care requirements. |
For the budget, divide the complete quoted total by the quantity supplied. As an arithmetic example only, a hypothetical $240 total for 40 patches equals $6 per delivered patch; that is not a GetUSAPatches price or estimate. Use this method to catch quotes that move costs into setup, backing, or freight.
The 10-piece minimum makes a small team order possible, but ask how different designs, dimensions, colors, or backing combinations affect minimums and setup. Ten identical patches are not necessarily the same production job as ten individual names. The patch pricing guide and material comparison guide explain the decisions behind those differences.
Order, approve, and plan delivery to New York
A clean order starts with one written specification and one current artwork version. Email chains containing three sizes, two renamed logos, and an old screenshot are where preventable mistakes begin. Put the agreed dimensions, quantity, backing, and required delivery date together before requesting the final quote.
GetUSAPatches provides a free digital mockup before production, and we produce only after approval. Review that proof as a manufacturing instruction, not just a picture of the logo. The person approving it should be able to confirm spelling, placement, and the actual uniform requirements.
- Send the artwork and garment reference. Include a photo of the receiving panel with a ruler, plus the finished dimensions in inches.
- Specify quantity and variants. Separate different sizes, role labels, names, colorways, and backing combinations so they can be quoted correctly.
- Provide the New York delivery ZIP code and required in-hand date. State whether the shipment goes to a staffed office, business receiving desk, or another approved address.
- Review the quote and digital mockup together. Confirm what is included, what remains optional, and whether a physical sample is needed.
- Approve the final specification explicitly. Changes after approval may affect tooling, price, and the production schedule.
- Confirm dispatch and transit expectations. Allow receiving time before uniforms are issued or merchandise is distributed.
Production time and shipping time are different
Do not treat the day you submit an inquiry as the start of manufacturing. Artwork revisions, approval, any sample review, and order requirements come first. Confirm the production start conditions in the quote, then add the shipping estimate for the selected service.
There is no single delivery promise that fits every design and destination. A new sculpted design with a physical sample review has a different schedule from an unchanged repeat order. The production timeline guide explains those stages so a team can plan backward from its issue date.
Orders ship nationwide from Corona, CA, including to all 50 states. For New York City deliveries, include the company or unit name, floor or suite, and any receiving details requested by the carrier. A patch order arriving at the building is not the same as that order being checked and ready for a Saturday training event.
If timing is tight, ask which choices affect the schedule before approving the design. A simpler specification may be worth discussing, but do not assume it creates an automatic rush option. Confirm the available production and shipping arrangements in writing rather than building a uniform issue around an unconfirmed date.
Inspect the first shipment and keep the patches serviceable
Open the shipment before distribution day. Check quantities, spelling, dimensions, orientation, and backing against the approved specification, then test representative pieces on the actual garments. Lay a ruler across the finished patch rather than comparing it only to a screen image.
For hook-backed patches, look for full engagement with the loop panel and corners that sit properly. Try ordinary movement, putting on an outer layer, and shouldering the bag the patch will ride on. This is a practical fit check, not a substitute for any required equipment testing.
- Wipe the PVC face with a soft cloth and mild cleaning solution compatible with the supplied product; follow the specific care instructions.
- Clear lint from hook backing gently so the hooks can engage the receiving panel.
- Remove detachable patches before laundering when the garment and patch care instructions call for it.
- Avoid assuming that dryer heat, solvents, disinfectants, or prolonged hot storage are safe for the patch and its backing.
- Keep a few approved reference pieces and the final artwork record for later comparison and reordering.
The face may tolerate routine wet handling, but that does not make the complete assembly waterproof or chemical-resistant. Sewing, adhesives, backing, and the garment all have their own limits. The patch care guide is a useful general reference; product-specific instructions take priority.
Plan one patch program across different garments
A consistent team identity does not require identical construction everywhere. Keep the same primary symbol and color references, then adapt size and material to the surface. That is usually more convincing than putting one thick patch on every item from a lightweight polo to a winter jacket.
A training team with uniforms, caps, and bags
For an illustrative 18-person team, one sleeve patch and one bag patch per person means 36 pieces before spares. If the bag panel is larger, quote the bag version separately rather than stretching the sleeve design without checking proportions. A cap version may need a smaller footprint and a different layout; the hat patch guide explains why crown shape matters.
Use the same emblem, but let each version do its job. The sleeve version can prioritize the team name, the bag version can carry a fuller badge, and the cap version can use the central symbol alone. Confirm minimums and any separate setup for each version before choosing the final mix.
A public-facing uniform and an off-duty club jacket
A hospitality polo or public-facing work shirt may call for a lighter stitched or woven mark, even if the team's equipment bags use PVC. A biker vest or wool jacket may suit a traditional embroidered crest with a thread border. The difference is not a compromise in branding; it is a better match between the patch and the garment.
For local purchasing comparisons, the New York embroidered patch buyer's guide helps separate material and attachment questions from delivery logistics. Keep the final artwork, size, backing, and quote notes together for every approved version. That record makes the next order easier to check and reduces the chance that a reorder quietly changes the fit.


