
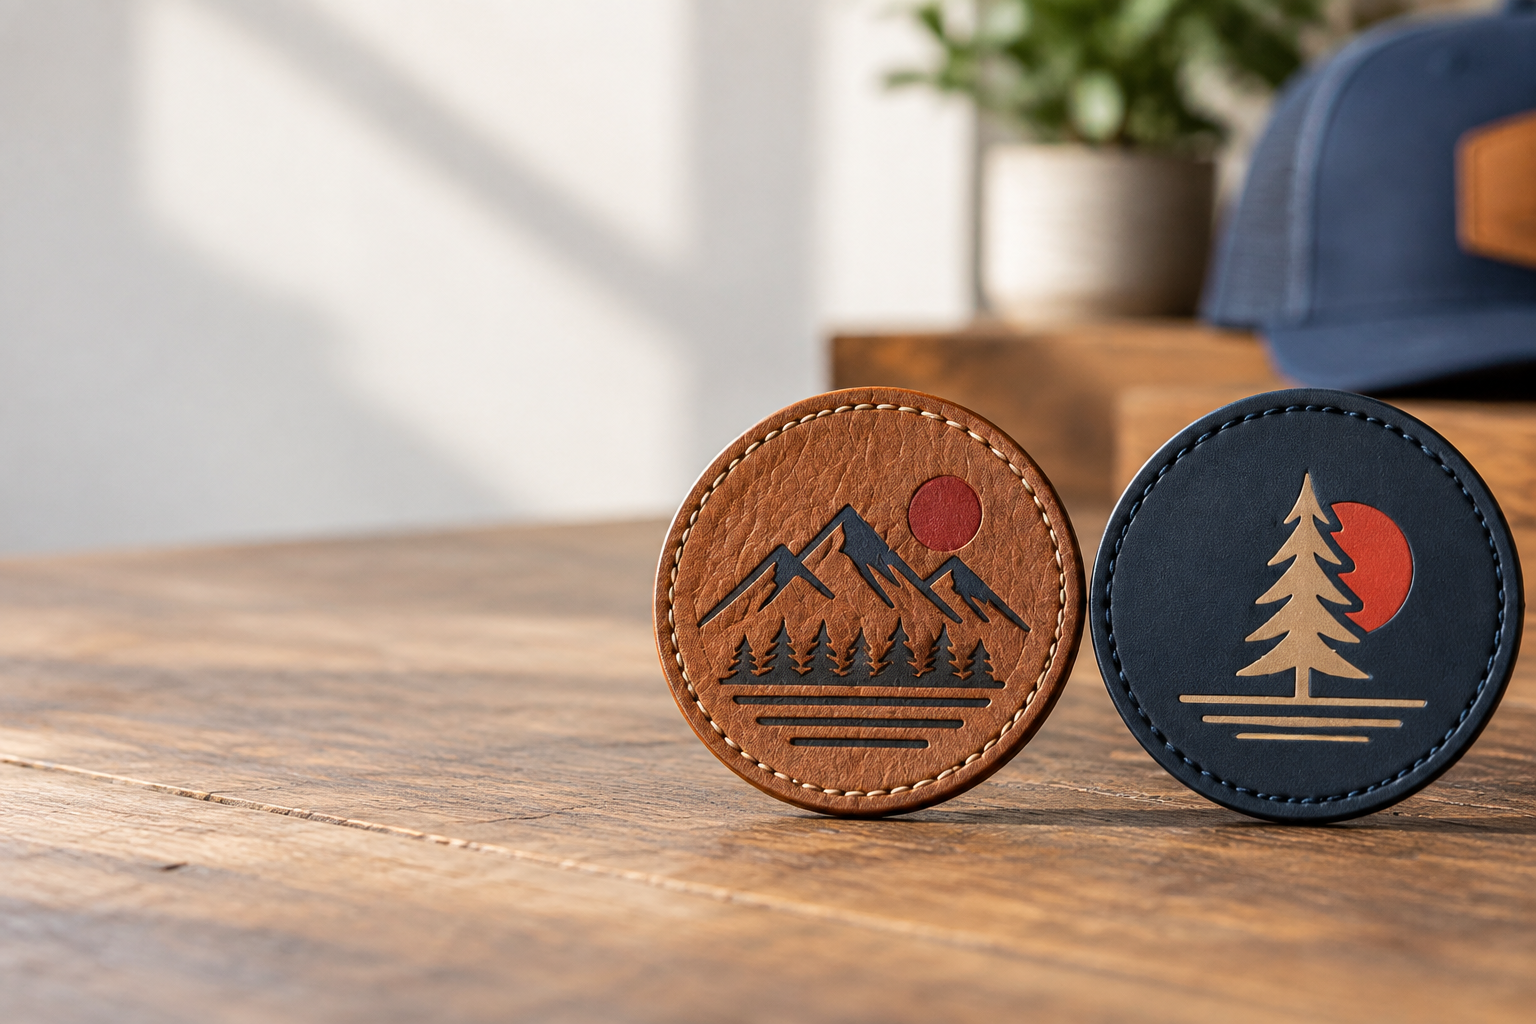
GetUSAPatches supplies custom leather patches Los Angeles hat brands can order with a 10-piece minimum. Start with the cap model, patch dimensions, genuine or faux leather preference, and attachment method so the quote reflects the product you actually need. We provide a free digital mockup before production, produce only after approval, and ship from Corona, CA, to all 50 states.
A leather patch can look right on a screen and still sit badly on a hat. A stiff badge may bridge a center seam, a wide rectangle can crowd a low crown, and an adhesive that works on one fabric may lift on another. The useful decisions happen before the quantity discount: match the patch to the hat, simplify the artwork where needed, and decide who will attach it.
What to specify for custom leather patches in Los Angeles
The first question at the production desk is not just how many. It is what the order includes: loose patches, patches prepared for an outside decorator, or a requested patch-and-hat attachment service that needs its own confirmation. Those are different scopes, and two quotes can look far apart simply because one includes labor that the other leaves out.
For a Los Angeles streetwear drop, we need the actual cap style, not just a description such as black snapback. A structured six-panel cap, a foam-front trucker, and an unstructured cotton dad hat each put different demands on the patch. Include the blank manufacturer's model number if you have it, plus a front and side photo.
- Quantity: list the total and the breakdown by artwork, material color, size, and backing.
- Dimensions: give finished width and height in inches, including the outer border.
- Material: identify genuine leather or faux leather and the preferred shade or finish.
- Decoration: state the engraved, debossed, embossed, or printed appearance you want, subject to material compatibility.
- Attachment: name sew-on, an approved adhesive system, or hook-and-loop rather than writing standard backing.
- Delivery: provide the destination ZIP code, required in-hand date, and whether another decorator needs the patches first.
Our leather patches hub is the material starting point, while hat patches covers the broader cap application. Keep one written specification with the order. It is much easier to correct a missing backing line before approval than to sort out several hundred patches after they arrive.
Genuine leather, faux leather, or another patch material?
Genuine leather gives you natural grain and a surface that may change with handling and wear. That variation can suit a workwear label or a small-batch outdoor collection, but it can frustrate a brand expecting every tan badge to match a single flat color swatch. Approve the material description and expected variation, not just a brown rectangle on a digital proof.
Faux leather can provide a more uniform starting appearance, although its construction varies by supplier and product. Do not treat all synthetic sheets as interchangeable or assume they are automatically suitable for heat application. Ask about the specific material, available decoration methods, thickness, and care limitations.
| Patch choice | Useful for | Main trade-off | What to confirm |
|---|---|---|---|
| Genuine leather | Heritage caps, workwear-inspired collections, and simple logos with room around the lettering | Natural grain and shade variation; moisture and cleaning can affect appearance | Leather type, thickness, finish, expected variation, decoration method, and care |
| Faux leather | Collections seeking a controlled starting appearance and a non-animal material option | Wear, heat tolerance, and coating durability depend on the exact construction | Material composition, color availability, application limits, and any non-animal claim |
| Embroidered patch | Team caps, recognizable crests, bold lettering, and thread-based brand colors | Thread texture can reduce clarity in very small lettering and fine details | Thread colors, stitch coverage, border style, and minimum readable lettering |
| Woven patch | Small text and detailed flat logos on lightweight caps | Less raised texture than embroidery or a thick leather badge | Actual-size readability, edge finish, backing, and color count |
| Printed patch | Gradients, illustrations, and artwork that depends on full-color detail | Printed is flatter; that is the point, but it will not imitate leather grain | Print substrate, color expectations, surface finish, and attachment |
| PVC patch | Bold dimensional graphics and caps that need a different material response to wet conditions | Can feel heavier or more rubber-like than the brand wants | Thickness, relief, fine-detail limits, weight, and attachment compatibility |
Sometimes the right leather quote ends with choosing something else. A hospitality logo with three tiny lines may read better as woven patches, while a high-school team crest may need the familiar texture of embroidered patches. Start with the result, not the material name.
For a closer material comparison, use Leather vs. Faux Leather Patches: Differences, Pros and Cons. If your collection is aimed at outdoor use, Are Custom PVC Patches Worth It for Hat Brands in Los Angeles? is another useful check before committing to leather.
Size the patch against the crown, not the product photo
A rectangle around 2.25 inches wide by 1.25 inches high can be a reasonable paper-template starting point for some adult caps. It is not a universal recommendation. A 2.5-inch circle occupies much more vertical space, and a low-profile crown may make that same circle look crowded or push it too close to the bill.
Cut the proposed shape from paper and hold it on the actual blank. Check the front view and the side view, because a patch that looks centered straight on may bridge away from the crown at its corners. Leave working clearance for the attachment equipment; the decorator needs more than a nice-looking placement mark.
Structured caps and center seams
A structured front supports a patch better than a soft, collapsing crown, but a raised center seam still creates an uneven base. Patch flexibility, placement, and attachment pressure all matter. Ask the decorator to check the cap and patch together instead of assuming a flat heat press setup will produce even contact.
Unstructured hats, foam fronts, and beanies
A thick badge can pull an unstructured cotton crown forward or make a foam-front trucker look pinched. On a rib-knit beanie, a large nonstretch patch changes how the cuff stretches and sits against the head. A smaller, lighter specification may be the better product even if a larger patch shows more artwork.
Use Custom Patch Size Guide: How Big Should Your Patch Be? to build the initial dimensions, then test them on the blank. For a range that includes youth hats and adult caps, do not assume one size fits both. A second patch size can add ordering complexity, but it may prevent a visibly oversized youth product.
Build artwork that survives the move from screen to leather
A phone screen hides scale problems because you can zoom in until a tiny tagline looks comfortable. Print the artwork at finished size and view it without magnification. If the lower line needs a closer look on white paper, it may struggle even more when the design depends on contrast between a leather surface and an engraved or pressed mark.
Engraving removes or changes the surface, while debossing presses a design below it; embossing creates a raised effect where the material and process allow. These are not interchangeable instructions. Send a reference for the visual effect, then ask which method suits the chosen stock rather than requesting every effect on the same badge.
- Use solid shapes and clear negative space around lettering. Avoid crowded lines that may visually merge.
- Identify the must-keep elements, such as the brand name, registered artwork, or a club emblem that cannot be redrawn freely.
- Allow room between the logo and any attachment stitch line. A border is part of the usable-space calculation.
- Ask for the production team's minimum line and gap guidance for the selected material and method; there is no single safe number for every leather.
- Provide vector artwork when available. A clear PNG or JPG can help with quoting, but cleanup requirements should be confirmed.
The Artwork File Guide for Custom Patches: Vector, PNG, JPG and More explains the useful file types. A digital mockup can show spelling, placement, shape, and dimensions, but it cannot prove leather softness, exact grain, or how the attachment behaves on your cap. Where those details decide the order, ask about a physical sample and its cost and schedule.
Choose backing and attachment as part of the specification
Sew-on is often a practical starting point for leather hat patches because it does not rely only on an adhesive bond. It still needs a suitable machine, accessible placement, and a stitch pattern that works with the material. Stitching too close to an edge or crowding needle holes can weaken a patch rather than secure it.
Heat-applied backing needs a complete compatibility check: patch material, adhesive, hat fabric, crown construction, equipment, and the specified application settings. Do not borrow temperature and dwell time from a different product. An iron-on that peels after a dryer cycle is not fixed by calling the backing permanent; it needs the correct material, application, and care plan.
Velcro panels are a separate setup. A removable patch needs the correct hook or loop component to match the receiving panel, and a hat without that panel may need additional work. Confirm which side is included and check the patch dimensions against the actual panel, especially on public-safety or tactical-style caps.
- For a permanent retail cap, compare sew-on attachment with a specifically approved adhesive system and test the exact combination.
- For removable branding, identify the receiving panel and the required hook-and-loop component before pricing.
- For nylon shells or water-repellent fabrics, do not assume heat or stitching is harmless; coatings, heat sensitivity, and needle holes matter.
- For outside decoration, send the patch specification to the decorator before placing the bulk order and confirm who is responsible for application testing.
See Patch Backing Options Explained: Sew-On, Iron-On, Velcro® & More for the larger comparison. Merrowed crests and cut leather badges also have different edge construction, so do not carry a border specification over unchanged from an embroidered order. The quote should describe the edge and attachment separately.
Read bulk pricing as a finished-product cost
The lowest patch unit price does not necessarily produce the lowest finished-hat cost. A badge that takes longer to align, requires a second attachment operation, or creates rejects can erase a small saving. Compare quotes using the same size, material, decoration, backing, quantity, and service scope.
For planning, use this calculation: landed patch cost per usable hat equals patch charges, applicable setup or sample charges, attachment labor, freight, and expected waste, divided by usable finished hats. Keep blank cap cost and retail packaging visible too. Shipping to an outside decorator and shipping finished hats to your warehouse are separate movements.
A budget example, not a GetUSAPatches price quote
Suppose a hypothetical 200-hat project has $400 in patch charges, $240 in attachment labor, and $40 in patch freight. That is $680, or $3.40 per hat before blanks, taxes, packaging, and any losses. If only 190 hats become usable stock, the same $680 represents about $3.58 per usable hat.
That example explains the math, not current pricing. Actual quotes depend on the specification and requested services. Ask for a written breakdown in USD so a material upgrade, extra colorway, or change of backing has a visible effect instead of disappearing into one unexplained total.
- Request quantity options that match realistic demand, such as 50, 100, and 250 pieces, rather than buying a large run only for a lower unit figure.
- Ask whether different artwork, sizes, or material colors are priced as separate runs; do not assume every version shares one quantity tier.
- Identify any setup, artwork preparation, physical sampling, special packing, tax, or shipping charges that apply.
- Confirm whether the stated quantity is loose patches or finished decorated caps, and whether customer-supplied blanks are accepted for any requested attachment service.
The 10-piece minimum makes a small order possible, but minimum quantity is not the same thing as the best unit price. For cost drivers beyond leather, use How Much Do Custom Patches Cost? What Drives the Price. Buy enough to support the launch without turning an untested colorway into a storage problem.
Plan colorways, inventory, and repeat orders before buying bulk
A 300-piece purchase can be one straightforward design or a complicated collection of small runs. Three patch colors, two shapes, and two sizes create 12 combinations before you add different backs. Each combination needs a quantity, an approved specification, and a way to identify it during packing and attachment.
For an early hat collection, one strong badge across several cap colors is often easier to manage than a different badge for every blank. Check contrast on each cap, though. Dark brown leather on a black crown may look restrained in person and nearly disappear in a small online product image.
Keep a retained sample and a reorder record
Save an approved physical example when available and keep the final artwork, dimensions, material description, decoration method, backing, and proof reference together. A reorder note that says same tan as last spring leaves too much open. Genuine leather can vary, and a material source or available color may change between runs.
Set aside the quantity your decorator recommends for application setup and possible spoilage; there is no universal spare percentage for every process. If you expect to sell replacement patches separately, track that inventory apart from the units reserved for hats. Otherwise a small accessory sale can leave the next cap batch short.
For broader run planning, Ordering Custom Patches in Bulk: Minimums, Pricing and Planning is a useful companion. The best bulk order is not the biggest number on the quote. It is a run your team can approve, attach, store, and sell without guessing which version goes where.
Change the recommendation when the garment or wearer changes
The same logo does not need the same patch on every garment. A high-school booster cap may suit leather, while its matching letterman jackets need chenille patches for a large varsity letter and embroidery for a detailed mascot. Trying to force one material across the whole program usually creates a compromise somewhere.
Fire and public-safety units often need clear identification, consistent placement, and an approved uniform specification. A casual station fundraiser cap is a different brief from an operational garment. Do not substitute a decorative leather badge for a required identifier or assume a patch adds protective performance.
Hospitality polos tend to be light, flexible, and washed frequently, so a thick leather badge may be a poor chest application even if it looks good on the staff cap. Nylon shells raise heat and coating questions; wool coaches jackets require attention to pressing and fabric care. Those are garment issues, not artwork problems.
Biker vests bring another set of placement and attachment decisions, especially around linings, pockets, and large club sets. Keep the layout requirements distinct from a small hat badge, and review biker and motorcycle club patches for that use. A familiar club mark can stay consistent without forcing the cap patch to copy the construction of a full back piece.
If a logo relies on fine illustration or gradients, printed patches may preserve it better than a tonal leather mark. If raised lettering is the defining feature, consider 3D embroidered patches rather than asking leather to imitate puff embroidery. The honest recommendation sometimes changes the material.
Order in stages and build the schedule from the in-hand date
Start with the date the patches must be usable, not just the launch date. If another shop is attaching them, that shop needs time for receiving, a setup test, production, inspection, and forwarding. A box delivered the morning of a photo shoot is not an on-time result if the hats are still undecorated.
GetUSAPatches provides a free digital mockup before production, and we produce only after approval. Proof review, requested revisions, physical sampling if arranged, manufacturing, and transit are separate stages. Ask for the current schedule for your exact order; a nearby California destination does not shorten every part of that sequence.
- Send the brief: include artwork, cap model, dimensions, material preference, attachment, quantities, ZIP code, and the required in-hand date.
- Review the quote: confirm what is included, what remains the decorator's responsibility, applicable charges, and any material or process limitations.
- Check the mockup: verify spelling, orientation, finished size, border clearance, material description, decoration, and backing.
- Resolve physical questions: if softness, shade, crown fit, or application performance is critical, ask about a physical sample or test before bulk approval.
- Approve a final specification: designate one approver and keep the approved proof with the purchase record. Production starts only after approval.
- Confirm shipping and receiving: identify the correct destination, receiving contact, decorator handoff, and any needed distribution steps.
Shipping from Corona, CA, is not the entire lead time
We ship from Corona, CA, to all 50 states across the United States. For a Los Angeles brand, proximity is useful for planning the destination, but do not assume same-day service, pickup availability, or a guaranteed arrival without confirmation. Carrier service, dispatch timing, and the actual shipping address still matter.
Tell us if the shipment is going to a decorator rather than your office. Put the brand name and order reference in the receiving instructions so an unfamiliar box does not sit while someone searches for its owner. For a detailed breakdown of the stages, see Custom Patch Production Timeline: From Artwork to Delivery.
A digital approval is a production checkpoint, not a substitute for reading the specification. If the cap model, size, backing, or quantity changes afterward, request a revised confirmation and schedule. A short pause before production is better than a fast run built to yesterday's instructions.
Inspect the delivery and write care instructions for the whole hat
Open the shipment before the attachment appointment, not at the machine. Check counts by version, dimensions, spelling, decoration position, edge condition, and backing against the approved record. Inspect a useful spread across the shipment and compare any physical sample within the material variation that was agreed.
If something looks wrong, photograph it with the order reference and a ruler where dimensions are involved. Keep the affected pieces separate and contact the supplier before decorating the full run. Once a patch is attached to a retail blank, sorting out a specification issue becomes more complicated.
- Confirm the patch sits as intended on a first decorated hat before releasing the entire batch.
- Check for lifted corners, puckered fabric, crooked placement, uneven stitch spacing, and pressure marks around the attachment area.
- Verify that any removable patch engages the intended receiving panel without excess overhang.
- Label finished inventory by cap color and patch version so packing does not mix similar-looking combinations.
Care instructions should follow the least tolerant part of the finished product: the cap, leather or faux leather, decoration, backing, or attachment. Do not call the whole hat machine washable just because the blank's original label allows it. Test the actual decorated product before making a care promise to customers.
For many leather-trimmed caps, cautious spot cleaning and air drying may be the appropriate direction, subject to the material and hat supplier's guidance. Avoid inventing a conditioner routine or recommending direct heat without checking compatibility. How to Wash and Care for Patches (Embroidered, PVC, Leather & More) explains why care changes with the patch type.
A repeatable leather hat program comes from a repeatable specification. Keep the cap model, artwork, material, size, attachment method, approval, and care notes together. That record makes the next quote more useful than a message that simply asks for another box of the same patches.


