
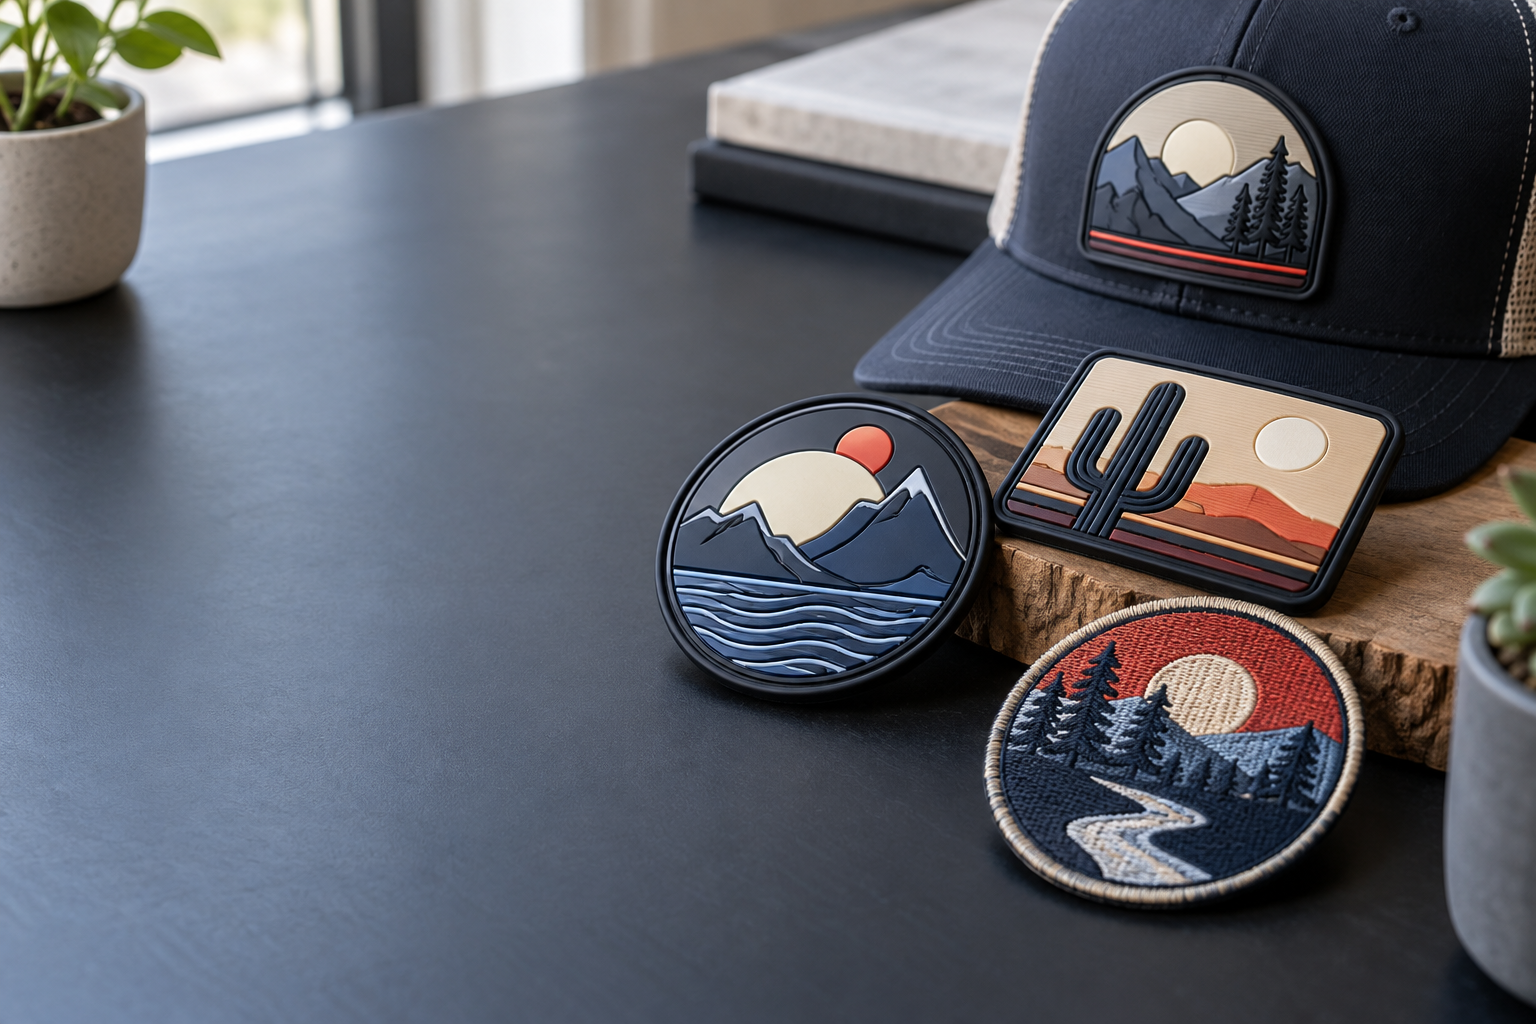
Yes—custom PVC patches for Los Angeles hat brands can be worth it when the logo is bold, the cap has enough structure, and a molded finish fits the line. They are less convincing on a soft crown with tiny lettering or on a budget that leaves no room for proper attachment. Choose PVC for what it does, not simply because it looks different from thread.
At the production desk, the useful starting point is the actual blank: a structured cotton-twill snapback, a foam-front trucker, or a lightweight nylon five-panel. GetUSAPatches works from Corona, CA, serving brands across the United States with a 10-piece minimum and a free digital mockup before production. We produce only after approval and ship to all 50 states.
When Custom PVC Patches for Los Angeles Hat Brands Are Worth It
PVC earns its place when the patch is part of the product identity. Think of a two-color skate-shop mark on a structured snapback, a simple outdoor-club badge on a trucker, or a removable staff identifier on a cap with a loop panel. The molded surface gives those designs a different feel from a stitched crest, and broad raised elements are easy to recognize.
The material also makes sense when customers want a surface they can wipe clean after ordinary dust and splashes. That does not make the finished hat waterproof, washable by any method, or suitable for unlimited sun exposure. The blank, attachment, color formulation, and care routine still determine how the complete product holds up.
The three questions that decide the quote
- Does the logo benefit from molded height and solid color areas, or does it depend on small type, gradients, and thin lines?
- Can the actual crown support the patch without flattening, puckering, or making the edges stand away from the fabric?
- Will the finished hat sell or serve its purpose at the total installed cost, rather than just the quoted patch price?
If the answers favor bold artwork, a supported crown, and a workable margin, PVC patches belong on the shortlist. If two answers are uncertain, compare another material before spending time on a detailed mold layout. A patch that suits the garment is a better purchase than an impressive patch attached to the wrong hat.
Start With the Crown, Not the Logo File
A six-panel cap puts a seam directly behind many front-center designs. That seam can create a ridge under the patch, particularly if the badge is wide or the crown curves sharply. A five-panel front offers a different working area, but the absence of a center seam does not automatically make a thin, unstructured fabric suitable for a thick patch.
Structured cotton twill often gives a molded badge useful support. Foam-front truckers require a closer look because attachment pressure and sewing can compress the foam, while a soft washed-cotton dad hat can pull inward around a stiff badge. Nylon running caps need particular care: their light weight is part of the product, and a heavy front patch can work against that.
A reasonable first paper test might be 2.25 inches wide by 1.25 inches tall for a compact horizontal mark. A taller crown may accept a larger footprint, but there is no universal hat-patch size. Measure the usable area above the brim and below the crown break, then check the shape with the hat being worn.
A flat photograph can hide a poor fit. Cut the proposed outline from paper, hold it on the cap, and look from the side as well as straight ahead. Our custom hat patch guide and patch size guide help frame the decision, but the actual blank remains the final reference.
PVC vs. Embroidered, Woven, Printed, and Leather Hat Patches
There is no single best material for every Los Angeles hat line. A surf-shop cap, a high-school booster hat, and a hospitality staff cap may carry similar-sized logos while needing completely different finishes. Compare the look, detail, stiffness, and attachment burden together.
| Patch type | Best artwork fit | Feel on a cap | Main trade-off | Useful hat application |
|---|---|---|---|---|
| PVC | Bold lettering, solid color areas, molded outlines, and selected raised elements | Rubberlike surface; flexibility depends on formulation, thickness, and shape | Tiny lettering and soft crowns may require compromises; tooling can affect small-run economics | Structured streetwear caps, outdoor branding, and removable team identifiers |
| Embroidered | Simple logos, readable text, traditional crests, and visible thread texture | Textile face with stitched depth; density and backing affect stiffness | Small text can fill in, and dense stitching can make a compact patch firm | School hats, uniform caps, club merchandise, and classic sporting designs |
| Woven | Small lettering and finer linework suited to textile construction | Usually flatter and thinner than a heavily embroidered equivalent | Less raised texture; artwork still needs a practical minimum detail size | Low-profile caps, compact badges, and wordmark-heavy branding |
| Printed | Gradients, illustrations, multicolor artwork, and photographic effects | Flat visual surface; the base and backing determine body | No molded relief or stitched depth; print method affects wear and appearance | Graphic merchandise, event hats, and detailed artist collaborations |
| Leather or faux leather | Restrained marks, broad lettering, and designs intended for engraving or debossing | Distinct grain or surface character; stiffness varies by material | Fine detail, moisture tolerance, and care depend on the selected material | Workwear-inspired caps, craft-brand hats, and understated retail lines |
Embroidered patches make sense when buyers expect the texture of a traditional badge. Woven patches are worth checking when the logo contains a smaller secondary line that embroidery or molded PVC would force you to enlarge. Neither choice is a downgrade; each solves a different production problem.
Printed patches are flatter; that is the point. They preserve visual effects that should not be forced into raised solid-color shapes, while leather patches suit a different retail story entirely. The broader embroidered, woven, and PVC comparison is useful when the same identity also needs jacket or bag patches.
Design the PVC Badge at Its Actual Finished Size
A logo that looks clean at 12 inches on a monitor may become a crowded badge at 2.5 inches. Start by separating the recognizable mark from supporting details: founding year, neighborhood name, social handle, and a long tagline. Often the strongest hat version keeps the mark and one short line, while the other information moves to a hangtag.
Solid color regions are a natural fit for molded PVC. Smooth gradients and photographic shading are not, so a designer may need to simplify them into distinct shapes or recommend printing instead. Do not assume the fine keyline around every letter can remain intact after the artwork is reduced.
Use height deliberately
Raised lettering over a recessed field can create a clear reading order without making every detail tall. Too many levels can complicate the artwork and change the feel against a curved crown. Ask the quote to describe the intended relief rather than relying on a dimensional-looking illustration alone.
Give color references in writing and identify which colors matter most. A screen preview is not a physical color standard, and the same nominal color can look different in thread, molded PVC, and printed ink. If a launch depends on close matching across several materials, discuss physical sampling, any added cost, and the effect on the schedule.
- Supply vector artwork when available, but do not delay an initial review just because you only have a clear PNG or JPG.
- State finished width and height in inches, along with the exact wording that must remain.
- Flag thin outlines, small counters inside letters, and narrow gaps for production review.
- Keep the stitch area clear of critical artwork if the patch will be sewn on.
- Review the design at actual size, not only enlarged on a phone screen.
The artwork file guide explains what to send and why file quality matters. A better file helps, but it cannot make an overcrowded design readable at an unsuitable size. Sometimes removing five words does more than rebuilding the entire logo.
Lock the Specification Before Comparing Prices
Two PVC patch quotes can look far apart because they describe different products. One may include a plain back and a simple molded face; another may include hook backing, a mating loop piece, more relief, and a different thickness. Without those details, the lower number tells you very little.
- Cap: brand, style number, material, crown structure, and placement photograph.
- Patch: width, height, outline, color count, and intended raised or recessed areas.
- Thickness: proposed overall thickness and any change caused by raised features, confirmed in the quote.
- Attachment: sew-on, hook-and-loop, or another specifically confirmed system.
- Edge: stitch channel or sewing margin where needed, with critical artwork kept inside it.
- Scope: loose patches only or attachment included, plus packaging and destination.
- Approval: digital proof requirements and any separately requested physical sample.
For an illustrative specification, start with a 2.5-by-1.5-inch rounded rectangle, a two-color logo, a recessed background, and a sewing channel. That is a discussion starting point, not a promise that every cap will accept it. Confirm thickness and flexibility against the blank instead of treating a stock measurement as a universal rule.
A molded PVC edge is also not the same construction as the merrowed crests used on many school or uniform patches. The border vocabulary matters because it changes both appearance and attachment. If you are moving an existing thread design into PVC, review the outline rather than requesting an exact material swap.
Sew-On, Hook-and-Loop, and Heat Application Are Different Jobs
For a permanently branded retail cap, sewing is often the first attachment method to evaluate. A planned stitch channel helps keep the seam tidy and away from the main design, but it does not eliminate the need for suitable equipment. Curved crowns, center seams, and sweatbands can make installation slower than sewing a patch onto a flat fabric panel.
Hook-and-loop makes sense when a wearer needs to change or remove the badge. Specify whether the cap already has a loop panel, whether you need hook backing only, and whether a separate mating loop piece is included. Stacking the patch, hook, and loop adds thickness, so check the profile from the side.
Do not assume a PVC patch can be ironed on with a household iron. Heat compatibility depends on the complete patch, adhesive system, blank, and application equipment; nylon shells and lightweight cap fabrics can be especially unforgiving. An iron-on that peels after a dryer cycle is often an attachment or care mismatch, not proof that every adhesive-backed patch is poor.
Use the backing options guide to name the requested construction correctly. The sew-on guide covers basic attachment principles, while the hook-and-loop guide helps distinguish the patch back from the receiving panel. A cap still deserves its own installation test.
Calculate Cost Per Finished Hat, Not Cost Per Patch
The useful number is the landed, attached cost of each sellable hat. Include the blank, patch, any separately quoted tooling or setup, attachment labor, packaging, freight, and an allowance for test pieces or rejects. A low patch quote does not rescue a run if installation damages expensive blanks.
Here is a hypothetical USD budget, not GetUSAPatches pricing: an $8.00 blank, a $2.75 patch, $1.50 attachment, and $0.75 allocated packaging and freight total $13.00 per hat. At a $30.00 selling price, $17.00 remains before selling fees, taxes, marketing, returns, and other overhead. Calling all $17.00 profit would misread the job.
Fixed charges also matter on short runs. If a hypothetical order had a separate $60 setup charge, allocating it over 20 hats would add $3.00 per hat; over 100 hats, it would add $0.60. Those figures illustrate the math only—ask what your actual quote includes and how later reorders would be handled.
- Compare quotations at the same quantity, dimensions, relief, backing, and shipping destination.
- Ask whether attachment is included or whether the price covers loose patches only.
- Confirm how artwork changes, separate colorways, or additional designs affect setup and minimums.
- Account for a physical test before committing every blank to the full installation run.
- Balance unit savings against unsold inventory; a lower unit price can still create a larger cash risk.
GetUSAPatches has a 10-piece minimum, which gives a small brand room to start without buying a large quantity of patches. Ask how that minimum applies to separate designs or specifications rather than assuming assorted versions can be combined. For a fuller cost breakdown, use what drives custom patch pricing.
Three Hat Briefs That Lead to Different Recommendations
A structured streetwear snapback
Consider a hypothetical Los Angeles streetwear line with a broad two-letter mark and a structured front. PVC is a sensible candidate because the artwork can use a raised mark over a recessed background without relying on fine detail. The test is physical: does the patch follow the crown, and does the finished profile look intentional rather than bulky?
A lightweight hospitality staff cap
Now put a three-line restaurant logo on a soft cap worn through a long shift. A flatter woven patch may preserve the wording with less visual bulk, while embroidery may better match hospitality polos already in service. PVC is not wrong by definition, but the garment and existing uniform system give good reasons to compare it carefully.
A club cap with a removable identifier
An outdoor club using caps with existing Velcro panels has a clearer reason to consider molded PVC with hook backing. Members can remove the badge for cap care or exchange identifiers, provided the patch matches the receiving panel. Avoid an overhanging shape that can catch during ordinary use.
The same quote discipline applies beyond hats. High-school sports teams may need merrowed crests for warmups and chenille patches for letterman jackets, while biker vests usually need a layout and scale unlike a cap badge. A wool coach's jacket, a nylon shell, and a fire or public-safety unit's uniform cap should not inherit one attachment specification just because they share a logo.
For public-safety and workplace applications, confirm the organization's uniform requirements before ordering. A custom patch does not establish protective performance or authorize a uniform modification. The uniform and workwear guide addresses the purchasing questions that sit outside the artwork itself.
Durability Means the Face, Edge, Attachment, and Hat
PVC has no embroidered face threads to snag, and ordinary surface dirt can often be removed with a damp cloth and mild soap. That is a useful benefit for a daily cap. It is not a basis for promising a fixed service life, permanent color retention, or resistance to every cleaner.
Raised areas can show abrasion, recessed details can hold dirt, and attachment stitches can wear independently of the patch face. The hat may also fade or lose shape before the badge looks worn. Check the whole assembly when judging value, not just a loose patch rubbed between your fingers.
- Follow the care instructions for the complete hat and the confirmed attachment system.
- Start with gentle spot cleaning rather than assuming machine washing is acceptable.
- Avoid high heat, harsh solvents, and aggressive scrubbing unless specifically approved for the materials.
- Remove a detachable patch before washing when the cap and patch care instructions call for it.
- Inspect lifting edges, loose stitches, and clogged hook backing during normal use.
Los Angeles brands selling outdoor merchandise should also ask what testing or material information supports any proposed UV or weather-resistance claim. Do not turn a general material characteristic into a lifetime promise on the product page. The patch care guide is a better starting point for customer instructions than a blanket statement that PVC is indestructible.
How to Order and Build a Realistic Lead-Time Plan
A usable quote request names the cap, patch dimensions, quantity, colors, attachment, destination ZIP code, and the date finished hats need to be ready. Include a front photo and an inside photo if the sweatband or lining could affect sewing access. If someone else is attaching the patches, bring that shop into the specification discussion early.
- Identify the blank. Supply the brand and style number, fabric, crown structure, and any existing receiving panel.
- Confirm the footprint. Test a paper outline on the actual hat and record width and height in inches.
- Send the artwork. Identify exact wording, required colors, and details that can be simplified.
- Request a complete quote. Separate loose patches, any installation service, setup, sampling, freight, and packaging.
- Review the free digital mockup. Check spelling, proportions, border, relief notes, and the written backing specification.
- Approve the final specification. GetUSAPatches produces only after approval; request written confirmation of the schedule.
- Allow for attachment and inspection. Patch delivery is not necessarily the same date as finished-hat readiness.
The schedule has several parts: artwork review, approval, production, any physical sampling, shipping, and attachment. A requested revision or a test that changes the patch dimensions can move later steps. Ask for a job-specific estimate rather than applying another customer's timeline to a different construction.
We ship from Corona, CA, to all 50 states, but being close to Los Angeles does not remove production time or guarantee same-day delivery. Give an in-hand date and distinguish it from the launch date so there is room for inspection. The production timeline guide explains why approval and delivery should be tracked as separate milestones.
A digital mockup establishes the proposed visual arrangement; it cannot prove flexibility, exact physical color, or sewing performance on your blank. If any of those factors could make or break the run, ask about a physical sample and its cost and timing before approval. This is especially useful when a new cap supplier or attachment shop is involved.
Inspect the First Installed Hat Before Finishing the Run
Receiving inspection should happen before the patches disappear into cartons of finished merchandise. Compare the delivered patches with the approved specifications, then check a first installation on the actual blank. Looking only at loose patches will not reveal crown puckering or an edge that stands proud above the brim.
- Measure the overall width and height against the approved size and any stated tolerances.
- Check spelling, color arrangement, molded detail, and the agreed backing.
- Look for distorted edges, missing features, or visible defects that need review before installation.
- Confirm placement with the hat on a head or suitable form, not only flattened on a table.
- Inspect inside the crown for trapped sweatbands, rough thread ends, or attachment that affects comfort.
- Test the intended care and ordinary handling on a sample before making broad durability claims.
Keep the approved artwork, dimensions, backing notes, cap style, and installation placement together as the reorder record. If a later run changes the blank, treat it as a fit review rather than an automatic repeat. Even a similarly named cap can have a different crown curve, seam, or front-panel stiffness.
For larger releases, retain a finished reference hat as well as a loose patch. That gives the next installer something concrete to match and helps separate patch changes from garment changes. Ask how tooling retention and artwork revisions are handled before assuming a reorder will carry the same setup terms.
The Practical Verdict for a Los Angeles Hat Line
Choose PVC when molded shape, bold color, and a wipe-clean face support the product you are building. Pair it with a suitable crown, simplify the artwork where needed, and budget for proper attachment. It can be a strong retail feature, but extra thickness is not automatically extra value.
Choose another construction when fine lettering, a soft hand, or a traditional textile look matters more. A woven badge on a low-profile cap or an embroidered crest on a school hat may do the job with fewer compromises. The right decision should still make sense after you remove the trend from the conversation.
For the next planning step, compare the hat style guide, the material comparison, and the patch cost guide. Together they cover the three questions that settle most quotes: will it fit, will the artwork work, and will the finished hat meet the budget?


