
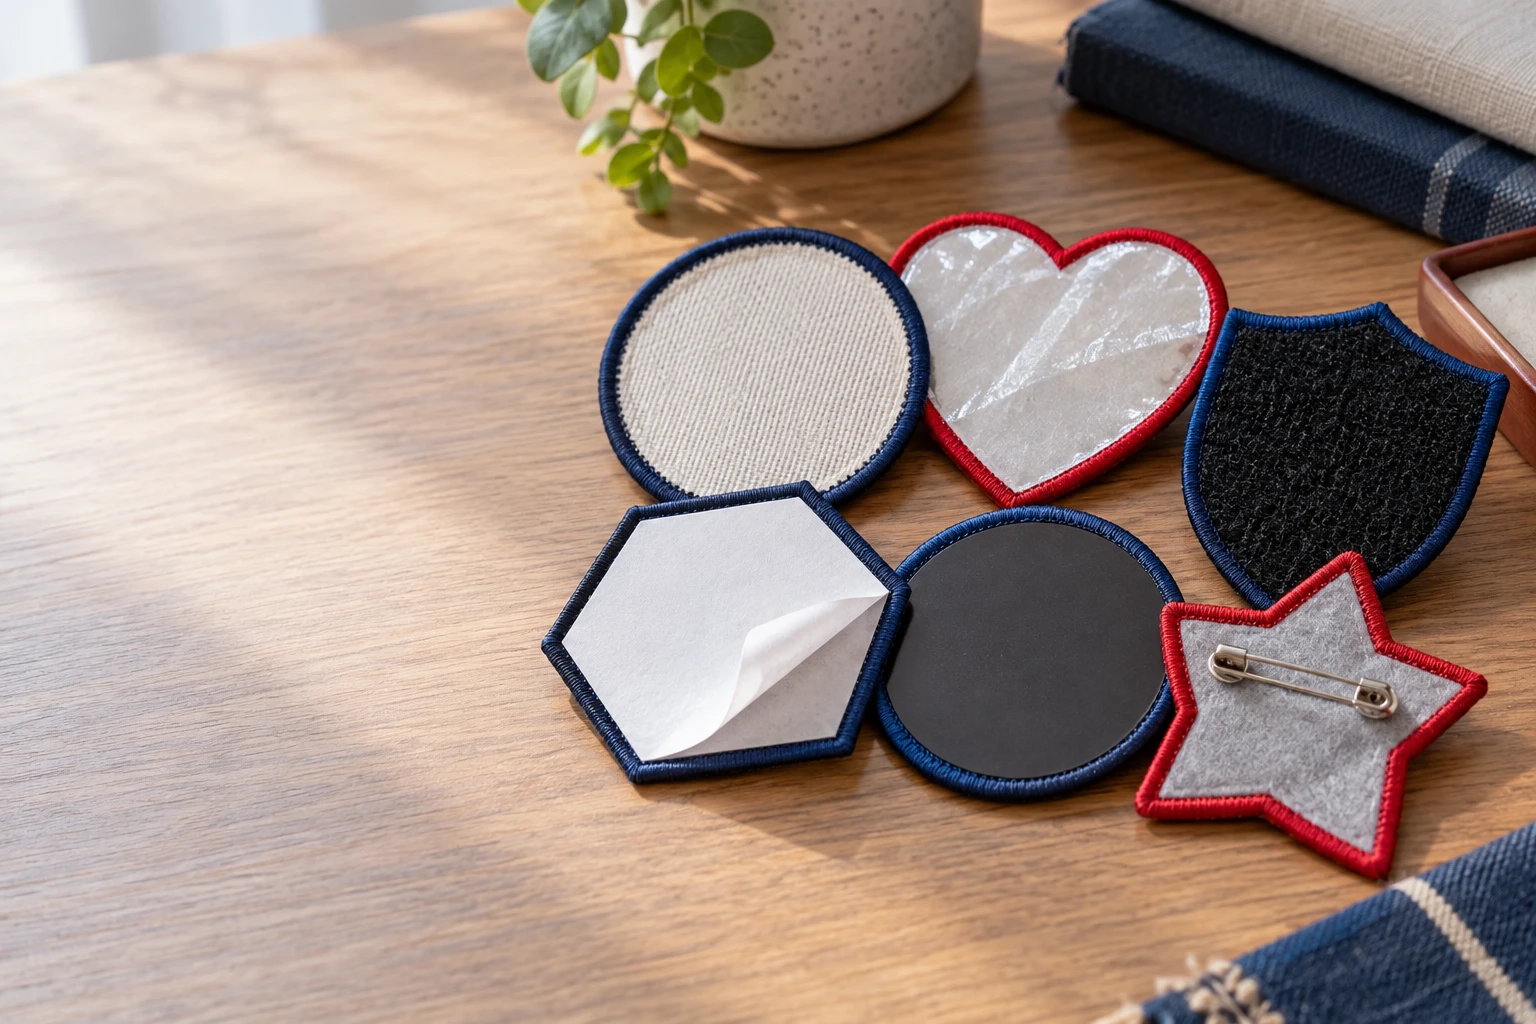
Custom woven patches Phoenix boutiques use on denim jackets, cotton caps, and work shirts usually need a backing chosen for the garment—not simply the easiest application method. Start with sew-on for washable apparel, consider iron-on only on heat-compatible fabric, and use hook-and-loop when the design needs to come off.
For size, measure the actual placement and test a paper cutout before committing to a large run. GetUSAPatches works from Corona, CA, with a 10-piece minimum, a free digital mockup before production, and shipping throughout the United States to all 50 states; we produce only after approval.
What makes woven patches a good fit for boutique apparel?
A woven patch forms its design from interlaced threads rather than building raised embroidery over a fabric base. That construction generally gives you a smoother face and better room for fine details than conventional embroidery at a comparable size. It is useful for a small desert illustration, a narrow wordmark, or a badge with several lines of clean lettering.
The important word is comparable. Woven construction does not make a long address readable inside a 1-inch circle. The finished width, letter height, contrast, and number of elements still decide whether a customer sees a recognizable logo or a little rectangle of thread.
Choose the surface your collection actually needs
On hospitality polos and lightweight overshirts, woven patches can keep the branding relatively low profile. On letterman jackets, the raised texture of embroidered patches may be the better visual match. A high-school team crest and a boutique neck-label-style badge do not need the same surface.
For photographic artwork or a soft color gradient, compare printed patches. Printed is flatter; that is the point. If the collection needs a fuzzy varsity letter, chenille patches provide a different texture, but they are not the place to put a fine-lined storefront illustration.
- Choose woven for flat-color logos, compact badges, and linework that needs a relatively smooth textile face.
- Choose embroidery for stronger thread relief and a traditional crest appearance, accepting that fine details may need simplification.
- Choose print when tonal transitions or photographic elements matter more than visible woven texture.
- Compare leather patches for a different material identity on denim or caps, with material-specific care and attachment requirements.
Sizing custom woven patches for Phoenix boutique garments
Use finished outside dimensions in inches, including the border. A 3-inch-wide patch does not give the artwork a full 3 inches of clear interior space. The border, edge clearance, and sewing path all take part of that footprint, so specify the outside measurement and let the proof show the usable design area.
These ranges are planning examples, not production limits or promises that every logo will fit. A wide wordmark and a square cactus emblem behave differently at the same width. Start with the garment, then adjust the art rather than forcing every placement into one universal size.
| Placement | Starting finished size | Useful shape | Check before approval |
|---|---|---|---|
| Cotton cap front | 2.25–3 inches wide by 1–1.75 inches high | Horizontal rectangle or shallow oval | Crown curvature, center seam, and access for attachment |
| Work shirt or overshirt chest | 2.5–3.5 inches wide | Rectangle, oval, or compact crest | Pocket opening, button placket, and interior stitching |
| Denim jacket chest | 2.5–4 inches wide | Crest, rectangle, or simple custom outline | Panel seams, pocket flaps, and the smallest jacket size |
| T-shirt sleeve | 1.25–2 inches wide | Small circle or short rectangle | Stretch, sleeve drape, and skin-side comfort |
| Canvas tote | 3–4 inches wide | Rectangle or broad custom shape | Handle stitching, lining, and sewing access |
| Removable utility panel | Match the existing loop field | Usually a simple rectangle | Exact panel dimensions, corner shape, and hook coverage |
Test the smallest garment, not just the display sample
A patch that looks balanced on a large denim jacket can crowd the pocket on an extra-small. Put the paper cutout on both sizes and photograph them straight on. If one patch size will not serve the range, price separate sizes as separate specifications rather than assuming a mixed-size order costs the same.
Caps need their own test. A wide badge may bridge a six-panel cap’s center seam, while a tall badge can climb into a crown area that will not sit flat during pressing. The hat patches hub is useful for comparing styles, but the actual blank cap still controls fit.
Backing comparison: sew-on, iron-on, hook-and-loop, and adhesive
Backing is an attachment decision, not a quality ranking. Sew-on is often the practical starting point for a boutique garment that will be worn and washed, while hook-and-loop solves a removal problem. Iron-on can reduce sewing work on compatible blanks, but only if the adhesive and fabric tolerate the same application conditions.
Phoenix heat does not select the backing for you. A hot car is not a calibrated heat press, and an adhesive rated for one application is not automatically appropriate for every nylon shell or performance shirt. Confirm the supplied backing instructions and the blank garment’s limits together.
| Backing | Best starting use | Main trade-off | Production check |
|---|---|---|---|
| Sew-on | Denim, canvas, work shirts, and washable collections | Requires attachment labor; stitching can show inside | Check fabric support, sewing access, and stitch placement |
| Iron-on | Heat-compatible blanks approved for pressing | Bond depends on fabric, coating, temperature, pressure, and dwell time | Test the supplied application instructions on the actual garment |
| Hook-and-loop | Removable badges on a matching loop field | Adds thickness and needs a compatible receiving panel | Specify hook back only or hook back plus a separate loop panel |
| Pressure-sensitive adhesive | Temporary positioning or suitable short-term display uses | Should not be assumed to survive garment laundering | Confirm intended surface, removal behavior, and whether sewing is required |
Sew-on is straightforward, but it still needs a sewing plan
A sturdy denim panel usually gives the operator a better starting point than a thin stretch jersey. On jersey, the patch can hold one area still while the surrounding knit stretches, producing ripples or a stiff spot. The sewing shop should decide the needle, thread, stitch settings, and any support needed for that blank.
Check what sits behind the placement. Sewing through a chest pocket can close it, and stitching through a lined jacket can catch the lining or leave an unwanted seam inside. Biker vests and lined wool coaches’ jackets often need more attachment planning than an unlined canvas tote.
Iron-on needs a real application test
An iron-on that peels after a dryer cycle may have a weak initial bond, incompatible fabric, incorrect pressing conditions, or care exposure beyond the adhesive’s limits. More heat is not a universal repair. It can scorch fabric, flatten texture, mark a finish, or distort a synthetic panel before it improves adhesion.
Do not publish one temperature and time for every patch. Use the instructions supplied for that backing, check the garment label, and test a spare blank with the intended equipment. A heat press offers more controllable pressure than a household iron, but equipment alone cannot make an incompatible coating bond.
Specify both sides of a removable patch
For Velcro panels, say whether the garment already has a loop field. A hook-backed patch does not attach directly to ordinary denim, and the hook face can snag nearby knits during washing or storage. If the garment needs a receiving panel, quote that component and its attachment separately.
This detail matters on fire and public-safety unit orders as much as it does on utility-inspired boutique jackets. Match the patch footprint to the existing field, including rounded corners, rather than relying on a nominal size. For operational garments, follow the organization’s approved decoration requirements instead of assuming a fashion application is suitable.
Borders and lettering: where a good design can lose room
Merrowed crests have a familiar wrapped edge that works well with many simple outlines. That border also has visible bulk and occupies space around the design. A tighter cut edge may suit a more detailed silhouette, but the available finish should be confirmed against the shape and construction.
Deep notches, thin projecting points, and narrow bridges deserve extra attention. They can complicate edge finishing and leave little room for an attachment stitch. For a boutique cactus badge, a broader silhouette may give a cleaner result than trying to reproduce every needle and narrow branch.
Judge lettering at physical size
A digital mockup enlarged on a laptop can make tiny text look safer than it is. Print the design at the intended finished dimensions, then inspect it without zooming. If the slogan already feels crowded on paper, do not expect thread to create extra space.
There is no single minimum letter height that works for every font and contrast combination. Open counters, simple strokes, and generous spacing help; hairline scripts and tightly packed small capitals are harder. Ask for an artwork review and consider a physical sample when very small text is essential to the product.
- Keep the brand name dominant and remove secondary text before shrinking every element.
- Specify required wording separately from the artwork so a small spelling error is easier to catch.
- Use clear light-to-dark contrast instead of relying on two nearby colors to separate fine details.
- Keep the sewing path clear of important lettering and delicate parts of the mark.
- Treat a digital color preview as a reference, not a guarantee of an exact physical thread match.
Build the patch around the garment, not the other way around
The same woven face can behave very differently on a heavyweight denim jacket and a lightweight nylon windbreaker. Thickness, stretch, surface coatings, and access behind the panel all affect the attachment. On the quote desk, the garment style number and a care-label photo can answer more than a paragraph calling the fabric durable.
Separate loose patch supply from garment decoration in the written scope. Do not assume a patch quote includes sewing, pressing, receiving blank garments, or repacking finished apparel. If a local Phoenix decorator will handle attachment, involve that shop before the patch dimensions and backing are approved.
Denim jackets, overshirts, and canvas totes
For an illustrative boutique capsule, a 3-inch-wide woven badge on an unlined denim jacket could start with sew-on backing and a simple border. Put the sample away from pocket flaps and major seams so the operator has a workable path. Keep the same design language on a canvas tote, but check handle reinforcement and any interior pocket before copying the placement.
A hospitality overshirt usually needs a more restrained footprint than a club vest. A compact chest badge may be enough, especially if the garment also carries a name strip. Large biker and motorcycle club patches follow a different visual scale; borrowing their dimensions for a lightweight shirt can make the front panel hang awkwardly.
Nylon shells, performance polos, and soft tees
Nylon shells are not an automatic iron-on application. Heat sensitivity and water-repellent finishes can create problems, while sewing introduces needle holes that may affect a weather-resistant panel. Confirm the blank manufacturer’s decoration guidance, and do not describe an altered shell as waterproof without suitable testing.
On performance polos and soft tees, start small and watch the drape. A thick backing or wide badge can pull a sleeve downward or create an uncomfortable interior edge. If the patch fights the fabric during a wear test, a smaller patch—or a different decoration method—may be the honest answer.
Test washing, wear, and presentation before scaling the collection
A digital proof confirms the proposed appearance and listed specifications; it does not prove adhesion or garment performance. Use a representative patch and the actual blank for application testing when the fabric or attachment is uncertain. Ask about physical sample availability, cost, and scheduling rather than treating it as included with the free digital mockup.
Phoenix boutiques may sell lightweight summer pieces alongside heavier fall jackets, so one successful test does not cover the whole assortment. A cotton twill cap, a coated shell, and a brushed fleece hoodie are three attachment situations. Test the combinations you actually plan to sell.
- Record the garment style, backing, equipment, and application settings so a successful test can be repeated.
- Inspect the attached patch for curling, pressure marks, puckering, trapped lining, and uncomfortable interior stitching.
- Let an adhesive application set for the period required by its supplied instructions before testing or laundering.
- Wash and dry according to the proposed customer care instructions, staying within both garment and patch limits.
- Check the face, edges, bond, and surrounding fabric after care cycles; record the number of cycles rather than calling the result wash-proof.
- Wear or handle the item in its normal use position, checking that a cap sits properly and a sleeve still bends comfortably.
If you sell loose patches, include application guidance that matches the backing supplied. Do not tell customers that every patch can be ironed onto every fabric. A clear instruction card can prevent someone from pressing a heat-sensitive jacket with settings intended for a cotton tote.
Pricing a boutique run without hiding the attachment cost
GetUSAPatches has a 10-piece minimum, which lets a small collection begin without committing to a large patch inventory. Confirm how separate artwork versions, sizes, colorways, and backing combinations affect quantities and pricing. Ten pieces does not automatically mean ten unrelated designs can share one production setup.
Request a quote in USD for the exact specification rather than budgeting from a generic per-patch number. Size, quantity, artwork, border, backing, and any extra components can change the total. The guide How Much Do Custom Patches Cost? What Drives the Price provides a useful way to organize that comparison.
- Ask for the patch cost at your launch quantity and one realistic reorder quantity, using identical specifications.
- List application labor separately, including any handling required for lined garments or difficult cap placements.
- Identify whether shipping, physical samples, receiving panels, packaging, or other charges are included or separate.
- Separate patch-only delivery from the date the decorated garments will be ready to sell.
- Compare the complete landed and applied cost rather than choosing the lowest patch-only quote.
For illustration only, suppose a patch is quoted at $2.40, attachment at $1.60, and allocated inbound freight at $0.30 per item. That is $4.30 in decoration-related cost before the blank garment, packaging, and other business expenses. Those figures are arithmetic examples, not GetUSAPatches pricing.
A simpler shared patch can help a boutique carry the same identity across several blanks, but backing may still need to change. Do not force iron-on onto a sensitive shell just to make the order sheet uniform. Compare the construction trade-offs in Embroidered vs. Woven vs. PVC Patches: Which Should You Choose? before treating different products as equivalent quotes.
Ordering and lead time from Corona, CA, to Phoenix
Start with the date the finished merchandise must be ready, not just the day the loose patches should arrive. A pop-up opening needs time for receiving, counting, attachment, inspection, and any rework. GetUSAPatches ships from Corona, CA, to Phoenix and all 50 states, but proximity alone does not establish a production or carrier delivery date.
Ask for the current schedule against your actual artwork, quantity, backing, and destination ZIP code. There is no responsible universal turnaround for every custom order. Keep artwork review, approval, production, transit, and local garment decoration as separate steps on the calendar.
Send a brief that can be quoted without guessing
- Artwork: send the best available source file, exact wording, and any color references.
- Dimensions: state finished outside width and height in inches, including the border.
- Garment: identify the blank style, fabric, lining, coating, care label, and intended placement.
- Attachment: name sew-on, iron-on, hook-and-loop, or another requested backing; include any receiving panel needs.
- Quantity: list pieces per artwork, size, colorway, and backing rather than providing only a combined total.
- Delivery: provide the shipping ZIP code, required in-hands date, and any separate retail launch date.
- Scope: state whether you need loose patches only or want to discuss additional decoration services and their availability.
The free mockup quote is where that specification can start. GetUSAPatches provides a free digital mockup before production and produces only after approval. Review the front design and written backing details together, because a front-facing image alone cannot tell you which adhesive or hook configuration is on the back.
Before approving, check spelling, quantity, outside dimensions, border, color references, backing, and the shipping address. Resolve changes first; revisions after approval can affect cost or schedule. For a related explanation of timeline stages, read How Long Do Custom Embroidered Patches Take to Arrive in Phoenix, AZ?, but request a woven-specific schedule for this order.
Receiving the order and keeping the next run consistent
When the patches arrive, count them by version before sending everything to the decorator. Compare representative pieces with the approved specification for dimensions, wording, border, backing, and overall appearance. If something appears different, photograph it beside a ruler and contact the production desk before attaching the batch.
Have the decorator attach an initial piece for inspection before moving through the full garment stack. A placement that shifts half an inch toward a pocket can change the look, even when the patch itself is correct. Mark the approved placement from fixed garment features, not from a loose fold or an unevenly laid sleeve.
- Retain the approved artwork, written specification, order reference, and a representative physical patch.
- Record placement measurements from stable references such as a pocket edge, seam, or placket.
- Keep the blank garment style and decoration notes with the reorder file.
- Note any changes in fabric, supplier, color, or finish before repeating the attachment method.
- Recheck availability, pricing, and timing on a reorder instead of assuming the original terms remain unchanged.
The practical target is not the biggest badge or the most elaborate backing. It is a patch the customer can read, a garment that still wears properly, and an attachment method your shop can repeat. Once those three agree, a Phoenix boutique has a specification worth reordering.


