
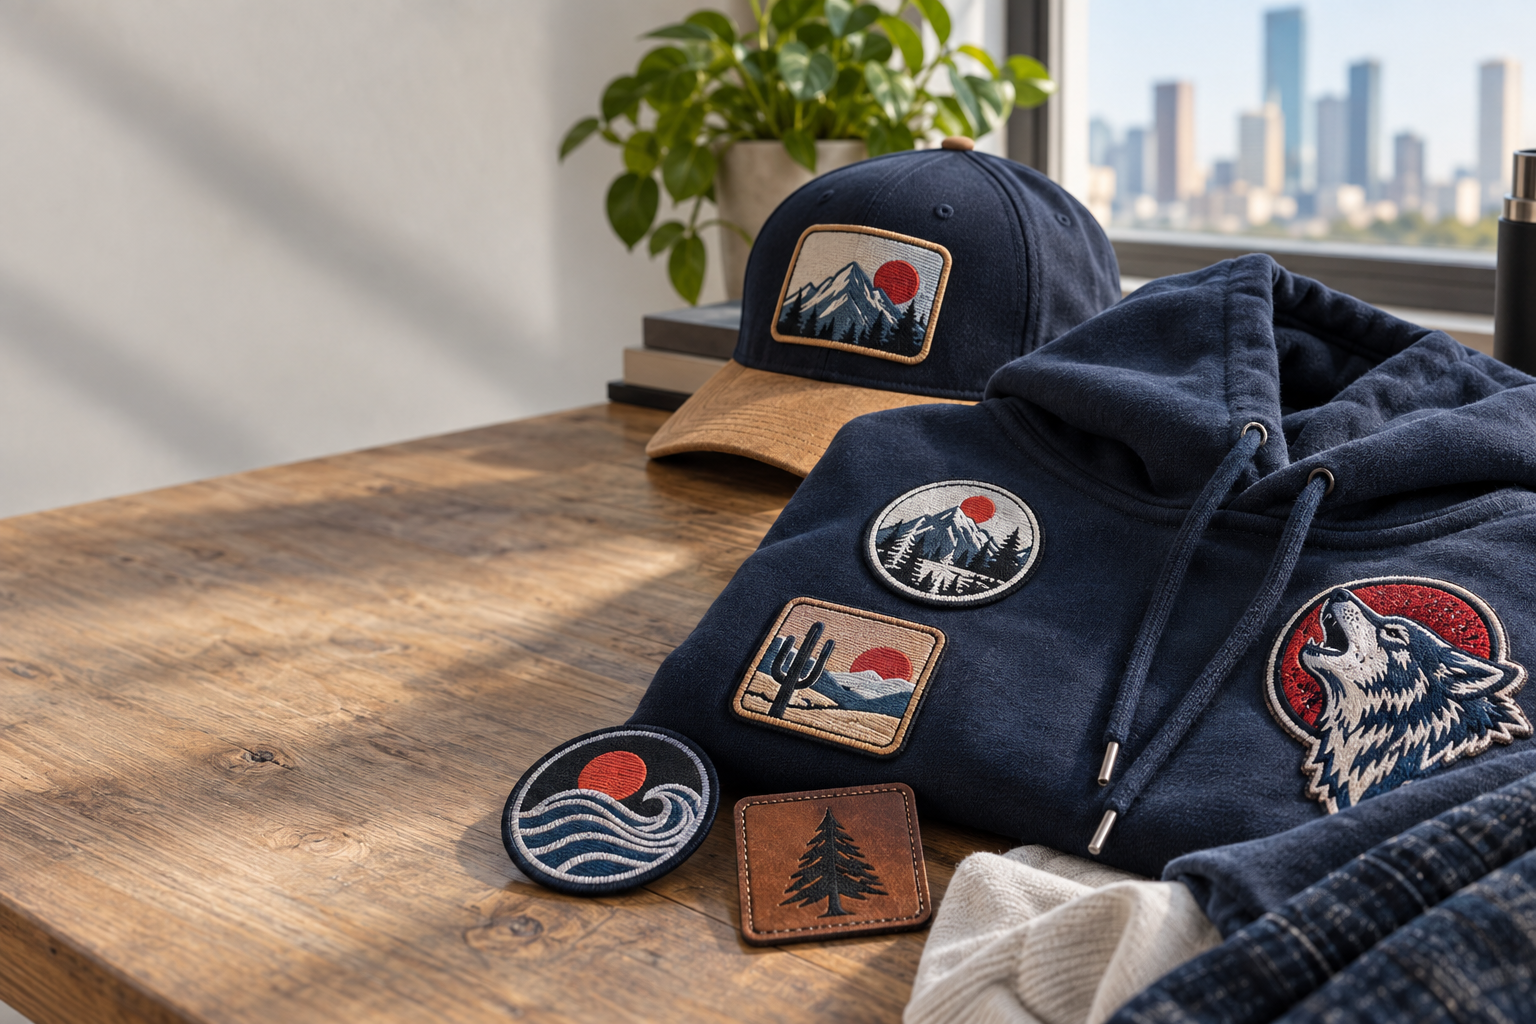
Custom woven patches are worth it for Houston streetwear brands that need detailed logos, readable small lettering, and a flatter finish on caps, overshirts, or jackets. They are less useful when the whole design depends on thick raised stitching or photographic color. Choose them for what the artwork and garment need, not because one patch type is supposed to be better at everything.
GetUSAPatches serves brands, teams, clubs, and businesses throughout the United States with a 10-piece minimum. We provide a free digital mockup before production and produce only after approval. Orders ship nationwide from Corona, CA, to all 50 states, including Texas; Houston is your delivery destination, not a claim of a local production address.
What makes a woven patch worth paying for?
A woven patch forms its design by interlacing threads rather than laying embroidery stitches over a separate base fabric. That construction generally accommodates finer detail and a lower-profile face than conventional embroidery. It still looks and feels like textile branding, which matters if a printed transfer feels wrong for the garment.
Think of a small badge on a twill work shirt: a wordmark, a narrow frame, and a short line of collection text. Woven construction can make sense because those details need room without turning the badge into a large chest crest. On a heavyweight hoodie with a broad varsity letter, that advantage may disappear; the customer may be buying the raised texture instead.
- Worth considering: compact brand marks, thin geometric artwork, small collection names, and detailed crests intended for structured garments.
- Less convincing: artwork made mostly of one large letter where loft and visible stitching are the main visual features.
- Worth testing first: lightweight tees, stretch jerseys, coated outerwear, and placements that cross thick seams.
- Usually the wrong reason: expecting a different patch construction by itself to support a higher retail price without better design, fit, or garment quality.
A production quote starts with the same practical questions used for hospitality polos, high-school sports apparel, or club jackets: what is the garment, where does the decoration sit, and how will it be washed? Streetwear adds a strong visual brief, but it does not remove those questions. A beautiful badge that puckers the shirt is still a bad fit.
Woven vs. embroidered, printed, and other patch types
Start by comparing the finished face, not the product name. Woven patches offer detailed textile artwork with relatively little surface relief, while embroidered patches show more pronounced stitch texture. Neither construction automatically costs less on every quote; dimensions, quantity, edge treatment, and backing all affect the comparison.
Some artwork should not be translated into thread at all. A shaded portrait, distressed photo collage, or smooth multicolor fade may make more sense as printed patches. Printed is flatter; that is the point, and forcing that artwork into woven construction can remove the very detail that made it interesting.
| Patch construction | Best reason to choose it | Useful streetwear placements | Main trade-off |
|---|---|---|---|
| Woven | Detailed linework and smaller lettering in a textile surface | Twill caps, overshirt chests, jacket sleeves, and compact collection badges | Less raised texture; tiny text still needs an artwork review |
| Embroidered | Visible stitching and a traditional badge appearance | Denim jackets, workwear, heavyweight hoodies, and merrowed crests | Dense detail and small counters inside letters can lose clarity |
| Printed | Gradients, illustrations, photographs, and complex tonal artwork | Graphic-led capsules and art collaborations | The face does not provide the same thread-built texture |
| 3D embroidered | Raised impact for a bold, simplified mark | Structured caps and selected heavy outerwear | Not the natural choice for small type or delicate linework |
| Chenille | Soft pile and a large varsity-style presence | Letterman jackets and substantial fleece | Bulk and pile work against tiny details and light garments |
| PVC | A molded surface that can be wiped clean | Utility bags, removable badges, and technical-looking capsules | More body and a different feel than a thin fabric badge |
| Leather | A material-led look that suits denim and workwear | Waistband branding, caps, and overshirt details | Material, decoration method, and garment washing must be compatible |
Use 3D embroidered patches for the bold cap mark, not automatically for its tiny supporting tagline. Consider chenille patches for letterman jackets and wool coaches jackets when pile is part of the look. The broader embroidered vs. woven vs. PVC comparison is useful if your collection includes both everyday garments and utility accessories.
Custom woven patches Houston brands can size around the garment
Size is not just a width entered into a quote form. A 3-inch-wide rectangle may fit a jacket pocket comfortably but look crowded on a low-profile cap once its border, center seam, and crown curve enter the picture. Measure a real blank and use a paper cutout before deciding that the same badge will work across the entire line.
The dimensions below are starting points for placement tests, not production limits or promises that every design will read at those sizes. Patch height matters as much as width, especially on shallow cap fronts and above pocket openings. The custom patch size guide can help you turn a placement idea into a quote dimension.
- Cap front: test a badge around 2 to 3 inches wide, then check the actual crown height, front structure, seam position, and attachment access.
- Overshirt or jacket chest: try a 2.5- to 3.5-inch-wide paper template and leave enough clearance for pocket use and an attachment stitch line.
- Sleeve badge: start with approximately 2 to 3 inches across, then view it on a bent arm rather than only on a flat sleeve.
- Lower-hem brand badge: test a smaller format, but remove unnecessary words instead of shrinking the entire chest design until nobody can read it.
Small lettering needs open space, not just fine thread
Woven construction can handle fine detail, but there is no honest universal minimum letter height that works for every font and color combination. Thin script, tightly packed capitals, and dark gray text on black all create different problems. Ask for a review at the intended finished dimensions, with special attention to letter openings and spaces between words.
A useful revision often means removing one line, opening the spacing, or making a symbol slightly bolder. Enlarging the whole patch is another option, but that changes its relationship to the garment. Print the proof at actual size where possible; a design that looks clear on a laptop at 400% can still fail on a cap.
Choose the edge before approving the artwork
A merrowed edge creates the familiar wrapped border used on many traditional crests. It adds a defined rim and generally suits simpler shapes, but it also takes up visual space around the design. An appropriate cut edge can suit a lower-profile look or more intricate outline, subject to the patch construction and supplier review.
Do not run tiny lettering right into that rim. Leave room for both the border and the attachment method, and have the proof identify the intended edge treatment. The border is part of the specification, not a finishing detail to decide after the artwork is approved.
Match the backing to the fabric and the way it will be worn
Backing is where a good patch can become a bad garment decision. Sew-on is often the dependable starting point for permanent branding because attachment does not depend on an adhesive bond alone. That does not make sewing risk-free: stitch tension, needle choice, patch stiffness, and access inside the garment still matter.
Iron-on can be useful on compatible, heat-tolerant fabrics when applied according to the supplied instructions. It is not a blanket recommendation for nylon shells, coated fabrics, stretch garments, or anything whose care label restricts heat. An iron-on that peels after a dryer cycle may reflect an unsuitable fabric, poor application, or incompatible care—not necessarily a problem with the woven face.
- Sew-on: consider it for denim, cotton twill, work shirts, and many heavy sweatshirts; test for puckering and confirm that stitching will not close a pocket.
- Iron-on: confirm fabric compatibility and the specified application conditions; a household iron and a production heat press do not automatically give the same result.
- Hook-and-loop: use it when the badge should be removable; specify whether the quote includes the patch-side hook, the garment-side loop, or both.
- Coated or technical outerwear: do not assume that either heat or needle holes are acceptable; consult the garment specifications before choosing the attachment.
- Thin or stretchy fabric: test the complete combination because a low-profile woven face can still become stiff once backing and stitching are added.
Velcro panels are useful on utility vests and removable club pieces, but the complete assembly has more thickness than a plain sew-on patch. As with fire and public-safety units, the patch has to match the receiving panel rather than merely look right in a rendering. No patch choice by itself establishes suitability for protective or duty equipment.
For a streetwear drop, write the backing beside each garment instead of assuming one specification covers caps, tees, and jackets. The patch backing options guide explains the main choices, and the hook-and-loop attachment guide covers removable assemblies. This is also the right point to decide who will attach the patches.
Judge the price by installed cost, not the patch alone
A patch quote is only one part of the garment budget. The installed cost includes the patch, any separately quoted preparation or delivery charges, attachment labor, and the effect of damaged or rejected blanks. If a decorator needs extra handling to reach the sleeve or cap front, that work does not disappear because the badge is small.
Here is hypothetical planning math, not a GetUSAPatches price offer: suppose 50 patches cost $150, patch shipping costs $20, and attachment costs $2 per garment, or $100 total. The patch-related spend would be $270, which is $5.40 per garment if all 50 units are sellable. That example excludes the blank garment, taxes, packaging, and any other project charges.
If two garments become unsellable during decoration and the same $270 has been spent, that patch-related amount becomes approximately $5.63 across 48 sellable units. The lost blanks add a separate expense. This is why a modest attachment test can matter more than saving a few cents on each patch.
What belongs in a like-for-like quote?
- Finished width and height in inches, including the intended border.
- The same artwork, construction, color requirements, and edge treatment across the quotes being compared.
- Quantity by design, size, and backing, with clarification on how variants affect pricing and minimums.
- Any separately charged artwork work, setup, physical sampling, packaging, or delivery.
- A clear statement of whether the order is for loose patches or includes any garment-attachment service.
GetUSAPatches has a 10-piece minimum, which gives a small label a practical starting quantity. Ask how that minimum applies if the order contains several artworks or sizes; do not assume ten unrelated designs count as one production run. The patch pricing guide explains the main cost drivers without pretending every design has the same price.
Ordering more can reduce some per-piece costs, but excess inventory is still money sitting in a box. A permanent brand mark may justify spare patches for repeat garments and repairs. A date-specific release badge needs a tighter forecast because leftovers may have little use after the event.
Where woven patches fit a Houston streetwear collection
Houston's hot, humid weather makes garment weight and wear comfort sensible considerations, but it does not mean every local collection needs the lightest possible decoration. Brands still sell denim layers, structured caps, fleece, and outerwear for travel or cooler periods. Pick the patch for the actual piece rather than treating the city name as a material specification.
The useful question is how the badge behaves while the garment is worn. Does the chest bend naturally, does the cap front retain its intended curve, and does the patch edge catch during normal handling? Those checks tell you more than a flat product photo.
A twill cap with a compact wordmark
A woven badge can keep a detailed wordmark readable without the added height of raised embroidery. Start with the available front panel and check whether the proposed placement crosses a center seam. A firm backing on a soft unstructured cap can create a plate-like shape even when the patch face itself is thin.
A cap attachment test also needs to address access for sewing or the correct equipment for heat application. Do not assume a flat press setup will treat a curved crown evenly. The hat patches hub is a useful reference for separating the badge design from the cap-specific attachment problem.
A denim overshirt or heavyweight hoodie
Denim often gives a small sewn badge enough support to sit cleanly, provided the placement and stitch settings work. A sleeve collection mark or chest badge can carry more detail than a simple embroidered icon. Check pocket bags before sewing; stitching through the wrong layer can turn a usable pocket into decoration.
On heavyweight fleece, woven construction gives a clean contrast against the soft garment surface. Embroidery or chenille may be the stronger choice if the drop needs a bold collegiate look instead. This is the same distinction that matters on letterman jackets: readable detail and thick texture are different goals.
A nylon shell, light tee, or utility vest
Nylon shells need a fabric-specific discussion because coatings, heat sensitivity, and needle holes can complicate attachment. On a light tee, even a modest patch can pull the knit or feel stiff against the body. A woven patch is low profile compared with some alternatives, not weightless or automatically compatible.
Utility vests can support removable woven badges where a suitable loop field is already present. If a wipe-clean molded face is the design priority, compare PVC patches instead. For biker vests and larger club layouts, the conventions and garment access discussed under biker and motorcycle club patches are more relevant than a small cap-badge specification.
How to order without losing time between approval and delivery
A usable quote brief saves time because it separates design decisions from logistics. Send the artwork, dimensions, quantity, border preference, backing, garment details, and delivery ZIP code together. Include the date the patches must arrive, not just the date the finished collection goes on sale.
GetUSAPatches provides a free digital mockup before production and produces only after approval. That approval should cover wording, layout, dimensions, proposed colors, edge treatment, and backing. A digital mockup is an artwork and specification check; it cannot physically prove fabric feel, exact screen-to-thread color, adhesion, or wash performance.
- Send the best artwork available. Identify required text and any design elements that can be simplified, and use the artwork file guide if you are unsure what to supply.
- Measure a representative garment. Give width and height in inches, plus a placement photo showing seams, pockets, or the cap front.
- List quantities by specification. Keep different sizes, backings, and artworks separate so the quote can address them correctly.
- Review the free digital mockup. Check spelling at normal reading size and confirm that the written specification matches the garment plan.
- Confirm the full schedule before approval. Ask about current production timing, any sampling stage, shipping service, and the expected dispatch point.
- Approve only after the details are settled. Leave time after delivery for incoming inspection, attachment, quality checks, and packing.
Treat lead time as several separate stages
There is no useful universal delivery promise for every woven patch order. Artwork revisions, approval timing, production requirements, quantity, sampling requests, and the selected shipping service can all change the schedule. Get a current estimate tied to your actual specification instead of borrowing a timeline from an unrelated product page.
Orders ship from Corona, CA, to all 50 states, including Houston and the rest of Texas. Shipping time is separate from production time, and delivery to a decorator is not the same milestone as a retail-ready garment. If a pop-up is on Saturday, the decorator's required patch arrival date may be substantially earlier.
For a color-sensitive launch or an unfamiliar fabric, ask about physical sample availability, cost, and schedule before placing the order. A sample stage may add time, but skipping it can expose the entire garment batch to an untested attachment. The artwork file guide and clothing-brand woven patch guide provide useful preparation checks.
Check one finished garment before decorating the whole run
Inspect incoming patches against the approved specification before attachment begins. Check quantities, dimensions, wording, edge finish, backing, and visible consistency under ordinary lighting. If something differs from the approved details, resolve it before sewing the entire batch onto valuable blanks.
Then build a representative garment using the actual attachment method and equipment. A patch placed loosely on a hoodie is not an attachment test, and a test on scrap cotton does not validate a coated nylon shell. Use the intended garment where practical, especially for a new blank or new backing.
- Look for puckering around the perimeter and distortion across the patch face.
- Check that pockets still open and that internal stitching or backing does not create an uncomfortable contact point.
- On caps, check crown shape and patch contact along the edges rather than judging only the center.
- For hook-and-loop, confirm the mating surfaces, coverage, alignment, and clearance around the panel.
- Evaluate a representative garment under its intended care instructions, then inspect for edge lift, shrinkage differences, color changes, and seam problems.
A successful wash check is useful evidence for that tested combination, not a promise that every fabric and dryer setting will behave the same way. If the decoration requires gentler care than the blank, resolve that mismatch before sale. The sew-on guide and iron-on guide cover practical attachment steps, but supplied patch instructions and garment restrictions still govern the job.
The buying decision: detail, texture, or simpler production?
Choose woven when fine textile detail is doing real work: a compact logo, a small collection badge, or a detailed crest that would become crowded in conventional embroidery. Choose embroidery when visible stitches are part of the identity, and choose printed when tonal artwork matters more than a thread-built surface. A mixed collection can use more than one construction without looking inconsistent.
For a Houston brand testing its first patch-bearing garment, a focused small run is usually easier to evaluate than five sizes spread across unrelated blanks. Keep the artwork consistent, specify the backing, and record what the attachment test showed. Reorders become much easier when there is a saved specification rather than a photo and the request to make it look the same.
- For garment-brand planning, read Custom Woven Patches in Chicago, IL: Complete Guide for Clothing Brands; the artwork and garment checks apply across the United States.
- For budgeting, use How Much Do Custom Patches Cost? What Drives the Price to organize a comparable quote.
- For attachment decisions, review Patch Backing Options Explained: Sew-On, Iron-On, Velcro® & More before finalizing the garment specification.


