
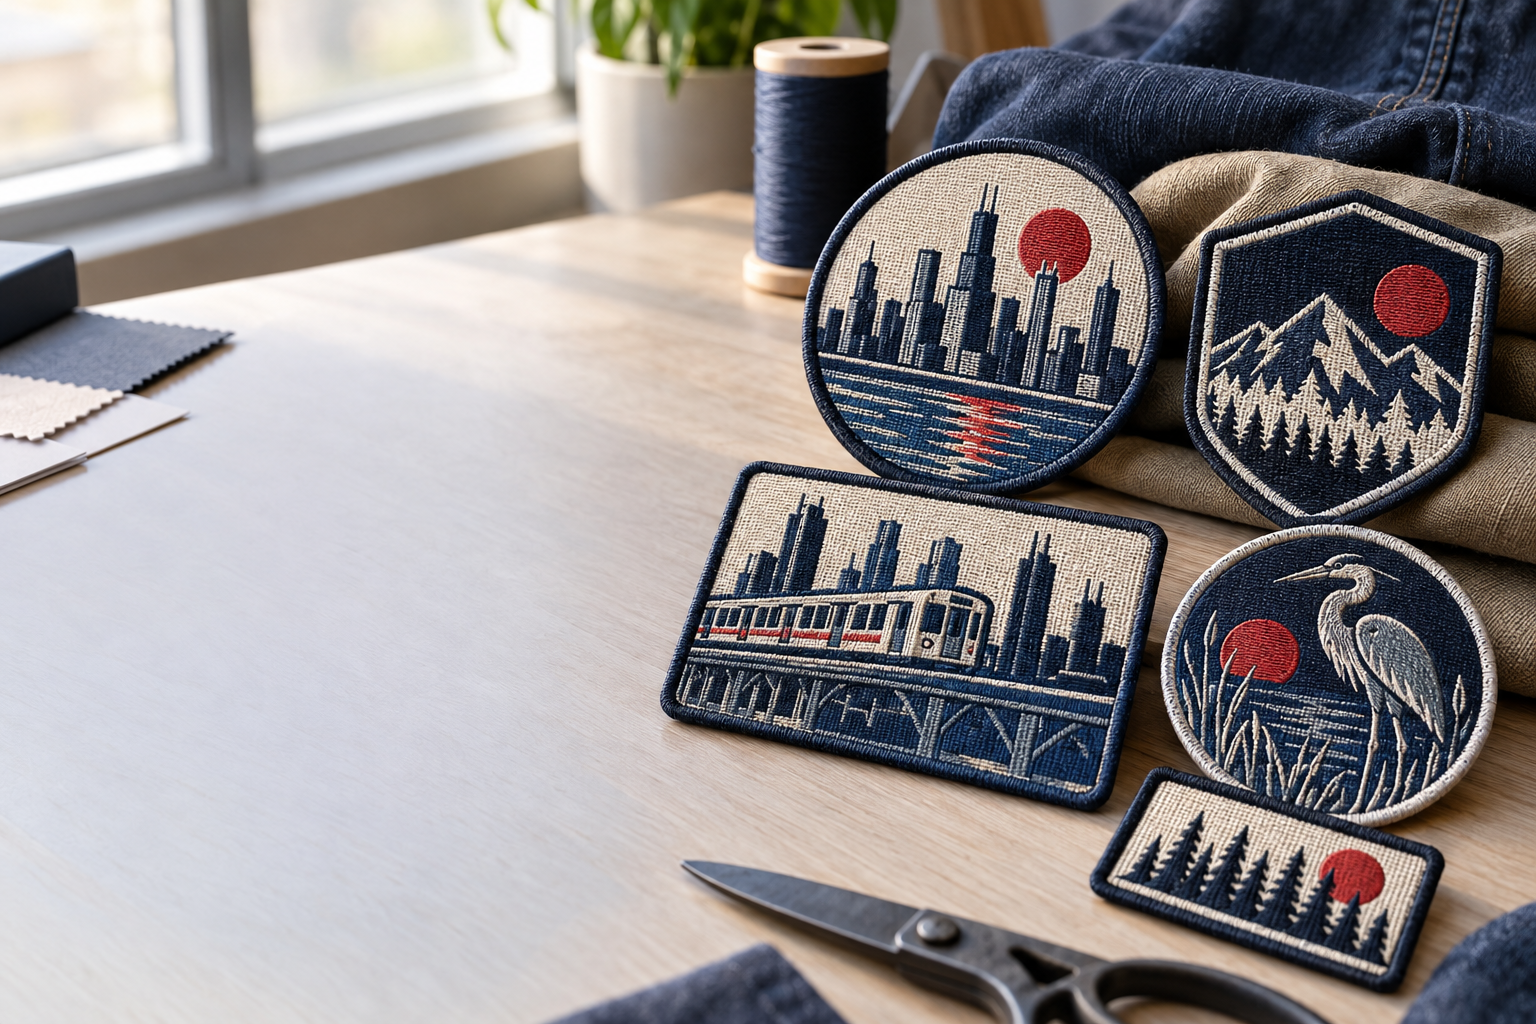
The custom woven patches Chicago clothing brands order work best for detailed logos, compact lettering, and a flatter finish on caps, overshirts, and jackets. GetUSAPatches serves Chicago from Corona, CA, with a 10-piece minimum and a free digital mockup before production. We produce only after approval and ship to all 50 states.
Start with the garment, not a large logo on a screen. A mark that looks excellent across a monitor can lose its small lettering on a 2-inch cap patch, while an oversized badge can turn a soft tee into a stiff panel. The useful quote includes finished dimensions, border, backing, quantity, and the date the patches actually need to reach your hands.
What woven construction does for a clothing brand
A woven patch forms its design with fine interlaced threads rather than building an embroidered design with stitches over a separate base. That construction generally gives you a smoother surface and better room for fine detail than conventional embroidery at the same finished size. It is still thread, though, not a photograph printed on fabric.
For a Chicago apparel label, that can mean a small wordmark on a canvas chore coat, a detailed crest on a twill overshirt, or a compact brand badge on a five-panel cap. The patch can carry more visual information without the raised surface of embroidery. Backing and border still affect how flexible the finished piece feels.
A woven patch is not automatically a woven neck label
Both use woven construction, but their edges and intended placement differ. A finished patch may have a substantial border and backing, while a neck label may need folded edges and a softer construction against skin. Do not order an exterior badge and assume it will be comfortable inside a collar.
Start with the woven patches product option if your design needs fine linework and a low profile. If the goal is a folded hem label, care label, or skin-contact branding, describe that application explicitly. The production specification should follow the application rather than treating every small fabric logo as the same product.
Woven, embroidered, printed, or another patch material?
Choose the surface you want people to see and touch. A woven badge and a merrowed embroidered crest can use the same artwork but make a jacket feel like two different products. On a high-school sports jacket, raised thread may be the whole point; on a small fashion label, that same texture may crowd the lettering.
There is no useful winner without a garment and design. Printed is flatter; that is the point. Woven keeps a textile appearance while handling detail, and embroidery puts more emphasis on dimensional stitching.
| Patch type | Strong use case | Main trade-off | Garment example |
|---|---|---|---|
| Woven | Fine lettering, narrow lines, and compact flat-color logos | Less raised texture; tiny low-contrast details can still disappear | Twill overshirt, work shirt, five-panel cap |
| Embroidered | Bold crests, traditional uniform marks, and visible thread texture | Dense stitching can make small text or a lightweight garment harder to manage | Letterman jacket, hospitality polo, club vest |
| Printed | Gradients, illustrations, and artwork better represented with ink | A flatter surface without the same woven or raised-thread character | Event jacket, band merchandise, graphic apparel |
| PVC | Molded details and a wipeable badge surface | More bulk and a different feel than a fabric patch | Gear bag, compatible tactical panel, structured cap |
| Chenille | Large varsity letters and soft pile texture | Not a practical substitute for tiny lettering | Wool letterman body, heavyweight school sweatshirt |
| Leather or faux leather | Simple marks where the material itself carries the look | Fine detail, cleaning, and heat tolerance depend on the material and decoration | Canvas cap, denim jacket, heavy tote |
Compare embroidered patches with woven when texture matters more than maximum detail. Consider printed patches for a skyline illustration with gradients rather than asking thread to imitate every tonal change. For big school letters, chenille patches belong in the conversation before anyone starts shrinking varsity artwork.
For rescue, fire, and public-safety units, material selection also has to follow the uniform program. PVC patches may suit a removable gear badge, but a fabric uniform shirt may call for something else. A custom patch is not evidence that a garment meets a protective-clothing standard, and required markings should not be changed casually.
Size custom woven patches for Chicago garments, not the screen
Finished width and height should be written in inches, including the border. Do not send only a diagonal measurement or ask for a standard cap size. A shallow five-panel front, a tall trucker crown, and a knit beanie cuff have different usable areas.
The dimensions below are starting points for paper templates, not production limits or fit guarantees. Cut the outline from paper, place it on the smallest garment in the run, and take a straight-on photo. You will catch a crowded pocket or an overwide cap badge faster that way than by debating a flat logo file.
- Five-panel or trucker cap: test roughly 2.25–3 inches wide and 1–1.75 inches high, then check crown shape, panel seams, and the attachment equipment.
- Overshirt or chore-coat chest: test roughly 2.5–3.5 inches wide. Keep the patch clear of the pocket opening unless the pattern intentionally integrates it.
- Sleeve badge: test roughly 2–3 inches wide, with enough space for the sewing foot and a placement that does not wrap awkwardly around a narrow sleeve.
- Beanie cuff: test roughly 1.5–2.5 inches wide on the cuff as worn. A patch that looks fine on relaxed rib knit may pull when the hat stretches.
- Heavy tote or jacket panel: test roughly 3–4 inches wide for a compact brand mark, but inspect the inside before choosing a sewing location.
The smallest size can decide the whole run
A unisex jacket program may have plenty of room on an XL and a cramped chest on an XS. Youth apparel creates the same problem sooner. One shared patch size simplifies inventory, but separate adult and youth versions may give you better proportions.
On hat patches, width is only half the question because crown curvature changes how the patch sits. The Custom Patch Size Guide is useful for planning, but the actual blank garment is the final check. Ask the decorator about access before approving a patch that crosses a center seam.
Prepare artwork that stays readable at finished size
Woven construction can handle detail well, but it cannot rescue every miniature logo. Fine script, tight counters inside letters, and light gray text against a white field can lose definition. Open the file at actual finished size rather than judging it at 800% zoom.
A common brand layout has a large name, a small founding date, a location line, and a thin decorative frame. At a compact cap size, all four elements compete for the same space. Keep the brand name, enlarge the essential secondary line, and consider moving the rest to a hangtag.
Send the best original file, then identify what cannot change
Vector artwork is helpful because its shapes can be resized and inspected without pixel blur. A clear PNG or JPG can still support a quote, but a screenshot of a screenshot makes small details harder to interpret. The Artwork File Guide for Custom Patches explains what to gather before sending the brief.
- Supply the exact wording in plain text as well as in the logo file. This helps catch a missing period, an old founding year, or a misspelled neighborhood name.
- Identify required colors with established references if available. Screen colors alone are not a physical thread match.
- Mark essential fine details and details that may be simplified. Do not leave the production team guessing which tiny line carries brand meaning.
- State the smallest finished patch size you plan to order. Artwork reviewed for a 4-inch badge should not be assumed to work unchanged at 2 inches.
- Ask for a separate review if you want several colorways. A dark-on-light design can behave differently after the colors are reversed.
Avoid a universal minimum-letter-height promise. Readability depends on the typeface, thread contrast, neighboring details, and final construction. A digital mockup helps confirm layout and specifications, but a physical sample is the better check for thread feel and critical color decisions; ask about its cost and schedule if you need one.
Match the border and backing to the garment
The border is part of the design, not just the last operation. A merrowed edge gives a rounded, wrapped outline that works well on many straightforward shapes. It also takes visual space, which matters when your lettering already sits close to the edge.
A cut edge can keep the outline less bulky and may better suit certain custom shapes. Narrow points and deep inside corners still need a production review. Compare the options in Merrowed vs. Hot-Cut vs. Laser-Cut Borders rather than specifying a complicated silhouette without an edge plan.
Sew-on for permanent apparel branding
Sew-on is often the practical starting point for work shirts, denim, canvas, and brand apparel that will be washed repeatedly. It avoids relying solely on a heat-activated adhesive bond. The installer still needs to choose a suitable needle, thread, stitch placement, and support so the garment does not pucker.
Iron-on only after checking fabric and application conditions
Iron-on that peels after a dryer cycle often traces back to incompatible fabric, inadequate bonding, uneven pressure, or care outside the adhesive's limits. Nylon shells, water-repellent coatings, stretch blends, and heat-sensitive trims deserve particular caution. Do not borrow heat settings from a different patch or assume a household iron behaves like a controlled press.
Hook-and-loop for a badge that needs to come off
Hook-and-loop backing makes sense for interchangeable identifiers and existing Velcro panels. Specify which side belongs on the patch and whether you also need a matching loop piece for the garment. It adds thickness, and exposed hook can snag knits if the patch is removed and stored carelessly.
The Patch Backing Options Explained guide helps compare attachment methods, but include the exact garment in the quote. A fleece vest, lined wool jacket, and coated nylon shell should not receive the same recommendation by default. Sewing through a weather-resistant shell can also affect its barrier, so involve the garment supplier before making permanent changes.
Build a patch system across your clothing line
A useful brand system does not force one badge onto every blank. Keep the recognizable elements consistent, then adjust the layout for placement. The cap version may carry only the wordmark, while the jacket version has enough room for a crest and location line.
This is especially useful for a small Chicago collection built around tees, caps, and outerwear. One compact woven design may cover the cap and canvas overshirt, while the tee needs a smaller, softer solution. Fewer versions can simplify purchasing, but the wrong shared size can make every garment look compromised.
School, hospitality, and club runs have different priorities
For high-school sports teams, check youth sizing, approved school colors, and how the patch relates to existing letterman awards. On wool coaches jackets and letterman bodies, a flat woven badge can carry detailed secondary information while the main varsity letter remains chenille. The Chicago guide to custom embroidered patches for schools is a useful comparison if the athletic department expects a raised crest.
Hospitality polos bring a different issue: stretch and repeated laundering. A dense patch can pull the chest out of shape if installation is not tested on the actual knit. For biker vests, check the complete placement plan before adding a badge near existing rockers, pockets, or club identifiers; biker and motorcycle club patches often require coordinated sizing across the set.
Keep a specification sheet for each approved version. Record width, height, border, colors, backing, placement, and the artwork revision. That sheet gives your decorator and purchasing team a common reference when the next batch includes a different jacket supplier or an additional cap color.
What drives woven patch pricing in dollars
A meaningful price needs more than a logo and the word bulk. Finished dimensions, quantity, design complexity, edge construction, backing, and the number of versions all influence the quote. Sampling, packaging, attachment, shipping, and any applicable taxes should be identified rather than hidden inside an unexplained total.
GetUSAPatches has a 10-piece minimum. That makes a small run possible, but it does not mean a 10-piece order carries the same per-piece price as a larger batch. If you need two designs or several colorways, ask how minimums and pricing apply to those variations before dividing the quantity.
- Ask for quantity breaks that match a real sales plan, such as 25, 50, and 100 pieces, rather than requesting the lowest possible unit price without an inventory plan.
- Quote every option against the same finished dimensions. A smaller patch can appear less expensive simply because you are comparing different products.
- Separate patch supply from garment attachment. Sewing 50 patches onto lined jackets is not the same job as sewing them onto unlined tote panels.
- Include freight to your actual Chicago-area ZIP code and clarify the shipment contents. Loose patches and finished garments create different handling requirements.
- Ask what changes the price after approval. A new backing, a larger size, or another artwork version can require a revised quote.
Here is budget math, not a GetUSAPatches price offer: if 50 patches cost $150 and freight is $20, the delivered patch cost is $3.40 each before any applicable tax. If your separate decorator charges $2 per garment for attachment, the patch-related cost becomes $5.40 per finished garment. That distinction matters when setting a wholesale price.
Use How Much Do Custom Patches Cost? to organize the variables before comparing suppliers. A lower patch-only quote can become the higher finished-garment cost if it requires extra handling or a more difficult attachment method. Compare the same deliverable, not just the first dollar figure.
Ordering and lead times for Chicago delivery
GetUSAPatches ships nationwide from Corona, CA, including Chicago and all 50 states. A Chicago-focused order does not mean local pickup or production around the corner. Put the destination ZIP code and required arrival date in the brief so production and shipping can be planned separately.
Do not build a launch around an assumed universal turnaround. Artwork revisions, sampling requests, construction, quantity, and the current production schedule can change the timing. Ask for an order-specific schedule, including the point at which the production clock starts.
The order sequence should be clear before approval
- Send artwork, finished dimensions in inches, quantity, garment details, backing preference, destination ZIP code, and the required arrival date.
- Review the quote for construction, variations, included services, freight, and the expected schedule. Resolve unclear items before approving artwork.
- Review the free digital mockup against your paper template and written specification. Check spelling, colors, border, orientation, width, height, and backing notes.
- Request revisions or ask about a physical sample if the project needs a tactile or color check. Confirm any added cost and time before proceeding.
- Approve the final specification. GetUSAPatches produces only after approval, so an unresolved design question should not be treated as a production-ready order.
- Allow for shipping, receiving inspection, garment attachment, and your own packing work before the retail launch or event.
Work backward from the date the finished garments must be ready, not just the day loose patches should arrive. If a Chicago screen printer or sewing contractor needs several working days after receipt, that time belongs in the schedule. Leave room for receiving and correction rather than sending a box straight from the carrier into event kits.
Keep approval with one responsible person. A designer approving the artwork while a buyer changes the backing in another email creates avoidable confusion. Use one final written specification, and state who can authorize changes after the mockup is issued.
Attach one test patch before decorating the full run
A good loose patch can still be installed badly. The first attachment should be a test on the actual blank, preferably one you can inspect and wash before committing the batch. Look for puckering, a lifted corner, distorted lettering, or a stiff spot that changes how the garment hangs.
For lined jackets, check access from the inside. Sewing straight through the outer shell and lining may catch an interior pocket or make a visible stitch line where you did not intend one. On caps, the crown shape and equipment access should be checked before the decorator receives the whole box.
Use an attachment method the fabric can support
- Confirm the patch construction and the garment care label. If heat limits or coatings are unclear, ask the suppliers rather than guessing.
- Mark placement from a repeatable reference, such as a seam or pocket edge. Record the measurement so the second garment matches the first.
- For sew-on work, have the installer select the needle, thread, support, and stitch path for the fabric and border. Do not sew a chest pocket shut accidentally.
- For iron-on work, follow the supplied adhesive instructions and use compatible equipment. Avoid applying a generic temperature, pressure, or dwell time to every patch.
- Inspect the cooled or finished attachment from both sides. Wear or stretch the garment as intended, then carry out a care test before repeating the process.
The How to Sew On a Patch guide covers basic sewn attachment, and How to Iron On a Patch the Right Way covers heat-application checks. Neither replaces instructions supplied for the actual patch and garment. A sturdy canvas jacket and a thin polyester shell do not tolerate the same treatment.
Inspect, wash, and reorder without losing consistency
Count the shipment before it moves to the sewing table. Compare the patches with the approved artwork and written dimensions, then inspect edge finish, backing, and obvious production variation. If something is wrong, photograph it clearly and contact the supplier before attachment turns a patch issue into a garment issue.
Care instructions must satisfy both the garment and the patch system. A fabric patch does not make its adhesive safe for high dryer heat, and a washable shell does not tell you how a newly added backing will behave. Follow the relevant supplier instructions and test the intended care routine on a decorated sample.
- Check edge lift and loose attachment stitches after the care test, not just color appearance.
- For removable patches, separate and secure hook surfaces as directed so they do not catch on knits or other garments.
- Avoid direct high heat on the patch unless the material and adhesive instructions permit it.
- Keep a retained approved patch and, if possible, a finished garment sample for comparison with future runs.
- Record any changes to the blank garment. A new fiber blend, coating, or lining can require a fresh attachment test even when the patch is unchanged.
The patch washing and care guide is a helpful reference for building customer instructions. Do not promise that every patch material can share one laundry routine. For resale apparel, the instructions should reflect the assembled product rather than the original blank alone.
On a reorder, reference the approved specification instead of writing same as last time. Confirm dimensions, colors, backing, border, quantity, and whether the garment has changed. Thread batches and screen displays are not identical reference systems, so discuss physical color expectations if consistency across collections is critical.
Useful guides for the next decision
The next useful resource depends on what remains unresolved. If the garment is selected but the order brief is not, use an ordering guide. If the artwork could go woven or embroidered, compare the finished surface and lettering at the same actual size before choosing.
- Los Angeles Apparel Startups: How to Order Custom Woven Patches Online covers the online-ordering side for apparel brands; the preparation questions also apply to Chicago orders.
- What Are the Best Custom Embroidered Patches for Schools in Chicago? is useful for school and team buyers comparing woven detail with embroidered texture.
- How Much Do Custom Woven Patches Cost in New York? Prices and Minimums offers another planning reference for woven orders; your actual quote still depends on specifications and destination.
Use the woven patches and embroidered patches hubs to keep the material comparison focused. The best specification is the one your designer, buyer, and garment decorator can all read the same way. Clear dimensions and a tested attachment plan do more for the finished collection than an extra line of tiny text.


