
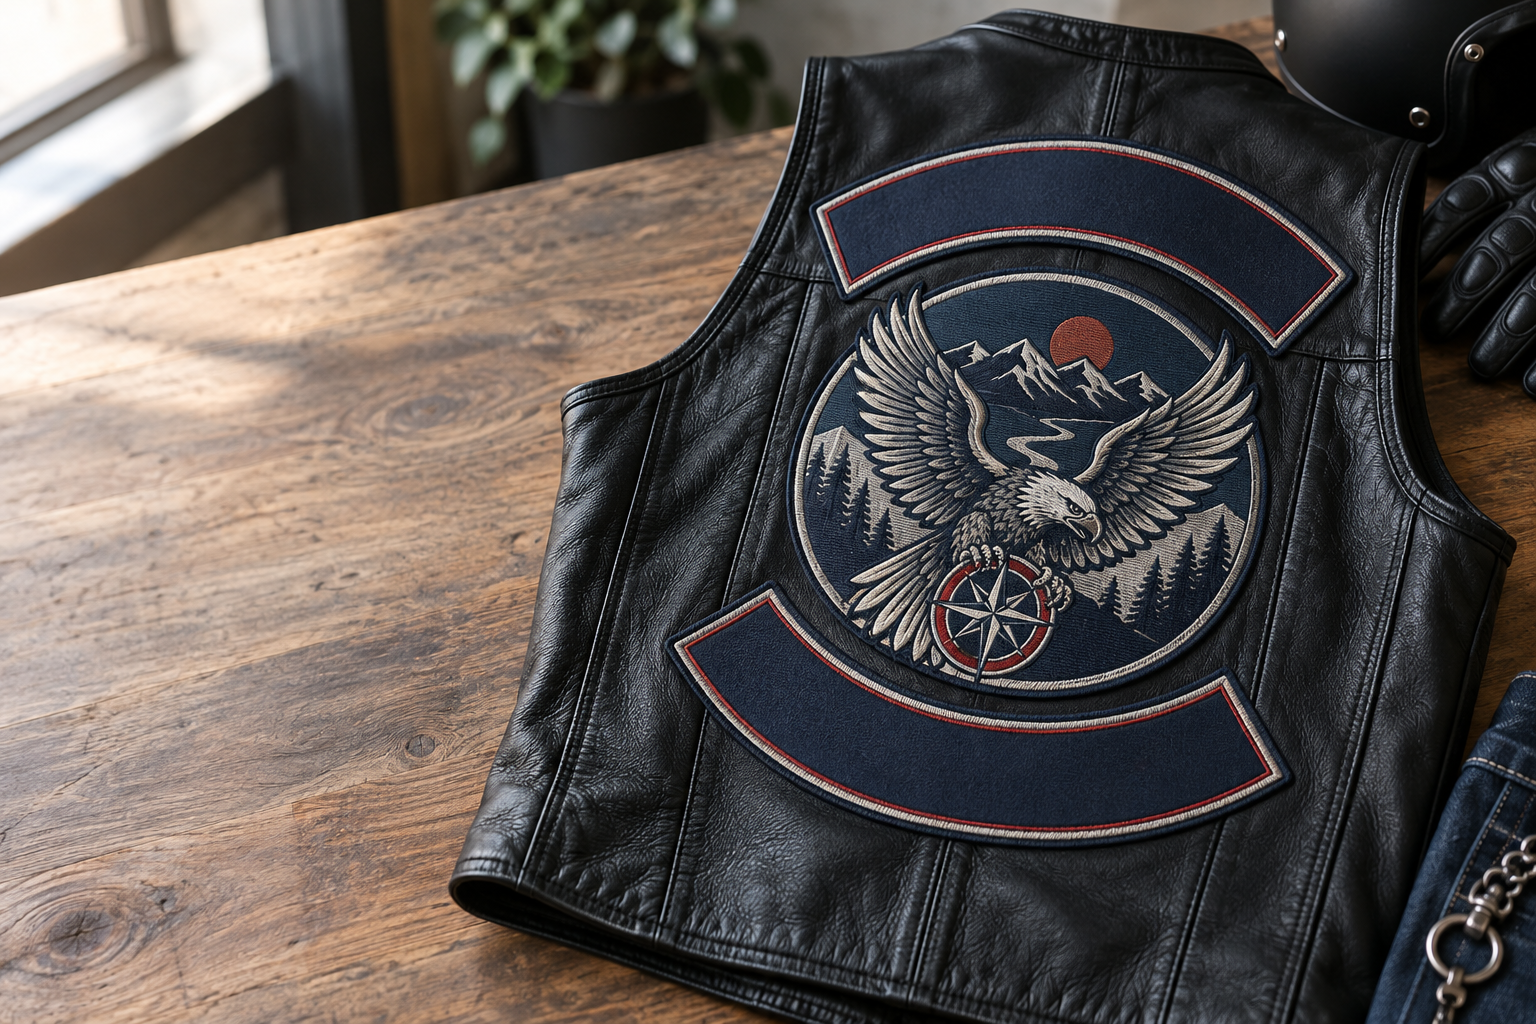
GetUSAPatches makes the custom biker patches Houston clubs order with a 10-piece minimum, a free digital mockup before production, and shipping from Corona, CA. We produce only after approval and ship to all 50 states. For Houston delivery, expect to confirm your patch dimensions, garment, backing, quantities, and required arrival date before the production schedule is settled.
The biggest ordering mistake is choosing a back-patch size from a screen instead of from the vest. A design can look balanced in a proof and still run into a shoulder seam, cover a pocket, or leave no room for the lower rocker. Start with the garment, then build the patch specification around it.
Custom Biker Patches Houston Clubs Can Order: What the Quote Should Cover
A useful quote identifies exactly what is being made, not just a price beside the word patches. It should distinguish a single-piece back design from a center emblem with separate rockers, and it should list finished dimensions in inches. The material, edge treatment, backing, and quantity belong on that same specification.
Shipping to Houston is a delivery destination, not a claim that the order is produced at a Houston shop. GetUSAPatches ships from Corona, CA, and serves customers throughout the United States. Ask for any manufacturing-origin requirement to be addressed explicitly rather than treating a U.S. shipping address as proof of where every component was made.
- Identify each physical piece: center emblem, top rocker, bottom rocker, chest name, officer tab, or event patch.
- List the finished width and height for each piece, plus the full layout dimensions if several patches will be worn together.
- State whether the order is for loose patches or includes any separately quoted application service; do not assume garment sewing is included.
- Give the delivery ZIP code and required in-hand date, not only the date of the ride.
- Ask how different names, sizes, or artwork versions affect the minimum and pricing before combining them into a quantity total.
Our biker and motorcycle club patches hub is the right starting point for the overall format. A three-piece layout may be visually familiar, but it means three separate pieces per complete set. Twelve complete sets would contain 36 patches, and that distinction matters for quoting, packing, and installation.
Measure the Vest Before Choosing the Patch Size
Lay the vest flat without stretching it, then measure the usable panel between seams and hardware. A medium leather vest and a medium denim vest can have very different back panels, so the size label is not enough. If the group wears mixed garments, check more than one sample.
Paper templates catch expensive mistakes early. Cut the proposed shapes at actual size, hold them against the vest, and photograph the arrangement from straight behind. Check the smallest vest in the group first; a layout that fits the largest member may not transfer to everyone else.
Starting dimensions are examples, not fit guarantees
- A chest name strip might start around 3.5 inches wide by 1 inch high, then change to accommodate the name and the pocket below it.
- A small event or memorial patch might start around 3 to 4 inches across, depending on its shape and lettering.
- A center back emblem might be explored at 9 to 11 inches wide, but the actual vest panel decides the final dimension.
- Separate rockers need their own width, height, and curve specification; the center emblem width alone does not describe the complete arrangement.
- A shared design for a vest and a cap usually needs separate size-specific artwork rather than one file reduced without review.
Put the vest on and sit in a riding position with the paper layout held in place. Watch for the bottom edge folding into the seat area or a large stiff patch bridging a panel that needs to flex. Leave enough access for a sewing machine or leather specialist to work around the perimeter.
For a deeper measurement check, use the Custom Patch Size Guide. The same logo on hat patches may need fewer words, wider gaps, and a different shape to sit properly on a curved cap front. Approve those adaptations separately.
Make the Artwork Read at Its Actual Wearing Size
Thread has physical width, and closely packed details can merge when a drawing becomes embroidery. Thin outlines, tiny counters inside letters, and tightly spaced dates are common trouble spots. A bold club name usually survives production better than several lines of narrow lettering squeezed into the same space.
That is a familiar quote-desk problem across high-school sports teams, fire and public-safety units, hospitality polos, and biker vests. A mascot that reads on a letterman jacket does not automatically read on a 3-inch sleeve crest. The artwork has to suit the finished size, not just the original logo file.
Resolve wording and rocker geometry before approval
Send exact capitalization, punctuation, dates, and place names as typed text along with the artwork. Curved lettering needs to follow the rocker without crowding its ends, and separate top and bottom rockers need room around the center emblem. A full-layout drawing is useful, but each physical patch still needs its own dimensions.
Club officers should settle who can approve names, insignia, and the final arrangement before the order moves forward. Do not copy another club's identity or treat a manufacturer proof as permission to use someone else's mark. The proof verifies the proposed product; your organization controls its own artwork authorization.
- Send a vector file if available, or the largest clear image you have; a small screenshot may require reconstruction.
- Identify mandatory details and optional details so simplification does not remove a meaningful symbol.
- Use strong contrast between lettering and its background, especially for names intended to be read from several feet away.
- Review a printout at 100% size rather than judging every letter from an enlarged phone screen.
- Treat screen colors as references, not physical thread samples; ask how a critical color will be specified.
Compare Embroidered, Woven, Printed, and PVC Biker Patches
For a traditional vest patch with bold lettering and visible thread, embroidered patches are a sensible first option. They give the design texture and a recognizable stitched surface. Large filled areas also add weight and stiffness, which matters when the patch covers much of a flexible vest panel.
Use woven patches when the design depends on finer lines and smaller lettering than conventional embroidery can comfortably reproduce. Choose printed patches for gradients, photographic artwork, or illustrations whose character depends on shading. Printed is flatter; that is the point, not a defect to disguise.
| Construction | Best starting use | Main trade-off | What to confirm |
|---|---|---|---|
| Embroidered | Bold club emblems, rockers, chest names, and traditional vest patches | Visible thread texture; dense stitching can make a large patch stiffer and can close up tiny details | Letter clarity, stitched coverage, edge type, and finished dimensions |
| Woven | Detailed crests, smaller lettering, and compact membership patches | A flatter textile surface with less raised thread texture than embroidery | Small text at actual size, color separation, edge finish, and backing |
| Printed | Memorial portraits, shaded illustrations, and multicolor event graphics | Preserves tonal artwork but does not reproduce the feel of raised embroidered fill | Print method, substrate, care instructions, color expectations, and edge treatment |
| PVC | Removable gear patches and designs intended for a molded surface | Can suit wet or dirty conditions, but weight, thickness, and attachment still need planning | Molded detail, thickness, sewing channel if needed, and hook-and-loop configuration |
PVC patches can make sense on compatible removable gear panels, but the patch does not make the underlying garment waterproof. 3D embroidered patches suit selected bold shapes and lettering; they are not a general fix for tiny details. A back emblem with fine linework may be better served by ordinary embroidery with revised art.
Chenille belongs naturally on many letterman jackets, but its raised looped surface deserves extra thought on gear that rubs against straps. Leather patches create a different finish again and need material-specific care. For a side-by-side decision beyond biker gear, see Embroidered vs. Woven vs. PVC Patches.
Choose the Backing and Border for the Actual Garment
For a permanent patch on a leather or denim vest, sew-on is generally the practical starting point. Stitching gives a mechanical attachment rather than relying only on adhesive. Leather needs particular care because needle holes remain after a patch is removed or repositioned.
Iron-on is not a universal shortcut. Coated leather, nylon shells, and temperature-sensitive fabrics may not tolerate the heat and pressure required, and household irons can apply heat unevenly. Iron-on that peels after a dryer cycle often points back to incompatible fabric, incomplete application, or care conditions the adhesive was not intended to handle.
Hook-and-loop needs two compatible sides
For Velcro panels, specify whether you need hook on the patch, a separate loop panel for the garment, or both. A patch with hook backing will not attach securely to plain denim just because it is described as removable. Check the panel dimensions too; exposed hook edges can catch adjacent fabric.
- Leather vest: start with sew-on and discuss installation with someone equipped to sew that leather and lining.
- Denim vest: sew-on is a strong starting choice; evaluate iron-on only against the garment label and patch instructions.
- Nylon riding shell: get garment-specific guidance before applying heat or making needle holes in a protective or weather-resistant layer.
- Existing loop panel: match the patch size to the panel and specify the correct hook backing.
- Wool coaches' jackets and letterman jackets: check the wool blend, lining, and care label before choosing attachment.
Merrowed crests have a wrapped, raised border that works well on many simple shapes. Tight inside corners and intricate outlines may call for a different edge treatment, subject to the material and design. Compare the full attachment options in Patch Backing Options Explained, and make sure the written specification names both backing and border.
Understand the Price Before Comparing Quotes
There is no responsible flat price for every Houston biker patch order. Size, construction, stitched coverage, edge work, backing, quantity, and the number of distinct designs can all change the quote. A small chest strip and a large filled back emblem are different production jobs even if both use the same two colors.
Compare the cost of a complete wearable set, not just the cheapest individual line item. If one quote covers a center emblem and another covers the emblem plus two rockers, their unit prices are not directly comparable. Separate installation, shipping, taxes, and any applicable setup or expedited charges so the delivered total is understandable.
Use cost-per-set math
As a hypothetical calculation, a $480 patch order for 20 complete sets works out to $24 per set before any excluded charges. If separately quoted sewing adds $12 per set, that planning total becomes $36 per installed set. Those numbers illustrate the calculation only; they are not GetUSAPatches prices or a shipping estimate.
- Ask for quantities that reflect real demand, such as the current roster plus a modest replacement allowance.
- Identify personalized names or officer tabs separately; changing text may change how the run is priced.
- Keep the same material, size, backing, border, and shipping assumptions when comparing suppliers.
- Ask which charges are included in the total and which remain estimates.
- Do not assume the 10-piece minimum permits ten unrelated designs or ten separate personalized versions without confirmation.
GetUSAPatches has a 10-piece minimum, which is useful for smaller groups that do not need a large inventory. The sensible saving is usually a well-planned specification that avoids remaking the order, not removing the backing or detail the garment actually needs. See How Much Do Custom Patches Cost? for the main price drivers.
Ordering, Approval, and Lead Time: Work Backward From the Ride
Give the required arrival date at the first quote request. A Saturday event may require patches in hand the previous week if a sewing shop needs several days to install them. Delivery on Friday afternoon is not much help if 25 vests still need three pieces attached apiece.
Separate artwork review, approval, production, carrier transit, and local installation into distinct stages. GetUSAPatches provides a free digital mockup before production and produces only after approval. Time spent collecting committee feedback or changing rocker wording is therefore part of your planning window, not production time already underway.
- Send the artwork, exact wording, finished dimensions, quantities, garment details, backing preference, Houston ZIP code, and required in-hand date.
- Review the quote for each distinct piece, included charges, shipping assumptions, and the schedule available for that specification.
- Check the free digital mockup at actual size and compare it against the vest measurements and approved club wording.
- Collect revisions through one designated contact so the latest instructions do not conflict with an earlier message.
- Approve the final artwork and written specifications only after size, backing, quantity, and schedule are settled.
- Allow the quoted production and transit windows, then leave time for receiving inspection and installation before the event.
What a digital mockup does and does not verify
A digital mockup lets you check the intended layout, wording, color placement, and specified dimensions. It does not let you feel stiffness, test an adhesive, or establish an exact physical thread color from your screen. If a physical sample or particular verification is essential, ask about availability, cost, and added time before assuming it is included.
There is no single honest delivery promise that fits every material, size, and approval date. Ask for the current production window and transit estimate for your actual order, then confirm what an expedited option would change if one is available. Faster shipping cannot recover days spent waiting for artwork approval.
Keep the approved proof and final specification together so a later reorder has a clear reference. The deadline planning guide for veteran riders covers the same backward-planning problem even though its destination example is Los Angeles. For Houston, use your own ZIP code and local installation schedule.
What Shipping From Corona, CA, Means for Houston Delivery
GetUSAPatches ships from Corona, CA, to Houston and all 50 states. The transit estimate depends on the shipping service, destination, dispatch date, and carrier conditions. Do not turn a general transit estimate into a guaranteed event arrival unless that commitment has been specifically confirmed.
Use an address where someone can reliably receive the package. A clubhouse that opens only one evening a week may be less practical than a staffed business address, particularly for an event-bound order. Include the suite number, receiving name, and any information needed to prevent an avoidable delivery problem.
- Confirm the complete delivery address before approval and flag any expected address change promptly.
- Ask which shipping service is included and how shipment or tracking details will be communicated.
- Tell the quote desk if delivery must reach an event venue, hotel, or temporary receiving location.
- Ask about split shipments before assuming one order can be divided among several members without additional handling or shipping cost.
- Keep a reasonable buffer for carrier delays and inspection instead of planning around the last possible delivery day.
Houston heat, humidity, and sudden rain also make package handling worth planning. Bring the shipment indoors after receipt, keep loose patches clean and dry, and avoid storing them in a hot vehicle while waiting for installation. Adhesive-backed items should be stored according to their supplied instructions, not treated like loose metal badges.
Install the Patches Without Creating a Garment Problem
Lay out every piece before the first stitch. A center emblem that looks straight on a table can sit crooked once the vest is worn, especially if the garment has asymmetric panels or an uneven hem. Check the arrangement on the wearer and verify the spacing between separate pieces.
Leather installation deserves the right equipment and experience. Sewing through the wrong layers can close a pocket, catch the lining awkwardly, or leave permanent holes after repositioning. For protective riding apparel, ask the garment manufacturer or a qualified repair specialist before altering panels that may have a protective function.
Match the application method to the garment
- For ordinary denim, confirm that the needle and thread suit the fabric and that the sewing path does not close a usable pocket.
- For leather, avoid casual pinning through visible areas; use an installer-approved positioning method.
- For lined jackets, decide whether the lining must be opened to reach the outer layer cleanly.
- For hook-and-loop, inspect the garment-side panel attachment as well as the patch-side grip.
- For iron-on, follow the supplied temperature, pressure, and cooling instructions only if the garment is compatible.
Our step-by-step sew-on guide is useful for planning an ordinary fabric installation. The iron-on guide explains why correct application matters, but it does not override a garment label that prohibits heat. Never assume an adhesive option makes sewing unnecessary on every riding garment.
Care is a combined garment-and-patch question. Follow the more restrictive applicable instructions, and get advice before washing leather or using high dryer heat. A removable patch may be easier to take off for cleaning, but the attached loop panel still has to survive the garment's care routine.
Inspect the Shipment Before Anyone Starts Sewing
Open the order early enough to compare it with the approved specification. Count each design separately, measure representative pieces, and check wording, backing, borders, and visible workmanship. A quick count of bags is not the same as checking that every complete set contains the correct rocker and center emblem.
Set one complete set on a representative vest before distributing the rest. This last layout check can catch a sorting mistake or a misunderstood arrangement while everything is still loose. If something appears inconsistent with the approval, photograph it clearly and contact the order team before sewing or altering the pieces.
- Compare spelling and dates against the final approved proof, not an earlier draft.
- Measure finished width and height without stretching the patch, and refer to any agreed dimensional tolerances.
- Verify that sew-on, iron-on, or hook backing matches the written order.
- Sort multi-piece sets on a clean surface and label any personalized pieces before handoff.
- Keep the order reference, approved artwork, dimensions, and color notes for replacements or future members.
For a reorder, send the previous order reference and state whether anything has changed. A new size, new title, or revised year is not necessarily an identical repeat. Ask how color consistency will be handled if new pieces need to sit beside older patches that have already weathered.
Three Practical Order Plans for Houston Groups
A small riding group with mixed leather and denim vests
Start with one shared sew-on emblem and measure the smallest usable back panel before settling the dimensions. Keep the artwork bold enough for the chosen size, and list personalized chest names separately rather than hiding them inside the emblem quantity. The 10-piece minimum provides a starting point, but mixed designs and personalization still need quote review.
An established club replacing a multi-piece set
Photograph the current arrangement with a ruler and provide each piece's dimensions, not just an overall back view. Count top rockers, center emblems, bottom rockers, and titles individually so the order matches the roster. Check old stitch lines before changing the outline, because a smaller replacement may expose previous needle holes or faded fabric.
A Houston charity ride with vests and event merchandise
Use the vest patch and the merchandise patch as related designs, not necessarily identical products. A portrait-based memorial patch may suit print, while a bold sponsor mark for caps may suit embroidery with simplified wording. Teams coordinating community artwork can also use 10 Embroidered Patch Ideas for Nonprofits in Houston as a planning reference.
Across all three plans, the reliable sequence stays the same: measure, specify, review, approve, produce, receive, and install. Material choice matters, but a complete quote brief usually prevents more problems than chasing a different patch style at the last minute. Settle the garment and deadline first, and the remaining decisions become much easier to check.


