
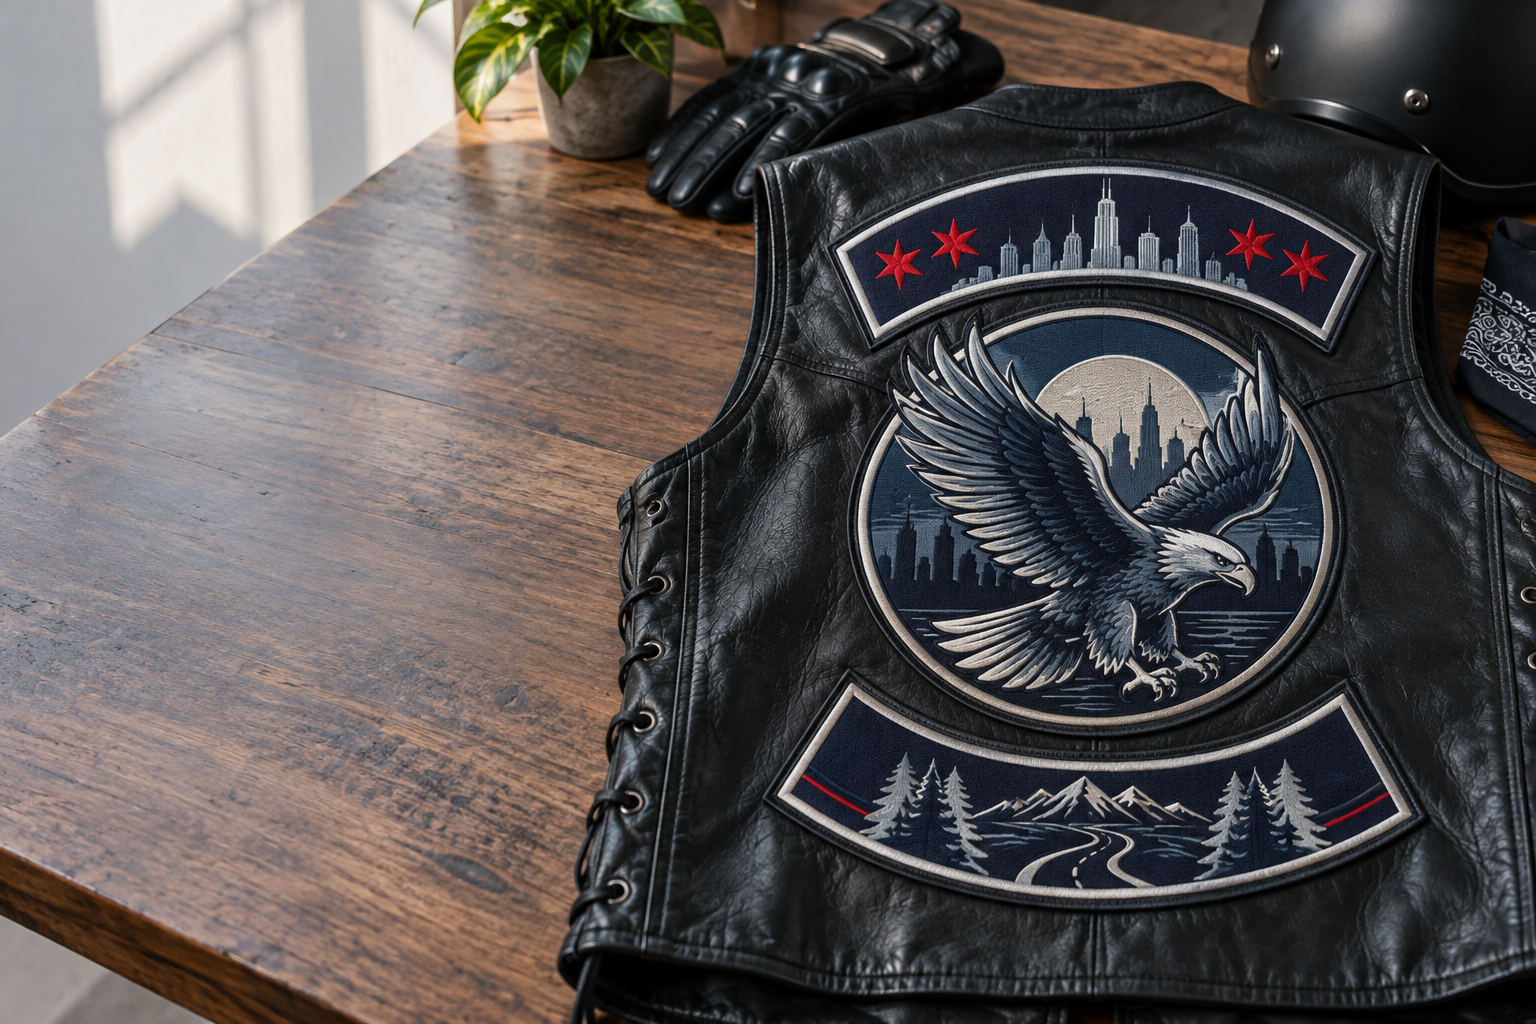
For most motorcycle clubs, sew-on embroidery is the best starting point for a permanent patch on a denim or leather vest. The right custom biker patches Chicago clubs order should have readable lettering, a shape that fits the vest, and a backing chosen for the garment—not just a good-looking logo on a screen.
GetUSAPatches has a 10-piece minimum and provides a free digital mockup before production. We produce only after approval and ship from Corona, CA, to all 50 states in the United States, including Illinois. For a useful quote, send the club artwork, approximate dimensions in inches, garment material, component quantities, and the date you need the patches in hand.
What Makes Custom Biker Patches for Chicago Clubs a Good Fit?
Best is a fit question before it is a material question. A large embroidered center emblem may be right for a heavy denim cut, while that same construction can feel stiff on a lightweight overshirt. A small rally patch with detailed skyline artwork may work better woven or printed, even if the club's main colors stay embroidered.
The first production-desk question is simple: what are we attaching this to? High-school sports jackets, fire and public-safety uniforms, hospitality polos, and biker vests all carry patches, but they do not behave alike. A backing that sits comfortably on a structured jacket can pull a thin polo out of shape or require heat a nylon shell cannot tolerate.
Separate club identity from event merchandise
Permanent club insignia deserves a repeatable specification. Record the finished size, thread colors, border, lettering, and placement so a replacement order does not drift. Event patches can be more flexible: a charity ride, anniversary run, or winter gathering might use a different shape or printed illustration without changing the established club set.
- For permanent vest colors, start with sew-on embroidery and check the layout on the smallest vest.
- For a detailed rally design, compare woven and printed construction at the actual finished dimensions.
- For interchangeable role tabs, consider hook-and-loop only if the garment has, or will receive, a matching loop panel.
- For supporter caps and merchandise, develop a separate size rather than shrinking a back patch until its lettering disappears.
Our biker and motorcycle club patches hub covers the product category, while this guide concentrates on the decisions behind a workable order. Chicago is the delivery destination, not a reason to prescribe one material for every rider. Garment construction, wear, storage, and installation matter more than a city name.
Compare Embroidered, Woven, Printed, and Other Patch Materials
Traditional club artwork often translates well into embroidered patches: strong outlines, a limited palette, and lettering with room around it. The raised thread gives the patch its familiar texture. It also imposes limits, especially where tiny lettering, narrow gaps, or several fine outlines compete for space.
A good quote should explain those limits before you approve the art. More embroidery coverage is not automatically better, and a heavier patch is not automatically more useful. An exposed twill background can keep a design readable without filling every square inch with stitches.
| Construction | Good motorcycle-club use | Main advantage | Trade-off to check |
|---|---|---|---|
| Embroidered | Center emblems, rockers, name strips, and bold event patches | Raised thread and strong visual separation suit traditional club lettering | Fine detail needs simplification; dense stitching can make a large patch less flexible |
| Woven | Small rally patches, detailed crests, and compact lettering | A flatter woven surface generally carries finer detail than conventional embroidery | Less raised texture; small text still needs an actual-size readability check |
| Printed | Photo-based memorial artwork, gradients, and multicolor ride graphics | Reproduces tonal transitions without turning every color area into stitched shapes | Flatter appearance; screen colors are not a physical color guarantee |
| PVC | Bold removable badges and patches for suitable loop panels | Molded relief and a surface that can be wiped clean | Added thickness and stiffness may be awkward for a large back layout |
| Leather or faux leather | Understated supporter merchandise, workwear, and cap branding | Material texture gives simple marks a different character from thread | Contrast, engraving detail, flexibility, and care depend on the selected material |
| Chenille | Club letterman jackets and large varsity-style letters | A raised yarn surface suits big, simple shapes | Not the first choice for small lettering, fine emblems, or frequent abrasion |
Choose detail or texture deliberately
Use woven patches when the design needs fine linework but should still look like a textile patch. Use printed patches when gradients, photographs, or many tonal changes are central to the artwork. Printed is flatter; that is the point. Trying to force the same image into embroidery can remove the feature the club wanted to preserve.
PVC patches make sense for certain removable badges, not as an automatic upgrade for a full vest back. Leather patches suit restrained branding, while chenille patches fit the letterman-jacket side of club merchandise. These are different tools, not a quality ladder with embroidery at one end and something supposedly premium at the other.
Raised lettering can also lead to questions about 3D embroidered patches. Broad letters may suit puff construction, but a narrow rocker containing small curved text is a different job. Keep the established club insignia legible first, then consider raised effects where the artwork has enough width and spacing.
Size the Center Emblem and Rockers on a Real Vest
A vest back is not a blank rectangle. Shoulder seams, an action back, side laces, lower adjustment tabs, and the taper toward the waist all reduce usable space. Measure the smallest garment in the run before choosing a shared patch size; the largest member's vest is a poor starting template.
For an initial paper test, you might compare a center emblem around 9 to 11 inches wide and rockers around 11 to 13 inches wide. Those are planning examples, not standard sizes or a promise of fit. A narrow vest, tall emblem, or unusual rocker curve can need a completely different layout.
Measure the whole arrangement, not just the pieces
Cut the shapes from paper and position them on the vest using a method that will not mark the material. Leave the intended gaps between the top rocker, emblem, and bottom rocker, then measure the entire arrangement. The space between patches counts toward the finished footprint even though it is not included in any individual patch dimension.
- Record overall width and height for every component, including its finished border.
- Check the full layout while someone wears the vest over the clothing normally worn underneath.
- Keep pockets usable and avoid placing a patch where installation would stitch a pocket shut.
- Check rocker curvature against the center emblem instead of approving each piece in isolation.
- Photograph the paper layout beside a ruler so everyone reviewing it is working from the same scale.
Front name strips and role tabs need their own measurement. A 4-inch-wide strip might fit one pocket area and run into a zipper or seam on another vest. Our Custom Patch Size Guide: How Big Should Your Patch Be? is useful for setting dimensions, and the Biker Vest Patches: Sizes, Styles and How to Design a Club Set guide looks at the layout as a complete set.
Do not resize one member's emblem casually after the main order is approved. Scaling artwork changes the lettering, border proportions, and stitch layout as well as the outside dimensions. If the club needs two vest-size groups, quote and approve both deliberately, then label the components clearly for distribution.
Specify Backing, Border, and Lettering Before Comparing Quotes
For a permanent patch on a leather or denim vest, sew-on is usually the practical starting specification. It does not depend on a heat adhesive staying bonded through flexing and garment care. Leather installation still needs care: needle holes remain, and a thick vest or lined panel may need a shop equipped for that garment.
Iron-on is not a universal shortcut. Heat can damage some leather finishes, coated fabrics, and nylon shells, and an iron-on patch that peels after a dryer cycle is an attachment failure, not necessarily a bad patch face. Follow the garment and backing instructions; if they conflict, choose a different attachment method rather than turning up the temperature.
Hook-and-loop needs a receiving surface
A hook-backed patch cannot attach securely to ordinary denim just because the backing is often called Velcro. It needs a compatible loop surface. If the vest already has Velcro panels, measure the usable panel and confirm whether the quote includes only the hook-backed patch or also a separate loop piece for installation.
The Patch Backing Options Explained: Sew-On, Iron-On, Velcro® & More guide breaks down attachment choices. For motorcycle apparel, also check the garment maker's restrictions before altering liners, armor pockets, or structural seams. Decorating a separate vest is a different job from modifying protective equipment.
Choose an edge the shape can support
Merrowed crests have a wrapped, raised edge that suits many straightforward shapes. Deep notches, tight inside curves, and pointed details may call for a cut edge with a stitched border instead. Ask which edge is actually quoted; two drawings can look similar while producing very different outlines.
Lettering needs enough stroke width and open space to survive the manufacturing process. Thin outlines around narrow letters can fill the gaps and make a club name harder to read. Review the design at actual size, simplify small secondary wording, and ask for feedback on any text that is close to the process limit.
The spec is ready to compare only after material, dimensions, border, backing, and quantities are written down. A lower quote for a smaller patch with a different edge is not a lower price for the same job. That distinction matters more than adding another decorative effect.
Prepare Club Artwork That Holds Up at Finished Size
A clear original file saves guesswork. Vector artwork is helpful for clean shapes and lettering, but it is not a substitute for embroidery digitizing or production review. A sharp PNG or JPG can still be useful; a screenshot of a screenshot with a blurred rocker usually leaves more questions than answers.
Send exact wording separately from the image. Include punctuation, initials, chapter text, and the spelling of every member name or office. The artwork may look familiar enough that a reviewer overlooks a missing letter, especially on curved text, so read the proof slowly rather than approving it from a phone notification.
Keep the main identity; simplify what will disappear
Consider a winged wheel with a small Chicago skyline behind it. At a large back-patch size, simplified building silhouettes may work in embroidery; on a small chest patch, those same windows and rooflines can become visual noise. The answer might be fewer details, a separate small-format logo, or a switch to woven construction.
Strong contrast usually helps more than extra colors. Dark lettering on a similarly dark background can look subtle on a monitor and unreadable across a parking lot. If the club wants a subdued set, approve that reduced contrast intentionally rather than expecting it to read like bright thread on black twill.
- Identify the features that cannot change, such as the club emblem, official wording, or a recognized color arrangement.
- Identify details that may be simplified, such as tiny shading lines, small feathers, or background textures.
- Provide an existing physical patch or clear reference photographs if the job must coordinate with earlier club sets.
- Keep a dated copy of the approved artwork and written specifications for later replacement orders.
- Ask what production evidence is available if exact texture or color is critical; a digital mockup is not a physical sample.
The Artwork File Guide for Custom Patches: Vector, PNG, JPG and More explains file preparation in more detail. A digital proof confirms layout and recorded choices, but it cannot show every thread reflection or guarantee a screen-to-thread color match. Set that expectation before a committee approves a shade from several different phones.
Handle Club Sets, Rockers, and Member Variations Carefully
A three-piece arrangement may carry meaning within a club and its riding community. Let the club decide its own format, wording, and use of chapter or territory text before manufacturing begins. A patch supplier can help build the design, but should not be treated as the authority granting permission to use another organization's identity.
Use artwork the club owns or is authorized to reproduce. A photograph found online is not a reliable production file or proof of permission. Memorial images, sponsor logos, and borrowed illustrations deserve the same check, even when the order is for a small nonprofit ride rather than merchandise for sale.
Count pieces and sets separately
Twenty riders needing a center emblem and two rockers require 60 physical pieces before you add name strips or officer tabs. GetUSAPatches has a 10-piece minimum, but that does not automatically establish how mixed designs, changing names, or complete sets qualify. List each component and ask for the minimum to be confirmed against the actual order.
Build a simple member sheet with one row per rider and columns for each item. Mark replacements, new members, and spare stock separately. Ordering a few generic spares may be useful, while extra personalized name strips can become unusable inventory; those two decisions should not be bundled together.
Give one person final approval authority. A treasurer may approve the price, a club officer may approve the insignia, and a member may handle the files, but production needs one final version. Collect everyone's corrections before sending a consolidated revision so an older rocker does not get paired with a newer center emblem.
Understand Pricing Without Comparing Different Jobs
Patch pricing depends on the selected process, finished dimensions, quantity, design complexity, backing, and other construction details. Large, densely embroidered back pieces are not priced like small rectangular name strips. For embroidery, stitch density and coverage affect the job; for other processes, different setup and material factors apply.
Ask for the total delivered cost in USD and a breakdown by component. Confirm how artwork setup, individual names, packaging, shipping, applicable taxes, and any requested sample are handled. A headline per-piece number tells you very little if the quote leaves out half the club set.
| Quote item | What to request in writing | Why it matters |
|---|---|---|
| Component count | Quantity for every emblem, rocker, name strip, and role tab | Prevents a set price from being confused with a single-patch price |
| Finished dimensions | Width and height in inches, including the border | Keeps competing quotes tied to the same physical size |
| Construction | Material, border style, and embroidery coverage where relevant | Makes texture and edge differences visible before price comparison |
| Backing | Sew-on, heat adhesive, hook backing, and any supplied loop material | Clarifies what is included and what still needs installation |
| Delivered total | All quoted charges in dollars and delivery to the actual ZIP code | Supports a realistic per-member budget |
| Schedule | Proof, approval, production, dispatch, and estimated arrival | Separates manufacturing time from transit and installation time |
Here is budget math, not a GetUSAPatches price quote: if a complete delivered order were $600 for 20 members, the patch-order share would be $30 per member. If installation were another hypothetical $15 each, the member's total would become $45. Keeping installation outside the patch figure until it is quoted avoids an unpleasant collection round later.
For a deeper cost breakdown, read How Much Do Custom Patches Cost? What Drives the Price. The useful difference between suppliers is not a claim that every construction is premium. It is a clear spec, readable artwork advice, an approval checkpoint, and a quote that identifies what will actually arrive.
Order for a Chicago Ride Date Without Guessing the Lead Time
Start with the date riders need finished vests, not merely the date a box should leave the shop. Work backward through installation, receipt and inspection, shipping, production, and artwork approval. A patch arriving the afternoon before departure may already be late if a leather shop still has to sew 20 sets.
GetUSAPatches ships from Corona, CA, to Chicago and all 50 states. That is a shipping-origin statement, not a promise of local Chicago pickup or a fixed transit time. Give the actual delivery ZIP code and ask for the current schedule tied to your construction, quantity, and approval date.
Use an approval sequence that everyone can follow
- Send the artwork, garment details, dimensions, quantity by component, delivery ZIP code, and required in-hand date.
- Review the quote for the exact construction, minimum quantities, included charges, and proposed schedule.
- Check the free digital mockup at actual size, including rocker curves, spelling, colors, border, and specified backing.
- Collect club corrections and submit one combined revision rather than several conflicting messages.
- Approve the final proof and specifications. GetUSAPatches produces only after approval.
- On arrival, count and inspect the patches before distributing them or arranging garment installation.
Ask what the schedule depends on and when it will be reconfirmed. Artwork revisions, changing member names, a different backing, or an increased quantity can affect planning. If the deadline is tight, ask which options are available rather than assuming that a rush request can remove every production and shipping constraint.
A digital mockup is included before production, but a physical preproduction sample is a separate question. If the club needs one, ask about availability, cost, and the effect on timing before approving the order. The Need Biker Patches by a Deadline? Tips for Los Angeles Veteran Riders guide covers deadline planning that also applies to Chicago deliveries.
Install the Patches Without Creating a Garment Problem
Inspect the shipment before sewing anything down. Count components, check the wording against the approved proof, and look at the dimensions and backing. If something appears wrong, photograph it and contact the supplier before installation changes the patch or garment.
For leather, use an installer who understands the vest construction and can reach the intended area without trapping a liner or closing a pocket. Test placement while the vest is worn. A center emblem that looks level on a hanger can sit differently once the shoulders and chest fill the garment.
Match installation to the garment, not the patch alone
Denim can be easier to sew than thick leather, but pockets, rivets, and heavy seams still need attention. Nylon shells may have coatings or heat limits, and wool coaches' jackets and letterman jackets may contain linings that complicate access. The same merrowed crest can require a different installation plan on each of those garments.
Use How to Sew On a Patch: A Step-by-Step Guide for general sewing preparation and How to Iron On a Patch the Right Way (and Make It Last) only when the garment and patch backing are compatible. Heat adhesive should not be treated as permission to iron leather, coated nylon, or an unknown fabric.
Care for the assembly according to the more restrictive requirements of the garment and patch. Avoid assuming that a washable patch makes a leather vest machine washable. Check stitching and edges periodically, remove debris from hook-and-loop surfaces, and let damp gear dry appropriately before storing it.
Keep Club Merchandise Consistent Without Forcing One Patch Everywhere
The back emblem can anchor the club's identity without being copied unchanged onto every product. Caps need a compact design that respects the front panel and crown curve. Hospitality-style supporter polos need a lighter, smaller treatment, while a heavy letterman jacket can carry a much more substantial patch.
For caps, start with the garment dimensions and the hat patches hub rather than shrinking a 12-inch rocker into a tiny strip. A simplified wheel mark or club initials may read better. Keep the approved colors and main visual cues, but give each application a layout that can actually be made and worn.
Useful guides for the next production decision
- Embroidered vs. Woven vs. PVC Patches: Which Should You Choose? helps compare thread texture, fine detail, and molded construction.
- Custom Patch Size Guide: How Big Should Your Patch Be? helps turn an available garment area into a finished patch measurement.
- How to Sew On a Patch: A Step-by-Step Guide covers installation preparation after the construction and placement are settled.
A dependable club order is usually straightforward: readable art, measured dimensions, compatible backing, and a single approved specification. Start there. The patch can still have plenty of character without making the installer, treasurer, or next year's ordering officer solve problems that should have been settled in the quote.


