
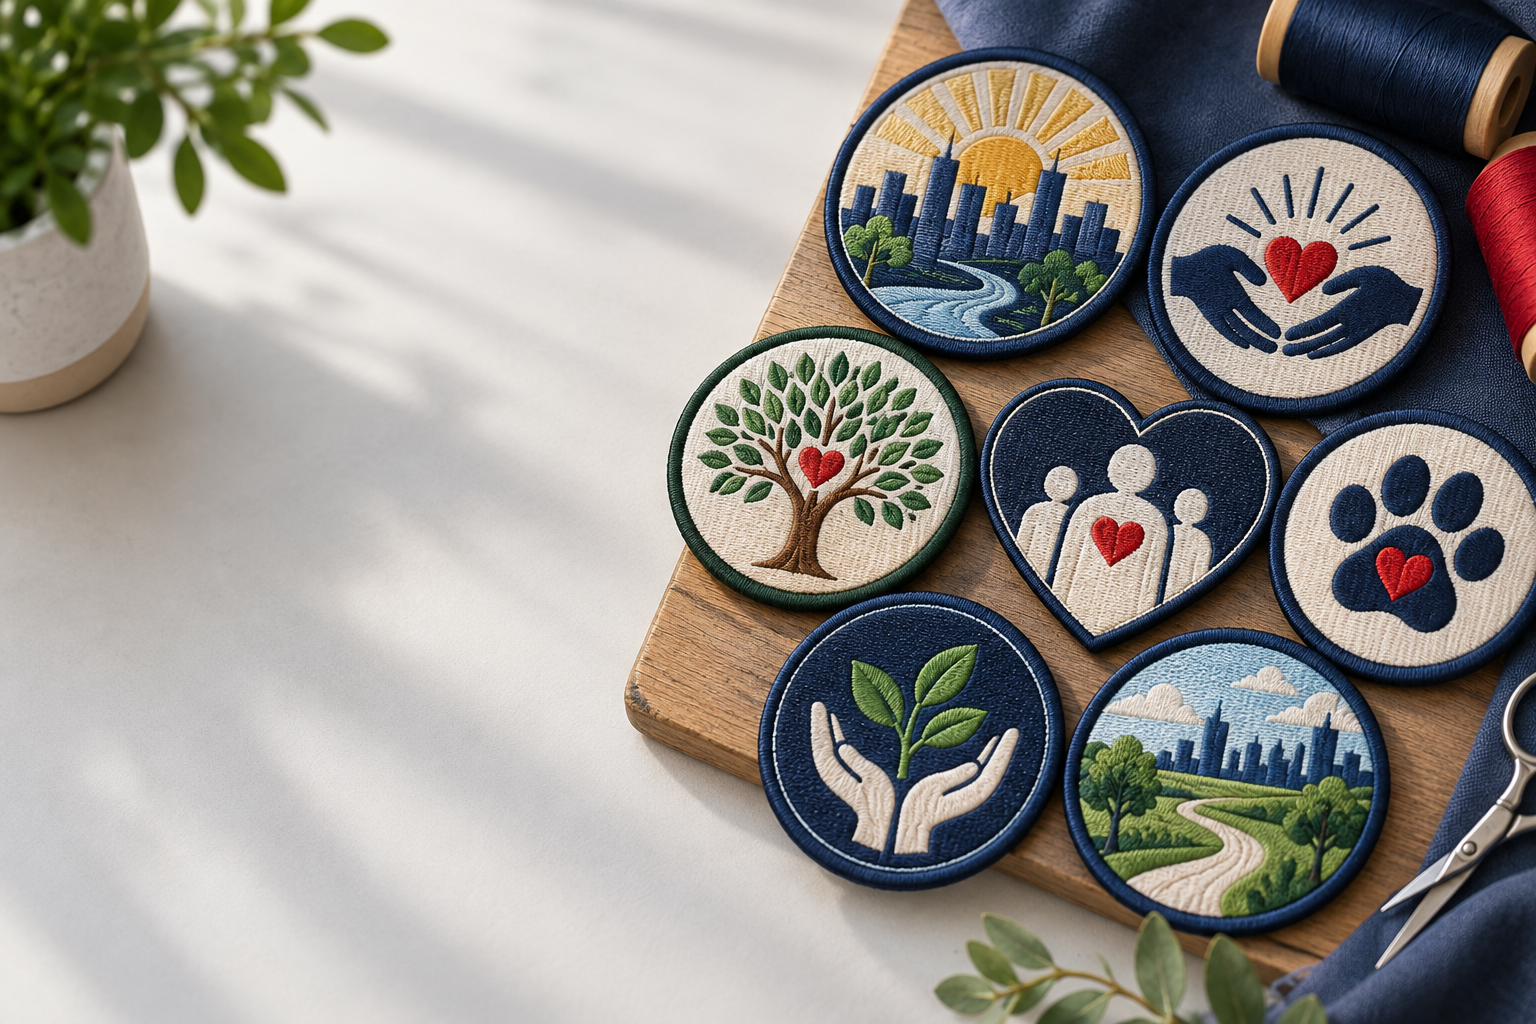
The most useful custom embroidered patches Houston nonprofits can order have a clear job: identify volunteers, recognize service, raise funds, or mark a community event. Ten workable ideas include volunteer crests, food-distribution crew patches, youth milestones, animal-rescue patches, cleanup badges, donor recognition, anniversary designs, literacy awards, fundraiser merchandise, and partner-team identifiers. Keep the message short and choose the backing for the garment, not just the patch artwork.
GetUSAPatches serves organizations across the United States with a 10-piece minimum and a free digital mockup before production. We produce only after approval and ship from Corona, CA, to all 50 states, including Texas. On a nonprofit quote, the first questions are practical: what are you putting this on, who needs to read it, and what date must it be ready to wear?
Five patch ideas for the people doing the work
Start with the program, not the outline of Texas. A recognizable symbol can help, but a volunteer checking in families needs a different patch from a supporter buying a souvenir at a benefit. These first five ideas prioritize people who will wear the patch repeatedly.
For most of these uses, standard embroidered patches provide visible thread texture and a familiar uniform appearance. They work best when the main symbol is bold and the wording can breathe. Treat the suggested dimensions below as starting points, not universal garment sizes.
1. A volunteer identity crest for recurring shifts
Use the nonprofit's name, one recognizable symbol, and a large VOLUNTEER line. A roughly 3-inch round or shield-shaped crest can suit a cotton-twill work shirt, canvas vest, or sturdy tote. If a volunteer needs to be recognized from several feet away, enlarge the role word instead of adding the mission statement.
For hospitality polos and lightweight performance shirts, a dense patch can pull the fabric or create a stiff spot on the chest. Try a smaller, lighter design and have the installer check the shirt before committing the whole run. A permanent sew-on crest also avoids asking each volunteer to manage a removable piece between weekly shifts.
2. A food-distribution crew patch
A box, a simple produce icon, or two supporting hands can identify a pantry or distribution crew without crowding the design. Put the program name across the top and a short role, such as CREW, across the bottom. A horizontal patch around 3.5 inches wide may fit an apron bib better than a tall shield.
Aprons get washed. Often. Specify the actual apron material and cleaning routine, then favor a securely sewn perimeter where the garment allows it. Keep the patch clear of pockets, ties, and fold lines; a beautiful crest placed across the top of a working pocket becomes an installation problem.
3. A youth-program milestone patch
Create a series for completed projects, attendance milestones, or leadership responsibilities rather than a different complicated logo for every activity. A 2.5-inch circle with the same border and a changing center icon gives participants a recognizable collection. Use words and symbols together so the distinction does not depend on color alone.
School backpacks and denim jackets usually offer more placement room than small polo sleeves. Check both before promising one size for everything. The same lesson applies to high-school sports teams and letterman jackets: a small achievement badge and a large jacket letter are separate products, even if they share the same program colors.
4. An animal-rescue foster or adoption-team patch
A clean paw, animal silhouette, or house outline can work well with FOSTER TEAM or ADOPTION CREW. Avoid combining several animal portraits with a long organization name in a 2-inch space. At that size, recognizable silhouettes usually hold up better than eyes, whiskers, and thin interior lines.
For volunteer vests, a 3-inch crest gives the design room without dominating the garment. A patch can identify the organization, but it should not imply an official credential or animal-handling qualification the wearer does not hold. Keep the role accurate and leave detailed instructions on training materials.
5. A bayou cleanup or neighborhood-service badge
Use a simple waterline, leaf, litter grabber, or neighborhood name to mark a Houston cleanup series. A reusable SERVICE CREW design is easier to reorder than a patch with a date that becomes obsolete after Saturday. Put the individual event date on a card or event shirt if the patch is meant to serve all year.
Outdoor work changes the material discussion. Embroidery has the familiar club-patch look, but thread can collect dirt and snag against rough surfaces. If crews repeatedly work around mud and wet gear, compare PVC patches for their wipe-clean surface; the attachment still needs to suit the garment.
Custom embroidered patches for Houston nonprofits: choose the specification first
Before choosing the remaining ideas, settle the basics that affect every design: finished dimensions, readable wording, stitch coverage, border, and backing. A screen proof can make a tiny crest look enormous. Print the proposed outline at actual size and place it on the garment before approving it.
A useful first pass is approximately 2 to 2.5 inches wide for a compact cap design, 3 inches for a simple crest, and 3.5 to 4 inches for a patch with more wording. Those are planning ranges, not promises that any logo will fit. Our Custom Patch Size Guide explains why available garment space matters as much as the artwork.
| Nonprofit use | Starting size | Suitable placement to evaluate | Backing to discuss | Main trade-off |
|---|---|---|---|---|
| Recurring volunteer identification | About 3 inches across | Canvas vest or cotton-twill work shirt | Sew-on | Clear permanent identity, but moving the patch means removing stitches. |
| Distribution crew role | About 3.5 inches wide | Apron bib with clear pocket space | Sew-on | A wide role word reads well, but a dense patch may stiffen a light apron. |
| Youth milestone series | About 2.5 inches across | Backpack or denim jacket | Sew-on or compatible iron-on | Easy to collect, but small badges cannot carry long achievement descriptions. |
| Supporter cap merchandise | About 2 to 2.5 inches wide | Cap front measured between usable boundaries | Attachment selected with the cap installer | Compact artwork suits caps, but curvature and center seams complicate attachment. |
| Rotating event assignment | About 3.5 by 2 inches | Vest with an existing loop panel | Hook backing matched to the panel | Roles can change, but the patch and panel must match in size and shape. |
| Anniversary keepsake | About 3 to 4 inches across | Jacket, bag, or display card | Plain sew-on or another specified backing | Extra room helps dates and names, but larger patches cost and weigh more. |
Lettering is usually the first thing to fail. Around 0.25 inch of letter height is a useful starting target for simple embroidered capitals, although the font, stitch plan, and surrounding detail can demand more room. That measurement describes the sewn letter, not the font size in a document; very small counters in letters such as A, B, and R can close up.
Coverage matters too. Leaving suitable background fabric exposed can reduce stitch density and preserve a lighter feel, while full embroidery creates a heavier thread surface. More stitching is not automatically better: a fully stitched patch on a thin performance polo can feel like a small board.
Merrowed crests have a wrapped border that suits many circles, ovals, and shields with uncomplicated edges. An intricate outline may need a different edge treatment rather than a thick wrapped border pushed around tight corners. Ask for the border to be identified on the specification so the finished silhouette is not a surprise.
If the approved logo depends on tiny wording, compare woven patches before enlarging every garment placement. If it depends on gradients or an illustration, compare printed patches. Printed is flatter; that is the point. It preserves image detail rather than trying to imitate raised thread.
Five more ideas for recognition, fundraising, and shared events
Recognition patches and fundraising patches have a different job from uniform identification. They need to mean something to the person receiving or buying them. A clear connection to the program usually matters more than adding another border color.
Separate long-running designs from date-specific designs while planning quantities. An evergreen supporter patch can remain useful after an event, but a dated anniversary patch becomes inventory tied to that occasion. That distinction should affect the order size before it affects the art.
6. A donor-circle or sustaining-supporter patch
A restrained emblem with COMMUNITY SUPPORTER or FOUNDING SUPPORTER can suit a canvas bag or casual jacket. Use recognition language the organization has actually approved. A patch should acknowledge participation without suggesting that a purchase automatically has a particular tax treatment.
Consider one central design with a separate presentation card explaining the recognition level. That avoids multiple nearly identical patch versions with small quantities. Metallic thread can add a different visual effect, but it may complicate fine lettering; compare the cost and readability rather than treating it as an automatic upgrade.
7. An anniversary patch for a Houston chapter
Make the anniversary number the main element, then place the organization name and verified founding year around it. A 3.5-inch circle often gives a short name and two dates more room than a narrow rectangle. Confirm the historical date before the committee signs off; a spelling check will not catch the wrong founding year.
A jacket version may deserve a different size from the cap version. Do not shrink a detailed commemorative crest and assume it will still read on a structured cap. For large varsity-style recognition on letterman jackets, chenille patches may fit the visual goal better, while embroidery remains useful for the smaller name and anniversary details.
8. A reading, tutoring, or mentoring achievement patch
Use an open book, a simple star, or a paired-figure symbol with a short milestone such as READING TEAM. Keep personal names off the shared design if the patch will be ordered for many participants. Individual recognition can go on the accompanying certificate without creating a separate production file for every student.
A consistent outline helps a series feel connected even as the center artwork changes. Limit each badge to one achievement, and make the distinction visible through wording or shape rather than thread color alone. Backpacks offer room to collect the series, but coated backpack fabric still needs an attachment check.
9. A fundraiser patch designed as merchandise
Design something a supporter would wear outside the event: a strong local symbol, a short phrase, and an identifiable organization mark. Skip the full sponsor list on a small patch. Sponsors can receive clear recognition on packaging or event materials instead of becoming unreadable lines at the bottom.
A loose patch gives buyers flexibility, but include accurate attachment guidance rather than calling every backing iron-on. A cap-and-patch bundle removes that decision for the buyer while adding cap sourcing and installation costs for the nonprofit. Compare placement requirements through the hat patches hub before pricing the bundle.
10. A shared-event partner or crew patch
For a joint neighborhood project, place a common event mark in the center and a clear CREW or PARTNER label beneath it. This works better than forcing six full partner logos into a 3-inch circle. Obtain permission for any organization marks and confirm which names belong on the shared artwork.
If assignments rotate, a rectangular hook-backed patch can work on existing Velcro panels. Confirm whether the order includes only the hook-backed patch or also a matching loop piece. For public-safety-adjacent volunteer work, keep the design visibly distinct from official agency credentials; a nonprofit crew patch is identification, not authorization.
Match the backing to Houston heat, laundry, and the actual garment
Houston heat does not automatically rule out iron-on backing, and an outdoor event does not automatically call for hook-and-loop. Application temperature, garment coatings, flexing, and the cleaning routine matter more than the city name. Start with the garment's care instructions and the patch's application requirements.
- Sew-on: A practical permanent choice for many denim jackets, canvas vests, twill shirts, and aprons. Stitching still needs appropriate tension and placement so it does not pucker the garment or close a pocket.
- Iron-on: Useful on compatible fabrics when applied with the specified heat, pressure, and dwell time. It is not a universal solution for nylon shells, waterproof finishes, stretch garments, or heat-sensitive materials.
- Hook-and-loop: Useful for changing roles or removing patches before laundering. The patch needs a compatible receiving surface, and an oversized patch can hang beyond the loop panel.
- Temporary adhesive: Better treated as a temporary placement option unless its exact intended use is confirmed. Do not assume a peel-and-stick backing is suitable for repeated uniform laundering.
An iron-on that peels after a dryer cycle may have had incomplete bonding, incompatible fabric, or a care mismatch. Do not solve that by blindly applying more heat. Test on a suitable sample, follow the supplied instructions, and consider perimeter stitching when the garment and use allow it.
Nylon shells need particular care because heat can damage the face fabric and needle holes can affect weather protection. On wool coaches' jackets and lined letterman jackets, an installer should check access to the outer layer rather than sewing through every layer by default. The attachment method that works on a biker vest is not automatically right for either garment.
Use Patch Backing Options Explained to compare the choices before the quote is finalized. For application, the sew-on guide and iron-on guide address different jobs. Keep care instructions with the finished volunteer kit so the backing decision survives the first wash.
Build a nonprofit budget around landed cost, not just patch price
A useful quote separates patch specifications from the other costs needed to put the order into service. Dimensions, quantity, stitch coverage, edge construction, backing, and design variations can all affect the total. Garments, attachment labor, packaging, shipping, and applicable taxes may sit outside the patch unit price.
GetUSAPatches has a 10-piece minimum. For a small volunteer group, that can support a practical initial run without planning a warehouse of stock. If you need several names, colorways, or backings, ask how the minimum applies to those versions rather than assuming ten different designs count as one ten-piece order.
- Count confirmed wearers first, then add a stated reserve for replacements and new volunteers. Keep event-sale inventory separate from uniform inventory.
- Quote one shared crest before dividing a small order into role-specific designs. Separate role labels may be useful, but they also create more items to manage.
- Ask for the complete delivered total and identify any costs paid to a local installer. A low patch price does not include labor unless the quote says it does.
- Compare a practical base quantity with a larger quantity only if you can use the extras. A lower unit cost does not help if dated patches remain unsold.
- For fundraising, calculate contribution after all direct costs and any selling fees. Do not describe the entire sales price as money available for programs.
For planning only, imagine 100 patches with an assumed all-in cost of $500. Selling all 100 at $10 each would produce $1,000 in gross sales and $500 before any other expenses; selling only 60 would produce $600 against the same $500 outlay. These are arithmetic examples, not GetUSAPatches prices or a forecast of demand.
The cheapest revision is often removing one unreadable line, not removing the backing the garment needs. Keep the function intact and simplify unnecessary detail first. For a fuller cost breakdown, use How Much Do Custom Patches Cost? What Drives the Price.
How to order and plan arrival before your Houston event
Give us the required arrival date, not only the date printed on the event flyer. If a Houston embroidery shop needs to sew patches onto 80 volunteer shirts after delivery, those shirts need their own installation window. Approval, production, transit, attachment, and distribution are separate steps.
Do not treat a general website estimate as a confirmed event schedule. Timing depends on the final specifications, quantity, revision cycle, current production availability, and shipping service. GetUSAPatches ships nationwide from Corona, CA; the delivery ZIP code is part of planning the route to Houston.
- Send the artwork and exact wording. Include a vector file if available, or the clearest PNG or JPG you have, plus any brand color references and permission needed for partner logos.
- Identify the garment and placement. State the fabric, finished patch width and height in inches, pocket or seam restrictions, and whether an existing loop panel must be matched.
- List quantities by version. Separate different designs, backings, and sizes so the quote reflects the actual order rather than a single combined number.
- Provide the delivery ZIP code and required arrival date. Mention installation, kit assembly, or advance distribution that must happen after delivery.
- Review the free digital mockup and written quote together. Check wording, dimensions, color choices, border, backing, and the stated quantity before approving.
- Assign one final approver. GetUSAPatches produces only after approval, so unresolved committee comments need to be settled before that approval is given.
- Confirm the schedule and receive the order. On arrival, check the count and specifications before sending the full batch for garment installation.
A digital mockup is a layout approval tool, not a physical sample or a guarantee of exact monitor-to-thread color. If a sponsor color or fine detail is critical, ask what physical sampling or color-reference options are available and how those affect cost and timing. Do that before authorizing the main run.
Keep a final approved file and a short specification record for reorders. Include dimensions, backing, border, thread references, and any garment notes. The Artwork File Guide for Custom Patches helps the person preparing the files avoid sending only a tiny screenshot from a social profile.
Check the first installation before distributing the whole run
Have the installer attach one patch to a representative garment before finishing every shirt or vest. Check that the patch sits level while worn, the pocket still opens, and the surrounding fabric does not pucker. A placement that looks centered on a flat table can sit differently on a curved cap or a worn polo.
For washable uniforms, test the intended care routine on a suitable sample before broad distribution. Keep a few uninstalled patches for new volunteers and repairs, and store them by version rather than loose in one box. Small controls like these prevent the next coordinator from guessing which backing or crest belongs on which garment.
The strongest nonprofit patch is not necessarily the busiest one. It is the one volunteers recognize, supporters want to keep, and the next program manager can reorder without reconstructing the entire job. Choose one clear purpose, prove the placement, and keep the approved specifications.


