
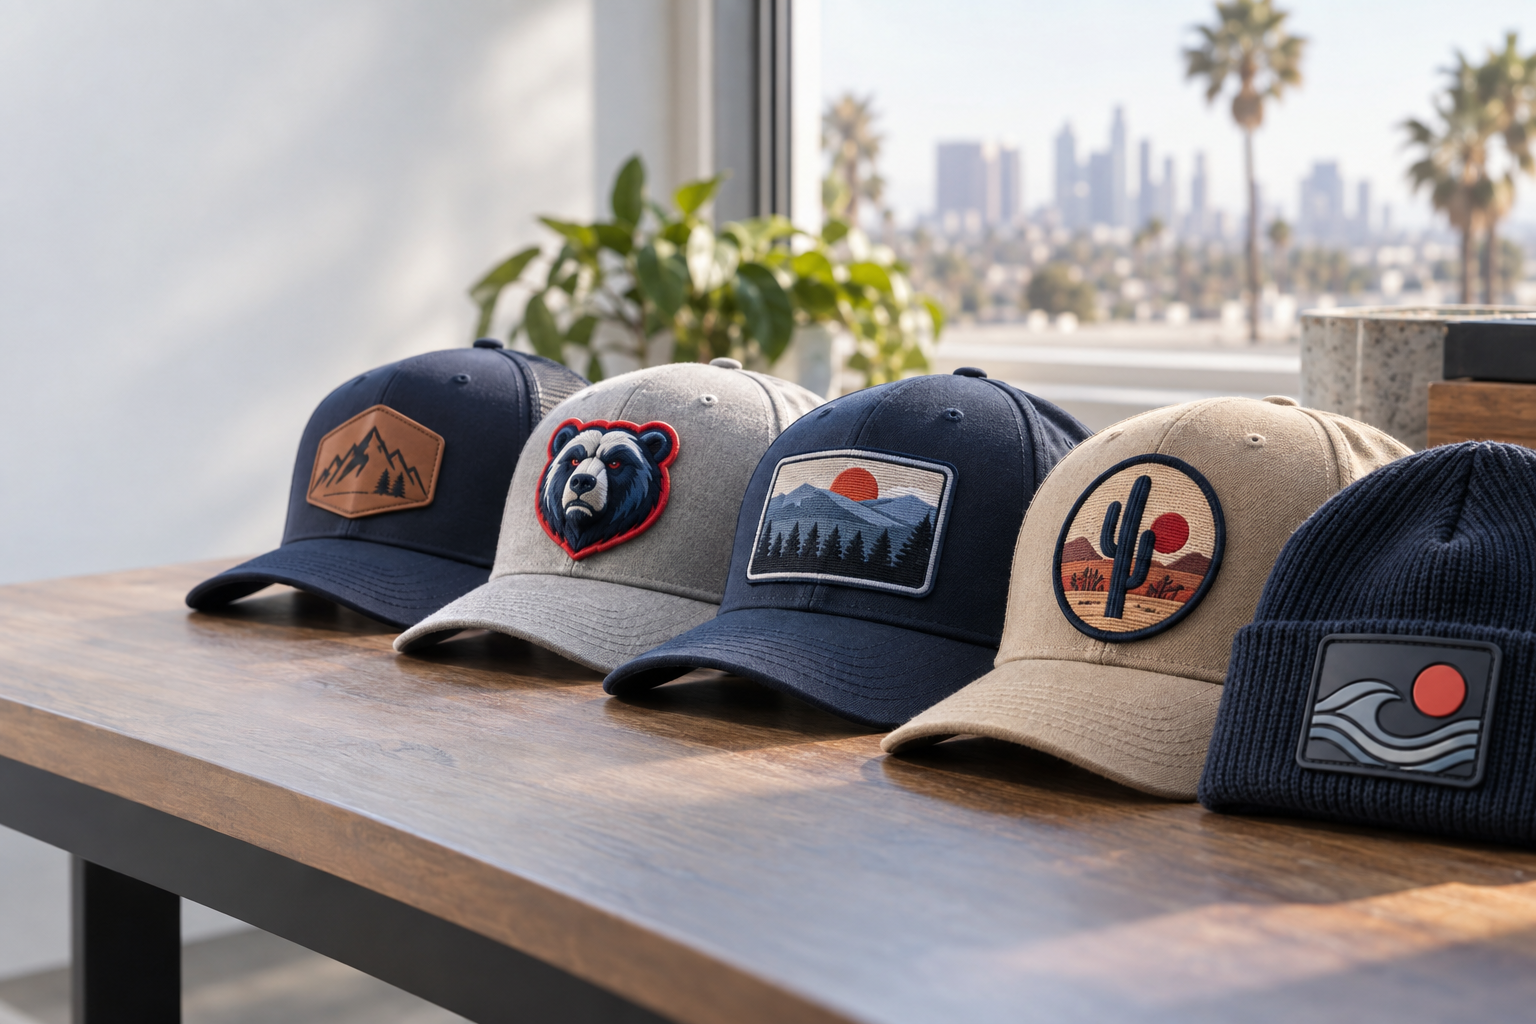
For 3D embroidered patches Los Angeles teams can put on caps, jackets, and club gear, expect raised stitching over foam, an artwork review, and backing chosen for the garment. GetUSAPatches has a 10-piece minimum and provides a free digital mockup before production. We produce only after approval and ship from Corona, CA, to Los Angeles and all 50 states.
The biggest decision is not the shipping distance. It is whether your logo has enough open space and strong shapes to work in raised thread without losing its identity. A block monogram on a structured cap is a different job from a detailed public-safety crest or a hospitality logo on a soft polo.
What 3D embroidered patches actually look and feel like
A 3D embroidered patch uses foam under selected stitched areas to create relief above the base fabric. The stitches cover and shape that foam, so the result feels rounded and substantial rather than simply dense. Regular embroidery has texture too, but more stitches alone do not make it a foam-backed 3D patch.
Most usable designs do not need every part raised. A large initial can stand up while a location name, founding year, or outer ring stays flat. That contrast gives the main mark some depth without turning the smaller information into a crowded knot of thread.
A patch is not the same job as direct puff embroidery
With a patch, the embroidered piece is made separately and then attached to the garment. Direct puff embroidery is stitched into the garment itself, which changes the production setup and the finished outline. If your reference photo shows a cap with no visible patch perimeter, clarify that difference before requesting an exact match.
Start with 3D embroidered patches for raised work, or compare standard embroidered patches if the design relies on finer detail. The construction explanation in 3D Puff Embroidery Explained: How Raised Patches Are Made is useful when your designer needs to separate raised and flat areas. Neither construction is automatically better; the logo decides.
Which artwork works for 3D embroidered patches in Los Angeles?
Bold capitals, broad outlines, and simple symbols are the strongest starting points. The stitched columns need enough width to cover the foam, and neighboring shapes need space between them. There is no single safe minimum for every font because a narrow script stroke behaves differently from a square athletic letter.
A two-letter school monogram may translate cleanly at cap size. A restaurant seal containing a skyline, a fork, an establishment date, and curved microtext probably needs simplification. Enlarging the whole patch can help, but not if the patch then exceeds the usable space on the uniform.
- Raise the main mark, not every detail. A flat outer caption can keep the wording legible while the center carries the dimensional effect.
- Open up tight letter counters. The enclosed spaces inside A, B, P, and R can shrink visually as thread builds around them.
- Remove hairline outlines and tiny floating marks. They may work as flat stitches, but they should not automatically receive foam.
- Translate gradients into deliberate solid colors, or consider a printed construction if the gradient is central to the artwork.
- Review the design at actual patch size. A logo that looks clear across a laptop screen can become unreadable at 2.5 inches wide.
What a digital mockup can and cannot prove
The proof should identify the intended raised areas, flat areas, finished dimensions, colors, and border. A digital mockup is an approval tool, not a physical measurement of loft or a guarantee that every screen displays thread color accurately. If texture, exact color appearance, or installation behavior is critical, ask whether a physical sample is available and what it adds to cost and timing.
Send vector artwork if you have it, along with any brand color references. A clear PNG or JPG can still communicate the design, but a blurry screenshot leaves more room for interpretation. The Artwork File Guide for Custom Patches: Vector, PNG, JPG and More explains what to send without making you rebuild a logo unnecessarily.
Choose size by the garment, not by the logo file
Measure the actual attachment area before choosing a finished size. A 3-inch-wide patch might fit a jacket chest comfortably but crowd a low-profile cap or bridge the front seam in an awkward way. A paper cutout is a useful first check because it shows the footprint, although it cannot predict the stiffness of the finished piece.
The production-desk question is simple: what is this going on? Structured twill caps, soft beanies, nylon shells, wool coaches' jackets, leather biker vests, and hospitality polos do not support the same patch equally well. Their curvature, stretch, heat sensitivity, and access for sewing all matter.
- Structured caps: test the usable front panel and cap curvature. A wide, stiff patch can lift at the corners even when the artwork itself looks good.
- Hospitality polos: keep weight and footprint in check. A heavy patch on light pique can pull the shirt front and make the chest area sit unevenly.
- Nylon shells: identify the fabric and coating before discussing heat. Sewing also creates needle holes, which matters on garments intended to resist water.
- Letterman jackets: check the relationship to existing chenille letters, sleeve awards, snaps, and pockets. More texture is not always a better layout.
- Biker vests: leave an attachment margin and inspect access behind the panel. Sewing through a pocket can close it or catch its lining.
- Velcro panels: match the usable panel dimensions and orientation. A patch that overhangs the loop field can snag and collect lint around its exposed hook edges.
Use sample dimensions as starting points
For a quote discussion, you might compare a 2.5-inch-wide cap badge with a 3.5-inch-wide jacket version. Those are planning examples, not universal size recommendations. The jacket version may allow the small wording to stay, while the cap version needs a simpler secondary logo.
Measure width and height separately, especially for shields and horizontal badges. The Custom Patch Size Guide: How Big Should Your Patch Be? helps turn a general request into a workable footprint. For cap collections, compare the installation considerations in Custom Hat Patches: How to Choose the Right Style for Caps and Beanies before finalizing the design.
Compare raised embroidery with flatter patch styles
Some logos should not be forced into 3D thread. Printed is flatter; that is the point. Woven construction can carry finer lettering than a bulky raised treatment, while chenille gives a different kind of depth suited to larger varsity shapes.
Use the table to choose construction before comparing prices. A quote for a flat woven label and a quote for a foam-backed embroidered badge are not interchangeable just because both pieces measure 3 inches wide. Their surfaces, edge behavior, and ability to reproduce detail differ.
| Patch style | Strongest use | Main trade-off | Garment or placement check |
|---|---|---|---|
| 3D embroidered | Bold initials, athletic lettering, and simple brand marks with raised areas | Fine text and narrow shapes may require flat stitching or simplification | Check cap curvature, overall stiffness, and clearance around raised elements |
| Flat embroidered | Traditional crests, uniform badges, and designs needing thread texture without foam | Very small lettering still has stitch-resolution limits | Suitable backing and manageable patch weight remain important |
| Woven | Compact lettering and detailed linework in a textile patch | A flatter surface with less pronounced stitched relief | Useful for smaller apparel branding where bulk is a concern |
| Printed | Gradients, illustrations, and artwork that relies on tonal detail | No raised thread effect unless another construction is specifically added | Confirm print material, attachment method, and garment care compatibility |
| PVC | Molded graphics, distinct color areas, and gear-oriented styling | A non-textile feel and different flexibility from stitched fabric | Check thickness, sewing provision, and hook-and-loop requirements |
| Chenille | Large varsity letters and letterman-style jacket decoration | Small wording and intricate shapes need another treatment | Allow room for the finished letter, felt layers, and nearby jacket details |
Look at woven patches if keeping the full small logo matters more than raised texture, or printed patches for artwork built around color transitions. For a varsity jacket, chenille patches may provide the familiar soft pile that the wearer actually expects. Ask what the reference image is showing rather than treating every thick patch as the same product.
The final specification should name the construction, dimensions, raised elements, flat elements, edge finish, and backing. That is enough to make the first quote useful instead of leaving three different interpretations on the desk. It also gives you a fair basis for comparing revisions.
Backing and borders determine how the patch wears
The front sells the idea, but the back decides how it attaches. Sew-on, iron-on, and hook-and-loop backing solve different installation problems; none fixes an unsuitable garment or an oversized patch. Specify the backing on the quote instead of leaving it as a final packing detail.
For jackets, vests, and pieces that will see repeated wear, sewing is often the dependable starting point if the garment can be stitched safely. The installer needs access behind the placement and a usable perimeter around the raised design. A patch sitting over a lined pocket requires more thought than one on an open fabric panel.
Iron-on is not a universal shortcut
An iron-on patch that peels after a dryer cycle may have had poor initial adhesion, incompatible fabric, or care conditions beyond what the adhesive could tolerate. Extra heat is not automatically the answer, especially on nylon shells, coated fabrics, or temperature-sensitive blends. Use the instructions for the actual patch and garment rather than a generic temperature found online.
Raised embroidery needs care during pressing because direct pressure can distort the surface. Ask the patch supplier and installer how the selected construction should be applied without crushing the puff. The How to Iron On a Patch the Right Way (and Make It Last) guide is useful background, but garment restrictions still control the job.
Hook-and-loop and edge finishes need their own specifications
For tactical shirts, bags, or uniforms with loop fields, identify whether you need hook backing only or a matching loop piece as well. Do not assume a quote includes both halves. Velcro® Patches: How to Attach and Use Hook-and-Loop Backing explains the attachment system.
Merrowed crests have a wrapped, stitched perimeter that suits many circles, ovals, and straightforward shields. Tight internal corners and intricate outlines may call for another edge treatment, subject to the material and production method. Compare Merrowed vs. Hot-Cut vs. Laser-Cut Borders: What’s the Difference? before approving a shape that is difficult to finish cleanly.
What affects your quote in dollars
There is no responsible single price for every 3D patch based on city and width alone. Quantity, stitched area, foam coverage, artwork complexity, backing, border, and packing requirements can change the job. GetUSAPatches has a 10-piece minimum, but that does not mean ten different designs are automatically one minimum order.
List every design, size, and colorway separately and ask how the minimum applies to those variants. Changing only a thread color may be a smaller change than changing the dimensions, but it still needs to appear on the quote. Do not assume that splitting a run has no cost or scheduling effect.
- Request a unit price and extended patch total for each version. A single blended number can hide the cost of a small secondary run.
- Ask whether artwork preparation, digitizing, or other setup charges are included. Do not infer that a free digital mockup makes every production service free.
- Confirm backing and border in writing. The lowest number is not useful if it leaves off the attachment system you need.
- Separate patch production from garment installation. Receiving finished loose patches does not mean your caps or jackets are already decorated.
- Request shipping charges, applicable tax, and any special packing charges before approving the total.
- If comparing quantities, keep the specification identical. Otherwise, a lower unit price may simply describe a smaller or simpler patch.
Compare landed cost, not just the patch line
For budget planning, add the patch total, quoted setup charges, shipping, applicable tax, and installation to determine the finished project cost in USD. As arithmetic only, a $300 patch subtotal plus $30 shipping equals $330 before tax and installation. Those figures are not GetUSAPatches pricing; they show why a unit-price comparison needs the same inclusions.
If the budget is tight, simplify small details before stripping away the backing or edge finish the garment needs. A clean two-letter raised mark can be more convincing than a crowded badge trying to reproduce everything. See How Much Do Custom Patches Cost? What Drives the Price for a broader cost checklist.
Ordering, approval, and delivery from Corona to Los Angeles
A nearby shipping origin does not remove the production queue. Orders ship from Corona, CA, but the date you receive patches depends on artwork readiness, approval, the confirmed production schedule, carrier service, and destination. GetUSAPatches ships to all 50 states, so Los Angeles buyers follow the same essential approval process as customers elsewhere in the United States.
Give the date the patches must be in your hands, not just the date of the event. A Friday game or Saturday pop-up may require earlier delivery for sewing, count checks, and packing. If another shop will attach the patches, ask that shop for its available installation slot before committing to the overall schedule.
- Send artwork, quantity, finished dimensions in inches, and a photo or description of the garment. Include the delivery ZIP code and required receipt date.
- Identify raised and flat elements, preferred backing, border style, and any separate versions. Ask for clarification where the artwork is too detailed for the requested size.
- Review the quote and free digital mockup together. Check that the price describes the same construction shown on the proof.
- Approve the final version only after spelling, colors, size, raised areas, and order details are settled. GetUSAPatches produces only after approval.
- Confirm estimated production completion and shipping service. Ask how revisions or a delayed approval would affect the projected receipt date.
- Plan receiving and installation time. Inspect the loose patches before distributing them or sending the full run to your decorator.
Treat proof approval as a real production checkpoint
A digital mockup may show the front clearly while backing or packing details appear in the order notes. Read both. Save the approved version so a school coach, purchasing contact, brand designer, and installer are not working from different screenshots.
Screen colors are not physical thread standards, and a rendered shadow is not a measured foam height. If a specific brand color or raised profile is essential, discuss how it will be evaluated before approval. Once you approve production, a later spelling correction or size change can affect both cost and timing.
Ask for current timing instead of assuming a fixed turnaround
Do not read Corona-to-Los Angeles proximity as a promise of same-day delivery, next-day delivery, or local pickup. Confirm any special handoff arrangement directly rather than assuming it is available. Carrier transit estimates and production estimates are separate, and neither should be confused with the time required to revise artwork.
For event work, build room for at least the inspection and installation tasks your project actually requires. The Custom Patch Production Timeline: From Artwork to Delivery helps organize those stages. A useful quote gives you a schedule tied to a clear approval point, not just a vague statement that the order is fast.
Check the shipment before installing the whole run
Open the shipment early enough to inspect it before the decorator starts. Check counts by version, measure the finished footprint, and compare the design with the approved proof. Look at the backing as well as the face; a correct logo with the wrong attachment system is still a problem for the job.
Inspect raised areas for coverage and consistency rather than expecting every thread to sit like a machined surface. Exposed foam, unreadable lettering, loose edges, or incorrect dimensions deserve a closer look. Photograph any concern before installation and contact the supplier with the order details.
- Lay one patch on the actual garment and check placement, curvature, and clearance around pockets or seams.
- Have the installer test the approved attachment method on one representative garment before processing the full batch.
- Confirm that stitching does not catch a pocket bag, pull the lining, or cut into the raised design.
- For hook-backed patches, check fit on the actual loop field rather than relying only on its advertised dimensions.
- Keep an approved reference patch and the final specification with your reorder records.
Care should follow the most restrictive instructions for the garment, patch, and attachment method. Avoid assuming that raised thread, adhesive, a coated shell, and a wool jacket all tolerate the same dryer setting. The How to Wash and Care for Patches (Embroidered, PVC, Leather & More) guide provides a starting point for the care information you pass to wearers.
How the specification changes for teams, uniforms, and club runs
For a high-school sports order, the raised school initials may work across caps and jackets, but the surrounding wording often needs separate layouts. Keep the recognizable mark consistent instead of forcing one oversized badge onto every garment. Record the size and backing for each version so next season's buyer can reorder without guessing.
For a fire or public-safety unit, start with the department's approved artwork and uniform requirements. A detailed operational identifier may be better in flat embroidery, while a simpler raised version can suit off-duty team merchandise. Do not replace an approved uniform badge with a different construction without checking the unit's purchasing and appearance rules.
Hospitality polos and letterman jackets need different priorities
On hospitality polos, weight, repeated laundering, and a neat chest placement can matter more than maximum height. A compact flat embroidered logo may sit better than a thick raised badge on lightweight knit. If the brand still wants puff, compare a smaller mark and test the installed result before committing the whole uniform run.
On letterman jackets, raised embroidery can work as a secondary badge beside a larger chenille letter. Check the visual balance and the jacket's available sewing access before adding another thick element. The Chenille Patches and Letterman Style: A Complete Guide helps separate the traditional varsity treatment from a foam-backed embroidered accent.
Biker vests and apparel brands need repeatable specifications
For biker and motorcycle club patches, agree on placement, spelling, size, and the relationship to the rest of the club set before approving a dimensional treatment. A raised accent might suit a small chest mark but be less practical for densely detailed artwork. Avoid changing an established set's proportions just to add more height.
For a Los Angeles apparel brand, preserve the approved artwork version, dimensions, thread references, backing, and border notes as a single reorder specification. Shipping from Corona makes geographic sense for a local delivery, but consistent production still starts with clear records. The best repeat order is the one that does not require anyone to reconstruct what the first order was supposed to be.


