
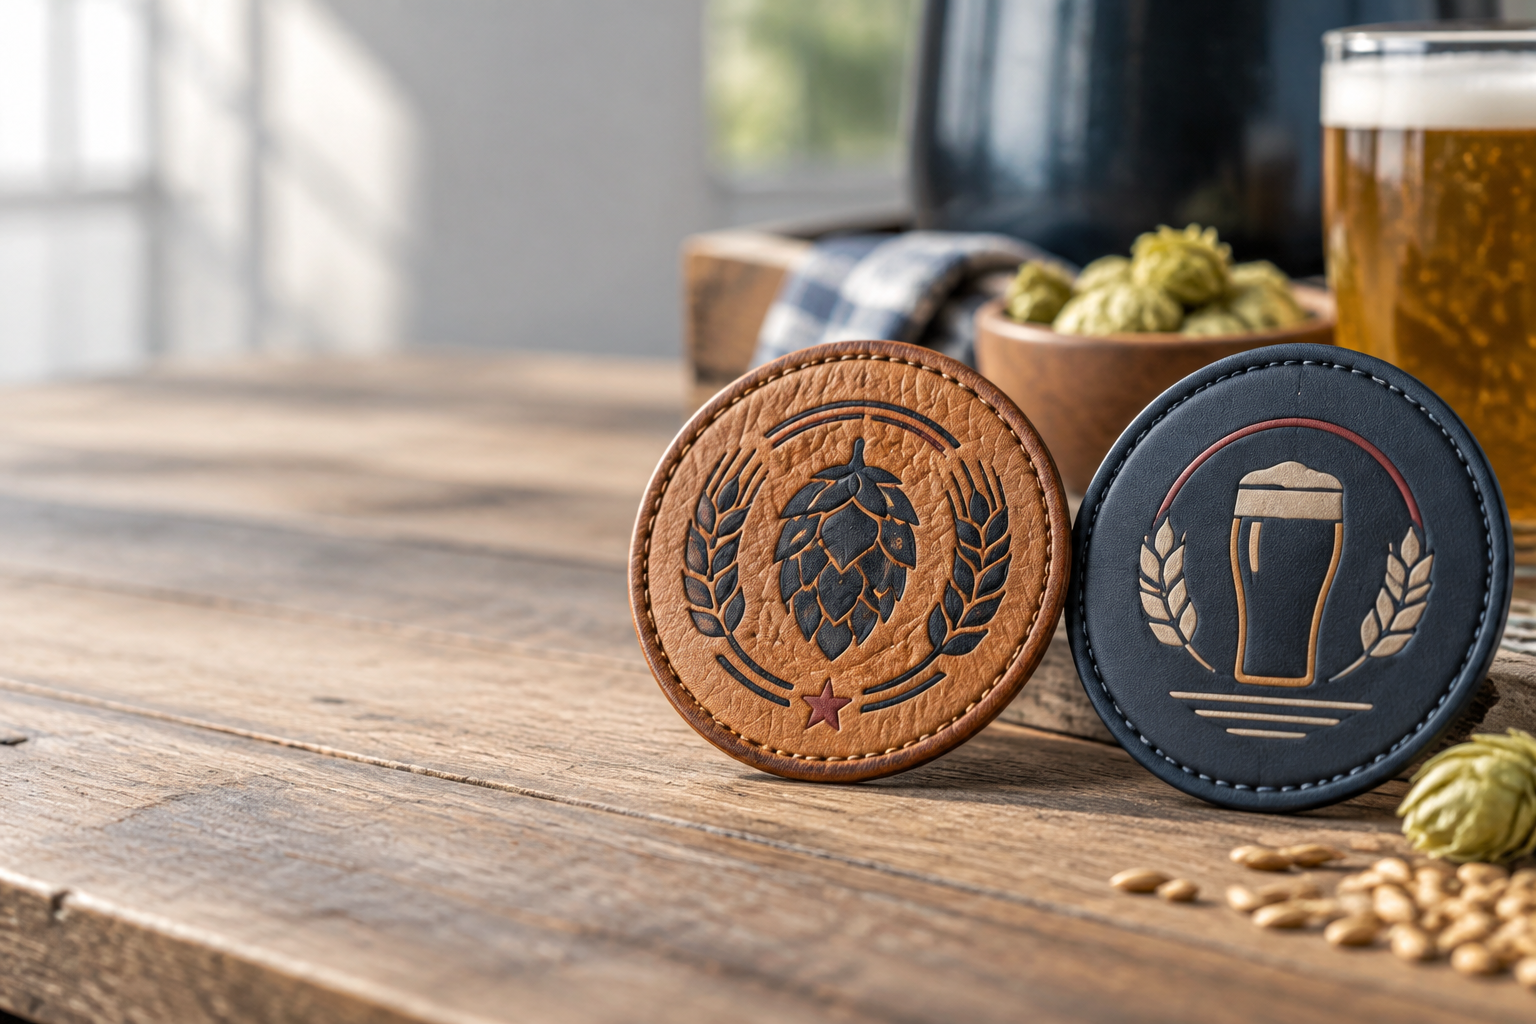
To order custom leather patches Houston breweries can use on hats, aprons, and jackets, send GetUSAPatches your logo, patch dimensions, quantity, garment details, and delivery ZIP code. We have a 10-piece minimum and provide a free digital mockup before production. We produce only after approval and ship from Corona, CA, to all 50 states.
Start with the garment, not the leather color. A structured trucker cap, a soft cotton dad hat, and a canvas taproom apron need different sizing and attachment decisions, even when they carry the same brewery mark. The useful quote is the one that tells you what will be made, how it will attach, and what is included—not just a price per patch.
Start With the Brewery Job, Not Just the Logo
At the production desk, the first question is where the patch will live. A retail cap needs to look right on a curved crown and feel comfortable during a long afternoon outside. A bartender's apron faces spills and repeated cleaning, while a denim jacket may see relatively little washing but more rubbing at the shoulders and chest.
Houston heat and humidity make that distinction useful. Sweat exposure, outdoor events, and storage in a hot vehicle are reasons to check material and adhesive compatibility; they are not reasons to promise that every leather patch will behave the same way. Your actual garment and cleaning routine are better specifications than the phrase heavy duty.
Separate Retail Merchandise From Staff Workwear
Retail merchandise and staff uniforms can share artwork without sharing construction. A leather badge may suit a brewery's canvas cap, while a washable fabric patch may make more sense on a hospitality polo that goes through the laundry several times a week. Decide which item matters most before adapting one patch to everything.
- Retail caps: prioritize readable artwork, crown fit, balanced placement, and a care message the buyer can follow.
- Taproom aprons: identify whether staff wash the apron at home or send it to a commercial laundry.
- Denim shirts and jackets: check pocket access, lining, and how much stiffness the patch adds to the panel.
- Club or collaboration runs: identify every logo version and quantity split rather than assuming one total covers all designs.
These are the same placement questions that come up on high-school sports orders, fire and public-safety units, biker vests, and letterman jackets. The difference is the use: a school crest may need bold thread color, while a brewery badge may rely on quiet contrast and a clean outline. Our leather patches hub is the material starting point, but the garment still decides the specification.
Choose the Leather Material and Marking Method Together
Leather is not one uniform surface. Genuine leather can vary in grain, shade, and marking response; synthetic leather-look materials have a different construction and may provide a more consistent appearance. Ask which material the quote actually includes and which options are available for your design.
Do not approve a description that says only brown leather patch if the distinction matters to your brand. The written specification should identify genuine or synthetic material, the selected color, the marking method, and any finish that affects use. If you intend to make an animal-free claim on the finished merchandise, request confirmation of the relevant components rather than inferring it from a product photo.
Engraved, Debossed, and Printed Marks Behave Differently
Engraving creates a mark by altering the surface, but the resulting contrast depends on the material and process. Debossing presses artwork below the surrounding surface, which can give a restrained appearance without bright color. Ask which methods can be quoted on the selected stock instead of treating every leather finish as interchangeable.
A dark logo on a dark patch may look appealing in a large screen preview and become difficult to read on a cap. Printed decoration can introduce color where the chosen construction supports it, but printed is flatter; that is the point. Raised thread, pressed detail, and printed color solve different visual problems.
For a brewery with a bold hop cone and short name, a single-tone leather mark may carry the identity well. A can label full of gradients, tiny stars, and illustrated buildings is a different job. Consider printed patches for that artwork rather than forcing the entire label into a small leather rectangle.
A digital proof is good for layout, not for touching grain or verifying the exact response of a material under light. If those physical details determine the purchase, ask about sample availability, cost, and timing before approving the run. A free digital mockup and a physical production sample are not the same deliverable.
Size the Patch Around the Hat, Apron, or Jacket
For a first paper test on a structured cap, a rectangle around 2.5 inches wide by 1.5 inches tall is a reasonable starting point—not a universal fit. Cut that shape from paper, hold it against the actual crown, and photograph it straight on and from the side. A design that fits across the front can still fight the crown's curve.
A five-panel cap may offer a cleaner uninterrupted front than a six-panel style with a center seam. That does not make one automatically better, but a center seam can affect contact and stitching. Soft, unstructured hats also need care because a stiff patch can pull the fabric into a shape the hat was not built to hold.
Allow Room for Attachment, Not Just Artwork
The outside dimensions include the edge area needed for attachment. If the design runs right to the cut line, a sewing line can cross letters or leave too little material outside the stitches. Ask the production team to show the proposed attachment margin and keep important artwork away from it.
Thickness belongs in this conversation too. A thicker patch can feel substantial on a canvas apron and unnecessarily stiff on a lightweight shirt. Request the proposed thickness or available range if flexibility matters, and let the sewing shop confirm what its equipment can handle.
- Cap front: measure the usable panel, account for the center seam, and check access for the attachment equipment.
- Apron chest: test placement while the apron is worn so straps, folds, and the wearer's movement do not hide the badge.
- Jacket chest: check the pocket opening and lining before deciding where a perimeter seam will go.
- Sleeve or side panel: reduce the design rather than shrinking every letter until it becomes unreadable.
Use the Custom Patch Size Guide for a broader sizing check, then return to the garment in your hands. Screen zoom is a poor measuring tool. Print the artwork at its intended size and read it from the distance at which someone would normally notice the cap or apron.
Compare Specifications for Custom Leather Patches Houston Breweries Order
Material, decoration, and attachment should be quoted as a complete combination. A low patch price can stop being useful if the patch needs an attachment process your local shop cannot perform. Compare the finished application, including cleaning limits and installation, rather than comparing loose pieces alone.
The table below is a selection guide, not a promise that every option fits every garment. Availability, material thickness, finish, and attachment compatibility need confirmation on the quote. For a mixed merchandise line, ordering two suitable constructions can be more sensible than making one construction cover incompatible uses.
| Option | Good brewery application | Main trade-off | Confirm before approval |
|---|---|---|---|
| Genuine leather with engraved or pressed artwork | Retail caps, denim jackets, and canvas goods with simple branding | Natural grain and shade variation; care restrictions depend on the leather and finish | Material identity, color, marking contrast, thickness, and care instructions |
| Synthetic leather-look material | Coordinated merchandise where a consistent surface appearance is preferred | Composition, heat tolerance, and long-term surface wear vary by product | Exact material, supported decoration method, attachment compatibility, and cleaning limits |
| Sew-on leather construction | Caps, sturdy aprons, and jackets that provide sewing access | Needs suitable equipment and leaves needle holes in the garment | Edge margin, stitch path, lining access, and who performs installation |
| Heat-applied leather construction, if supported | Compatible garments and patch materials with a tested application process | Heat can mark the patch, distort the garment, or fail to bond over seams | Approved adhesive system, temperature, time, pressure, and test procedure |
| Leather with hook-and-loop attachment, if available | Garments already equipped with a matching receiving panel | Adds thickness and requires the correct mating surface | Hook versus loop sides, panel dimensions, attachment method, and included components |
| Woven or embroidered alternative | Staff polos, colorful logos, and fabric-based uniform programs | Different appearance from leather; fine-detail capacity varies between thread constructions | Small-letter readability, border style, backing, and laundry requirements |
| PVC alternative | Merchandise expected to face frequent splashes or outdoor handling | Rubberlike appearance rather than natural grain; garment care still matters | Raised detail, attachment, thickness, and cleaning guidance |
For small lettering, woven patches can be worth comparing with leather. For visible thread texture and familiar uniform styling, compare embroidered patches. Traditional merrowed crests have a wrapped thread edge; a leather badge normally needs a different edge specification rather than borrowing that term.
A washable patch material also does not make an entire decorated garment suitable for every laundry process. The backing, thread, adhesive, garment fabric, and care label all matter. If apron laundering is the deciding issue, resolve that before selecting the surface color.
Choose Attachment for the Actual Fabric
Sew-on is often a practical starting point for leather on denim, canvas, and compatible caps because it does not depend on bonding adhesive to an unknown surface. It still requires appropriate equipment, needle selection, and access. Ask the installer to test the complete combination rather than assuming any machine that sews a shirt can sew the patch.
A perimeter seam can accidentally close a pocket or catch a jacket lining. On a cap, the sweatband and crown shape can complicate access. Our How to Sew On a Patch guide explains the general sequence, but leather and assembled headwear may call for professional installation.
Treat Heat Application as a Tested Process
Iron-on that peels after a dryer cycle is not just a cosmetic problem; it can make the whole merchandise batch difficult to sell. Too little pressure, an incompatible coating, uneven contact, or an unsuitable cleaning routine can all contribute. Do not treat a household iron setting as an approved process for every leather patch.
Nylon shells deserve particular caution because heat and needle holes can affect the garment, including its finish or water resistance. Wool coaches jackets and lined wool outerwear bring their own pressing and sewing concerns. Get instructions for the exact patch-and-garment combination, and test a spare garment before decorating the full run.
Specify Both Sides of Hook-and-Loop
Velcro panels are familiar on fire, public-safety, and club orders, but hook backing alone does not attach to an ordinary apron. The garment needs a compatible receiving surface, usually loop. State whether the order needs the patch-side component only or the mating panel as well.
Removable patches can help separate decoration from laundering, provided the garment-side components tolerate the cleaning process. They also add bulk and may not suit a low-profile retail cap. Review Patch Backing Options Explained before assigning one backing to the entire brewery merchandise program.
Prepare the Artwork and Remove Detail That Will Not Read
Send the best original logo file you have, preferably vector artwork if available. A screenshot pulled from social media may be enough to discuss the concept, but it is not a reliable reference for clean outlines or tiny text. The Artwork File Guide for Custom Patches explains what different file types can provide.
Brewery branding often includes a main name, a neighborhood reference, an establishment date, a hop illustration, and a beer style. All of that may work on a can. At cap size, the hierarchy needs to change: protect the main name first and remove secondary detail before shrinking everything.
- Mark the wording that must remain exactly as supplied, including punctuation and the establishment year.
- Identify decorative elements that may be simplified, such as hop-cone scales, barley lines, or small building windows.
- Provide a one-color version if you have one, but do not assume its black areas will reproduce as solid black on leather.
- List each brewery collaboration partner that must approve the artwork before the order can move forward.
- Include a straight-on garment photo with a ruler or dimensions; a styled merchandise photo alone can hide scale.
There is no responsible universal minimum letter size without knowing the material, marking method, and font. Thin scripts and distressed lettering usually need more attention than broad block letters. Ask the proof reviewer to flag details that are likely to close up or lose contrast, then make the decision at actual patch size.
Order, Approve, and Plan the Delivery Date
GetUSAPatches has a 10-piece minimum, which gives a small brewery a way to start without committing to a large merchandise run. If you want several designs, dimensions, or material colors, ask how the minimum applies to those variants. A total of 30 pieces does not automatically mean every possible split is covered under one setup.
Use the sequence below to prepare the order and keep approval responsibilities clear. The hands-on preparation and review may take about 25 minutes when your files and garment are ready, but that is not the manufacturing lead time. Quote response, revisions, production, and transit require their own schedule.
- Identify the garment and use. List the garment brand, model, fabric, placement, and cleaning routine. Photograph the actual panel and note any seams, lining, or existing hook-and-loop field.
- Measure and simplify the artwork. Measure the usable space in inches and test a paper outline at actual size. Supply your best logo file and identify any small lettering, dates, or illustrations that may need simplification.
- Request a complete written quote. Specify quantity, material preference, dimensions, marking method, backing, delivery ZIP code, and needed-in-hand date. Ask the quote to distinguish loose patches from any garment attachment services and to identify additional charges.
- Review the free digital mockup. Check spelling, dimensions, shape, material description, marking method, and attachment notes. Request corrections before approval, and ask about physical sampling if texture or exact color is a purchase requirement.
- Approve specifications and confirm delivery. Approve the final artwork and written specifications only after confirming the schedule and order terms. GetUSAPatches begins production only after approval; retain the approved file and shipping details for receiving and reorders.
Work Backward From the Day Merchandise Must Be Ready
If your Houston taproom anniversary is Saturday, the useful deadline may be several days earlier so staff can inspect, attach, count, and merchandise the patches. Give us the needed-in-hand date, not just the event date. If another shop is sewing patches onto caps, include that shop's receiving deadline and installation time.
Ask for separate confirmation of artwork timing, production timing, and shipping transit. A rush production arrangement, if available, does not erase carrier transit or a delayed approval. We ship from Corona, CA, to Houston and all 50 states, but a specific arrival date needs an order-specific shipping plan.
Assign one person to send final approval after the brewery's other reviewers have signed off. Conflicting notes from the owner, designer, and merchandise manager can turn a straightforward proof into multiple versions. Keep the approved file with the written specifications so a reorder does not begin with a cropped photo of the finished cap.
Read the Quote as a Finished-Garment Cost
A useful leather patch quote separates the variables that actually change the job: material, dimensions, marking method, quantity, backing, and any special finishing. It should also make clear whether you are buying loose patches or receiving a price that includes garment attachment. Do not assume a cap pictured beside a patch is included in the patch price.
Ask for all amounts in USD and identify shipping, applicable tax, setup charges, sampling, and installation where relevant. Not every job has every charge, but an unnamed charge is difficult to budget. For a general explanation of cost drivers, see How Much Do Custom Patches Cost?.
Compare the Same Specification at Different Quantities
Request quantity breaks without changing the design at the same time. Comparing 25 small sew-on patches with 100 larger hook-backed patches tells you little about the quantity savings. Hold the material, size, artwork, and backing constant, then compare the totals.
Use landed cost per usable decorated item for merchandise planning. As a hypothetical calculation—not a GetUSAPatches quote—$500 in patch-related and attachment costs spread across 100 completed caps adds $5 per cap before the blank cap's own cost. If additional handling or unusable pieces reduce the sellable count, update that calculation rather than relying on the original unit estimate.
- Ask whether any tooling or setup charge repeats on an unchanged reorder.
- Confirm whether changing the size, leather color, or artwork creates a new setup.
- Identify who supplies blank garments and who is responsible for attachment.
- Ask whether spare patches make sense for installation tests and later garment replacements.
- Compare the total order cost with realistic sell-through, not just the lowest unit price.
A larger run can reduce some per-piece costs, but unsold inventory still uses cash and shelf space. For a new cap style, a smaller first order may be the better business decision even if its unit price is higher. Keep the specification stable so you can evaluate the product rather than several changing variables.
Inspect the Delivery and Set a Care Routine
When the patches arrive, compare them with the approved specification before sending the whole batch to installation. Check count, dimensions, wording, marking placement, material identification, and backing. With natural leather, some grain variation may be expected, but that does not replace checking the order against what was approved.
Decorate a representative garment first and inspect it while worn, not just flat on a worktable. Look for lifted corners, puckered fabric, a distorted crown, or stitching that crosses artwork. If something appears wrong, document it with clear photographs and ask for guidance before continuing.
Give Staff and Retail Buyers Usable Instructions
Do not assume leather belongs in a hot wash or tumble dryer. Follow the instructions for the specific material and the completed garment, using the more restrictive requirement where necessary. If a commercial laundry cannot accommodate the decoration, change the patch system or garment assignment before outfitting the staff.
Avoid recommending leather conditioners, solvents, or aggressive cleaners without checking compatibility with the finish and marking. A product intended for boots can alter the appearance of a small decorated badge. Store spare patches dry, away from prolonged direct sunlight and excessive heat, and retain any supplied care information with the reorder records.
For washable workwear, an alternative may be more practical than a complicated care exception. PVC patches handle surface moisture differently from leather, while fabric patches may suit an established uniform program. Neither choice overrides the care requirements of the backing and garment.
Three Brewery Briefs That Lead to Better Specifications
These are hypothetical briefs, not customer reviews or past-order claims. They show how the same brewery logo can lead to different production decisions. The right result starts with a clear use case rather than a request to make everything match exactly.
A Small Taproom's First Retail Cap
The brewery wants 24 structured trucker caps with a short wordmark and hop icon. Start with a paper rectangle around 2.5 by 1.5 inches, confirm the cap model, and compare the logo at actual size. Quote the patches and attachment scope clearly, then remove a tiny tagline if it weakens the main name.
A Staff Apron That Goes to the Laundry
The brewery wants leather badges on 18 canvas aprons that are commercially laundered. Stop at the cleaning requirement before choosing the shade of brown. Compare a removable construction with a suitable fabric patch, and confirm that any receiving panel and its stitches are compatible with the laundry process.
A Collaboration Jacket for a Release Event
Two breweries want a jacket badge with both names and a release date. Check the jacket lining, available panel, and spelling approvals before finalizing size. If the artwork includes a detailed full-color label illustration, compare leather with printed or woven construction instead of assuming detail will survive a one-tone treatment.
The lesson across these briefs is simple: keep the branding consistent, but let construction follow the garment. A cap, an apron, and a jacket do not need identical backing to look like one merchandise family. Clear specifications prevent more problems than adding another decorative detail.
Related Guides and Product Hubs for the Next Decision
If your brewery is building more than one merchandise item, use the product hubs to compare appearance and construction rather than mixing requirements into one vague request. The hat patches hub is useful for cap-focused planning, while leather, embroidered, woven, and PVC options each deserve a separate look when the garment changes. Keep one written brief per distinct application.
- Bulk Leather Patches in Los Angeles: Ordering Guide for Hat Brands covers a related cap-ordering use case; use your own Houston destination and garment specifications.
- Why Denim Brands in Chicago Choose Custom Leather Patches provides a related denim application to compare with brewery jackets.
- Custom Patch Size Guide: How Big Should Your Patch Be? helps frame the dimensions before you test an outline on the actual garment.
The brief that moves cleanly into production is not necessarily long. It names the artwork version, material, size, quantity, backing, garment, delivery location, and approval contact. With those details settled, the free digital mockup becomes a useful final check rather than a guess about what you meant.


