
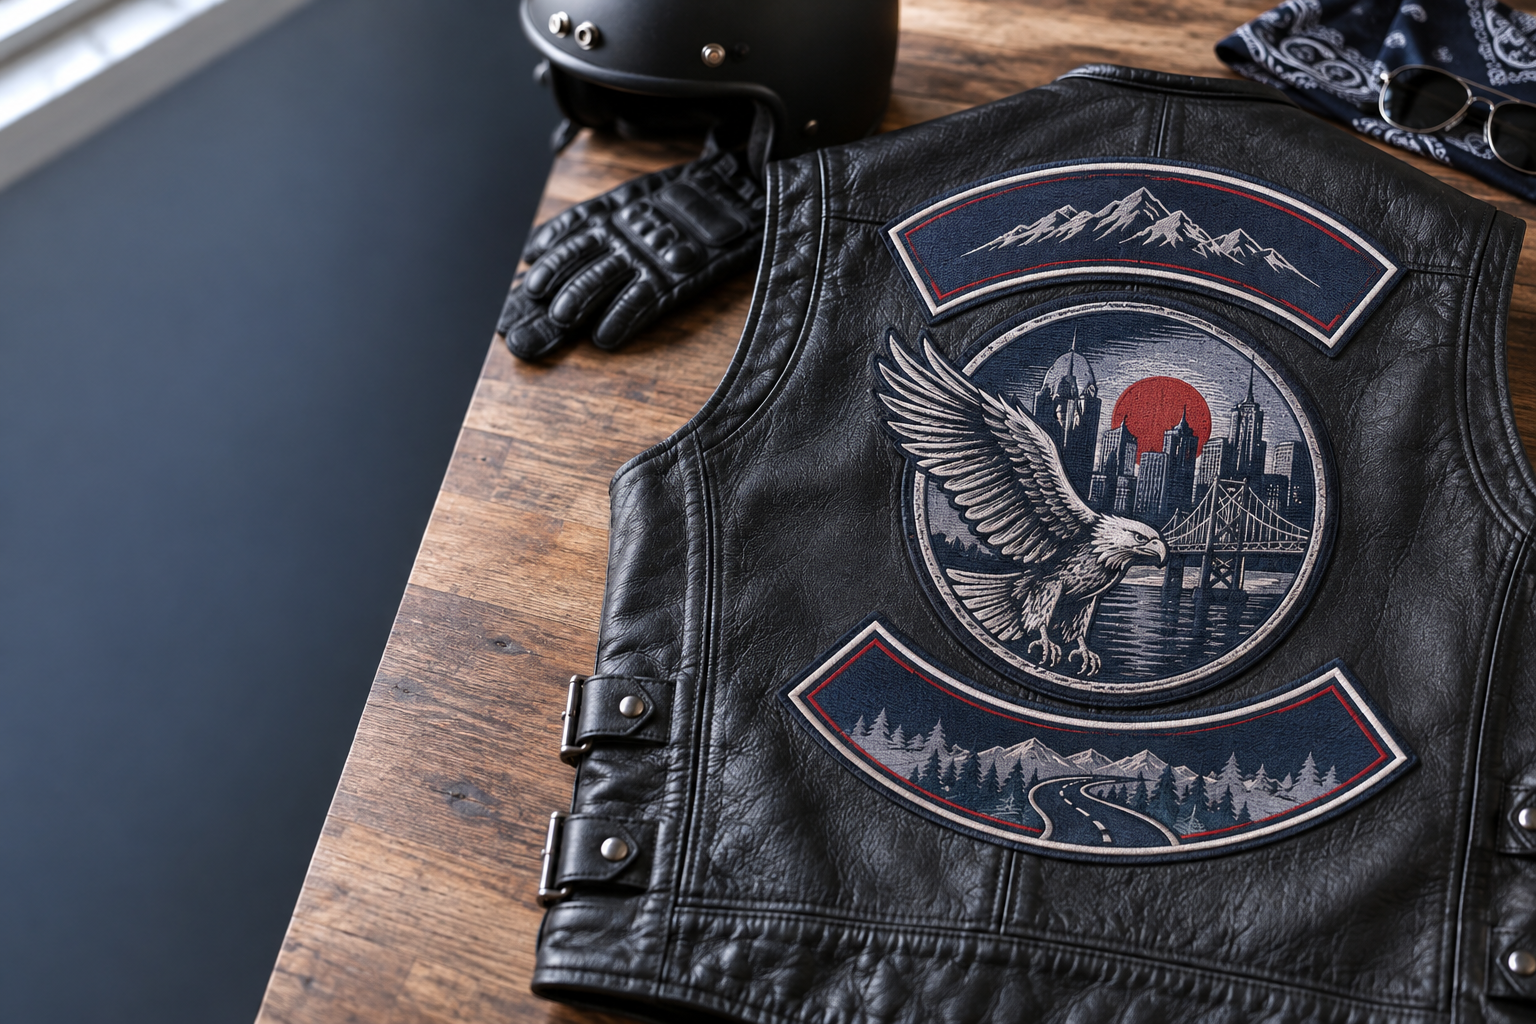
GetUSAPatches makes custom biker patches New York rally organizers can order for participant vests, volunteer jackets, and event merchandise, with a 10-piece minimum. Every order includes a free digital mockup before production, and we produce only after approval. We ship from Corona, CA, to all 50 states.
For most rally quotes, the first useful details are the garment, patch dimensions, quantity, and required in-hand date—not just the logo. A 3-inch souvenir for a denim vest has different needs from a large leather back piece or a removable volunteer identifier on a nylon shell. Get those differences into the brief early, and the quote becomes something your committee can actually compare.
What job does the rally patch need to do?
Start with its job. A registration souvenir should be easy to distribute and small enough that riders can find a place for it among existing patches. A volunteer identifier needs readable wording, while a sponsor item may depend on preserving a small logo that thread cannot reproduce clearly at the requested size.
Those are different production briefs, even if they share the same event artwork. On a production desk, the same distinction shows up between high-school team jacket emblems, fire and public-safety unit patches, and hospitality polo badges: the viewing distance and garment matter as much as the design. A patch that looks good alone can still be wrong for the uniform.
- Participant souvenir: prioritize the event name, year, and a recognizable symbol. Keep the design compact enough for a crowded vest.
- Volunteer patch: make the role readable before adding sponsor names or decorative lettering. Treat it as identification, not protective equipment.
- Fundraiser patch: decide whether it is included with registration or sold separately, and budget for unsold inventory.
- Club identity patch: obtain the club's approved artwork and layout rather than adapting a rally souvenir into club colors.
- Vendor or sponsor merchandise: confirm logo permission and decide whether exact detail matters more than a traditional stitched surface.
For a mixed event, one participant design plus a separate volunteer version is often easier to manage than six nearly identical versions. Each extra variation adds artwork checks, counting, and distribution work. The planning examples in Custom Patches for Fundraisers and Events: Ideas and Planning Tips help separate merchandise decisions from registration logistics.
Should a rally souvenir look like a motorcycle club patch?
Not automatically. A rally patch records participation; a club patch can communicate membership and identity. Rockers, territory wording, initials, and familiar symbols can carry meaning beyond the artwork, so ask the organizing club to approve the concept before spending time on thread colors.
For an open event with riders from several clubs, a single-piece badge with the event name, date, and city is often the clearer choice. That is a design recommendation, not a universal rule about motorcycle culture. Local expectations vary, and the organizer should resolve those questions with the participating clubs.
Keep event artwork and membership artwork separate
Do not copy another club's crest from a photograph and change the city. Ask for authorized source artwork, approved spelling, and a named person who can sign off on the design. Sponsor logos need the same attention, especially if the patch will be sold rather than handed out.
Our biker and motorcycle club patches hub covers the product category, while Biker Vest Patches: Sizes, Styles and How to Design a Club Set goes deeper into layout. For a multi-piece set, label the center piece and each rocker separately in the quote request. A set is not the same counting unit as one individual patch.
Sizing custom biker patches New York organizers can actually use
Measure the available garment panel, not the space on a computer screen. A roughly 3-inch-wide rally patch can be a useful starting point for a vest front, but its height and outline still need checking. An oval, shield, and square with the same width occupy different amounts of usable space.
For a larger back design, test a paper outline around 9–12 inches wide only if the vest has room; that range is a planning example, not a required biker size. Smaller vests, tapered panels, existing rockers, and center seams can change the layout. Check the smallest garment in the group before approving one size for everyone.
Use a paper test before adding more detail
Cut the proposed shape from paper, tape it lightly in position without damaging the garment, and photograph it from a normal viewing distance. Open the pockets and close the zipper or snaps. A patch that bridges a pocket opening or sits across a fold is a sewing problem waiting to happen.
- Denim vest front: check pocket flaps, existing patches, and the space beside the button or snap line.
- Leather vest back: check panel seams, lining access, and whether the design leaves room for current club insignia.
- Textile riding jacket: avoid assuming that a waterproof or protective garment can be sewn or heated without affecting its construction.
- Cap: measure the front panel and consider its curve. A vest patch rarely transfers to a cap unchanged.
- Volunteer outerwear: measure any existing hook-and-loop panel, including its corner shape, before specifying a removable patch.
For caps sold at the registration table, develop a dedicated hat patches version instead of shrinking the full back design until the lettering disappears. The Custom Patch Size Guide: How Big Should Your Patch Be? is useful for setting that first paper test. Final dimensions should appear in inches on the approved specification.
Which patch construction fits the artwork and budget?
Embroidery is the familiar starting point for biker merchandise because thread adds texture and gives bold lettering a defined edge. It is not the answer to every file. Tiny sponsor lines, fine spokes, and a detailed skyline may need simplification or a different construction.
Start with embroidered patches for bold crests and traditional vest pieces. Compare woven patches for finer lettering, or printed patches for gradients and image-heavy artwork. Printed is flatter; that is the point, especially when preserving artwork matters more than raised thread.
| Construction | Useful rally application | Artwork strength | Trade-off to check |
|---|---|---|---|
| Embroidered | Traditional vest souvenir, bold club emblem, staff badge | Strong lettering, broad shapes, visible thread texture | Small text and tightly packed lines may need enlargement or simplification |
| Woven | Compact badge with longer wording or finer linework | Finer detail with a relatively flat textile surface | Less raised texture than embroidery; small lettering still needs review |
| Printed | Full-color event art, gradients, detailed sponsor graphics | Continuous-tone artwork and visual detail | Flatter appearance; substrate and care requirements should be confirmed |
| PVC | Removable volunteer identifier on a compatible loop panel | Bold molded shapes and defined color areas | Added thickness and a different hand feel from a textile patch |
| Leather or faux leather | Simple merchandise badge with restrained branding | Bold marks suited to the selected material and marking method | Fine detail, material variation, and garment care need separate review |
A rainy event does not automatically make PVC the best choice for every rider. PVC patches may fit a removable staff system, while sewn embroidery may better suit the participant's denim vest. Ask which construction solves the actual use case, not which one sounds toughest.
The same restraint applies to raised and fuzzy finishes. 3D embroidered patches need suitable bold shapes; they are not a rescue for tiny lettering. Chenille works well for broad letterman-style forms, but a dense rally itinerary is a poor reason to choose it.
Which backing belongs on leather, denim, or nylon?
For denim and leather biker vests, sew-on is usually the practical starting point. Stitching gives the installer control over placement without asking heat-sensitive material to tolerate a press. Leather still needs the right equipment and an experienced installer because needle holes remain after a patch is moved.
Iron-on is convenient on suitable fabrics, but it is not a universal permanent attachment. Iron-on that peels after a dryer cycle can result from incompatible fabric, poor bonding, or care conditions outside the adhesive's limits. Do not prescribe one temperature and pressing time for leather, nylon shells, cotton denim, and coated polyester.
Match the attachment to the garment, not the sales label
- Leather vests and jackets: plan professional sewing unless the garment maker and installer approve another method. Do not assume direct heat is safe.
- Cotton denim: sewing is dependable for regular wear. Iron-on may be suitable if the garment and adhesive instructions agree.
- Nylon shells and coated rainwear: avoid unverified heat application. Sewing can puncture waterproof layers, so consult the garment maker before modifying them.
- Existing Velcro panels: specify the hook side on the patch and measure the receiving loop panel. Ask whether a separate loop piece is included.
- Wool coaches' jackets and letterman jackets: check shell fabric, leather sleeves, lining, and access before selecting an attachment method.
A hook-backed patch does not attach to bare leather by itself. It needs a compatible loop surface, and installing that surface is a separate task. The Velcro® Patches: How to Attach and Use Hook-and-Loop Backing guide explains the two sides; Patch Backing Options Explained: Sew-On, Iron-On, Velcro® & More helps compare the broader choices.
How do you keep New York details readable?
A skyline can work. A skyline behind a motorcycle, behind a bridge, under five sponsor names usually asks too much of a small patch. Choose one main image, one clear event name, and a short secondary line for the year or location.
City wording should describe the event accurately. If registration is in Manhattan but the gathering or ride starts elsewhere, confirm which location belongs on the patch rather than using New York, NY by habit. The shipping destination is a separate field and should never be inferred from the artwork.
Treat text, colors, and borders as production choices
There is no single minimum letter height that makes every font stitch cleanly. Block letters, thin scripts, outlines, and curved text behave differently. Check the design at actual size and let the production review identify counters, gaps, and narrow strokes that need more room.
Thread is a physical material, not a glowing screen color. Provide a brand reference when color matters, then confirm the proposed thread selection; a digital mockup cannot prove an exact physical match. The Thread Color Matching for Custom Patches: Getting Brand Colors Right guide explains why screen approval and material approval are different checks.
Merrowed crests have a wrapped edge that suits many simple shapes, but tight inside corners need a different conversation. A cut border may follow an irregular outline more closely, depending on construction. Compare the options in Merrowed vs. Hot-Cut vs. Laser-Cut Borders: What’s the Difference? before locking in a detailed silhouette.
What should a useful rally patch quote include?
Ask for a quote that defines the product, not just a price per piece. Width, height, construction, border, backing, quantity, and design variations should be visible together. Otherwise, one committee member may be comparing a plain sew-on patch with another person's hook-backed version and wondering why the totals differ.
Size, stitch coverage, detail, materials, and order quantity can all affect cost. A larger embroidered back piece uses more material and machine time than a small rally badge, while multiple designs may require separate preparation. GetUSAPatches has a 10-piece minimum; ask how that minimum applies to separate sizes, designs, and named versions rather than assuming mixed artwork pools into one run.
- List every finished patch size in inches, including separate dimensions for rockers and center pieces.
- State the quantity of each design and clarify whether a quoted unit means one patch or one complete set.
- Name the backing and specify whether any mating loop material is required.
- Ask which artwork preparation, production, packing, and shipping charges are included.
- Confirm any applicable taxes and optional services before approving the total in USD.
- Keep installation costs separate if a local shop will sew patches onto participants' garments.
Use landed cost for fundraiser math
Here is a planning example, not a GetUSAPatches price: if 200 patches cost $800 delivered, their landed cost is $4 each. Selling 150 at $10 produces $1,500 in revenue and leaves $700 after that patch purchase, before processing fees, booth costs, or other expenses. The remaining 50 patches are inventory, not extra cash.
That distinction matters for dated merchandise. A lower unit cost on a much larger order can still leave the fundraiser with less usable money if attendance falls short. Use How Much Do Custom Patches Cost? What Drives the Price to frame the quote, then model conservative attendance rather than the largest turnout anyone remembers.
How should organizers handle ordering and lead time?
Start with the date the cartons must be in the organizer's hands, not the day riders arrive. A Friday evening registration table needs inventory counted and packed beforehand. If a volunteer plans to carry the order from New York City to another rally location, that transfer belongs on the schedule too.
Production and transit are separate intervals, and artwork approval comes before production. GetUSAPatches provides a free digital mockup before production and produces only after approval. Ask for a current schedule tied to the final specification and destination; do not treat a general website estimate as a confirmed arrival date.
- Send the brief: include artwork, garment type, dimensions, backing, quantities, destination ZIP code, and required in-hand date.
- Review the construction: resolve fine text, border choices, attachment compatibility, and any proposed artwork simplification.
- Check the mockup: proofread the year, sponsor names, city, role labels, dimensions, and all separate pieces.
- Approve through one contact: collect committee comments internally, then send one clear approval or one consolidated revision list.
- Confirm the schedule: separate approval, production, shipment, transit, and the time your team needs to receive and count the order.
- Receive before distribution: check quantities and specifications before sealing registration kits or sending stock to volunteers.
Put a real receiving plan behind the address
A Midtown hotel, apartment building, office mailroom, and temporary event site have different receiving arrangements. Include the recipient's name and unit or department details, then confirm that someone can accept the shipment. For hotels or venues, check package acceptance rules and any handling fees directly with the property.
We ship from Corona, CA, throughout the United States, including all 50 states. New York delivery is part of that nationwide service; it should not be confused with a local pickup arrangement. Weather, carrier conditions, and address problems can affect transit, so keep receiving time separate from the rally deadline.
If the date is tight, ask what specification can meet it before promising merchandise in registration materials. Fewer variations or simpler artwork may reduce coordination, but they do not automatically guarantee faster delivery. The Custom Patch Production Timeline: From Artwork to Delivery guide gives your committee a useful way to organize the stages.
What should you check before approving the mockup?
Treat the mockup as a production document, not a poster. The overall look matters, but small factual errors are what turn a usable batch into a box nobody wants to distribute. Read the wording backward or have a second person check it without relying on the original design file.
- Confirm the event year, exact rally name, sponsor spelling, and location wording.
- Check width and height in inches, including the size of each piece in a set.
- Verify construction, border treatment, backing, and the quantity for every version.
- Confirm whether black areas are thread, exposed base fabric, printed color, or another material treatment.
- Check that volunteer and participant versions cannot be easily confused at the distribution table.
- Identify the approved file revision so a later email attachment does not accidentally replace it.
A digital mockup shows the proposed layout; it is not a physical test of stitching, stiffness, adhesive performance, or garment fit. If a physical sample is necessary, ask about availability, cost, and the effect on the schedule before approval. Do not assume a free digital mockup includes a free manufactured sample.
For submitted artwork, a clean vector file is useful, but an organizer should not guess at production settings inside the file. Supply the best available original and identify any fonts or logos that cannot change. Artwork File Guide for Custom Patches: Vector, PNG, JPG and More explains what helps the review.
How many extras should a rally order carry?
Base the order on distribution rules, not just attendance. If a patch is promised to every paid registrant, that commitment belongs in the base quantity; staff, sponsors, late registrations, and sales inventory should be separate lines. Count patches per person carefully if a registration package includes more than one piece.
For example, 240 prepaid participants plus 20 volunteers and 10 sponsor allocations creates a base requirement of 270 patches if everyone receives one. An organizer might choose another 30 for walk-ins and replacements, bringing the planning total to 300. That is an illustrative reserve, not a standard percentage that fits every event.
Design the handout process before the cartons arrive
Separate prepaid fulfillment from merchandise sales so the sales table cannot accidentally consume promised stock. Count each version when it arrives and label storage containers clearly. If individual packaging or special sorting is needed, request it during quoting instead of assuming it is included.
A date-free design can make leftover merchandise easier to sell later, while a dated patch gives riders a clearer keepsake of that specific rally. Neither is automatically better. Decide whether the patch is meant to commemorate one weekend or support ongoing club fundraising before artwork approval.
How should riders attach and care for their patches?
Include a short attachment note with the handout. Riders should not have to guess whether a shiny backing is meant for heat application or whether a hook-backed patch includes its matching loop piece. Clear instructions also keep the registration volunteers from improvising garment advice.
For leather, recommend an installer who works on leather garments and understands lining access. For denim, check that sewing will not close a pocket or catch an unwanted layer. How to Sew On a Patch: A Step-by-Step Guide is a useful reference, but protective riding apparel may require guidance from its manufacturer before modification.
- Follow the garment's care label and the patch material's care guidance; the more restrictive requirement should control.
- Do not give every participant the same ironing instructions. Fabric, coating, adhesive, and equipment affect suitability.
- Remove detachable patches before laundering when required, and prevent exposed hooks from snagging other fabrics.
- Check stitched edges after heavy wear, especially where a vest rubs against luggage or a seat back.
- Avoid treating leather patches, PVC pieces, and embroidered fabric patches as if they have identical cleaning needs.
If iron-on is part of the order, point participants to How to Iron On a Patch the Right Way (and Make It Last) and the specific application instructions supplied for their patch. For general maintenance, use How to Wash and Care for Patches (Embroidered, PVC, Leather & More). No decorative patch turns ordinary outerwear into protective motorcycle equipment.
What records make next year's reorder easier?
Save the approved artwork, dimensions, construction, border, backing, color references, and quantity breakdown in one folder. Add the purchase record and a photograph of the finished patch beside a ruler. A phone photo alone does not capture all the details needed to reproduce an order.
Record what was distributed, sold, left over, and requested after the event. Those numbers are more useful for the next budget than a general impression that the patches were popular. If next year's design changes only the date, still review the revised mockup and current quote before approving production.
For a recurring New York rally, keep the strongest visual elements stable and change only what helps identify the new event. That makes the series recognizable without forcing a complete redesign every year. The goal is straightforward: a patch riders can read, attach correctly, and keep wearing after the registration tents come down.


