
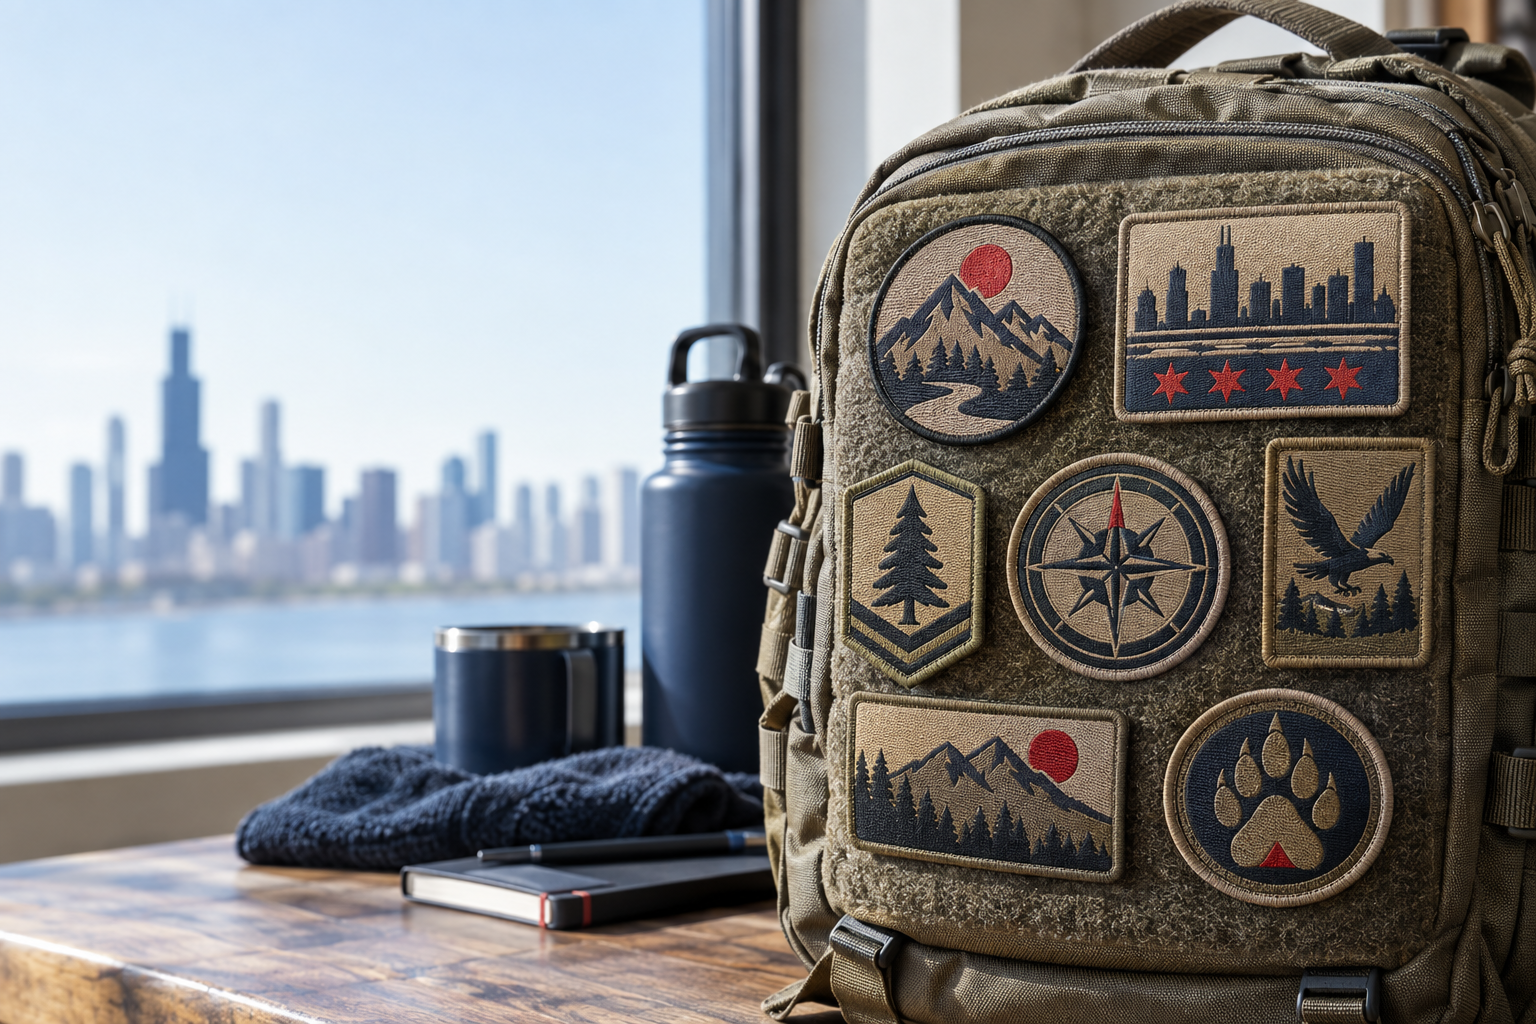
For custom military patches Chicago families can use on reunion jackets, caps, and backpacks, the best budget option is usually a readable design with a standard shape and a backing suited to the garment. Premium construction is worth considering when it solves a specific problem, such as fine lettering, a removable attachment, or repeated exposure to wet conditions. Compare the finished specification and delivered cost, not just the word premium.
At the GetUSAPatches production desk in Corona, CA, the first questions are what the patch goes on, how many you need, and when the box must arrive. We have a 10-piece minimum and provide a free digital mockup before production; we produce only after approval. We ship to all 50 states, serving military families and organizations throughout the United States without requiring a local pickup.
What budget and premium actually mean for a military family patch
Budget and premium are not standardized patch grades. One quote may call a fully stitched background premium, while another uses that word for molded PVC, removable backing, or individual packaging. Ask what changes physically between the two options before accepting the price difference.
A straightforward 3-inch embroidered circle with a clear family reunion name can look right on a denim jacket for years if it is made and attached properly. Adding more thread coverage does not automatically make that design more readable or its attachment stronger. Sometimes the exposed background fabric gives the lettering better separation.
Useful upgrades versus extra decoration
- A useful upgrade fixes a defined need: woven construction for smaller lettering, hook backing for an existing loop panel, or a larger finished size for a long unit name.
- A visual upgrade changes appearance: raised elements, additional texture, a shaped outline, or a different border treatment. It may be worthwhile for a commemorative keepsake without improving everyday function.
- An unnecessary upgrade adds cost without serving the placement. A thick patch can be awkward on a light hospitality polo, and extra relief can work against the curve of a small cap.
- A sound budget reduction removes complexity rather than basic workmanship. Fewer tiny details, one common design, and simpler packaging are usually better starting points than an unsuitable backing.
The same distinction comes up when quoting high-school sports teams, fire and public-safety units, biker vests, and letterman jackets. A bold crest can tolerate thread texture; a small commemorative date cannot tolerate losing half its characters. Start with what people must recognize, then decide what deserves the remaining budget.
Compare total cost before comparing the price per patch
Patch pricing depends on quantity, finished dimensions, construction, artwork demands, backing, and finishing. Small runs have fewer pieces over which to spread preparation work, so a 10-piece order should not be judged against a large-run unit price. GetUSAPatches accepts orders with a 10-piece minimum, but the actual price requires the design and specifications.
Use this calculation: quoted patch subtotal plus any separate setup, backing, packaging, shipping, applicable tax, and attachment costs equals your project total. Divide that total by the number of usable patches you need. Ask which items are already included so you do not count them twice.
A planning example, not a GetUSAPatches price quote
Suppose a family committee sets aside $300 for 30 patches, delivery, and any installation. That creates a $10-per-recipient budget, not permission to spend $10 on the patch alone. If sewing and other expenses use $90, the remaining patch allowance is $210, or $7 per piece; these figures demonstrate budgeting only, not current product pricing.
The lower unit price can also lose its advantage if the quote requires buying more pieces than your group will distribute. A reunion with 24 confirmed recipients may need a few extras, not a box of unused stock. Ask for quantities that match your actual distribution plan and compare the full cash outlay.
- Keep quantity, width, height, and delivery ZIP code identical when comparing two construction options.
- Ask whether each name, date, or artwork variation changes preparation costs or quantity treatment. Do not assume several different designs share one minimum.
- Specify hook backing only or hook plus a separate loop piece. Those are different supply requirements.
- Separate optional packaging from the patch itself so you can see what the presentation upgrade costs.
- Confirm any deadline-related charges before approval rather than assuming faster production is included.
For a fuller explanation of those variables, use How Much Do Custom Patches Cost? What Drives the Price. A useful comparison quote identifies the physical change behind every additional dollar. A vague premium label does not.
Material comparison: thread, woven detail, print, and PVC
Traditional embroidered patches are a strong starting point for family crests, commemorative shields, and bold military-inspired graphics. Thread gives the face recognizable texture, but it also occupies space. Narrow gaps and miniature text can close up when artwork is converted into stitches.
That does not make embroidery the budget material and everything else premium. Woven patches can suit dense lettering, while printed patches can preserve gradients or illustrated detail that would need simplification in thread. Printed is flatter; that is the point.
| Construction | Good use for a family order | What you are paying for | Main trade-off | Specification to confirm |
|---|---|---|---|---|
| Standard embroidery | Bold reunion crests, denim jacket patches, and readable cap emblems | Stitched texture with a design adapted to thread | Fine text and tight gaps may require simplification or a larger patch | Finished dimensions, stitch coverage, border, and backing |
| Woven | Long names, compact symbols, and detailed commemorative artwork | Finer thread-based detail in a relatively flat construction | Less raised texture than traditional embroidery | Smallest lettering and the legibility of the finished-size layout |
| Printed | Illustrations, tonal artwork, and designs with gradients | Color detail without translating every shape into stitches | A flatter face and a different visual character from thread | Source image quality, color expectations, edge finish, and care |
| PVC | Removable morale patches for compatible bags and outdoor gear | Molded construction with distinct shapes and possible relief | Added thickness, with tooling and design limits to review | Relief layout, overall thickness, backing, and any sewing provision |
| 3D embroidery | Large, bold initials on a cap or selected statement patch | Raised elements where the artwork supports them | Poor fit for tiny lettering or tightly packed commemorative details | Which elements are raised and how the patch fits the cap |
Do not ask one material to perform every job
PVC patches have a molded face that is easy to wipe clean, but the finished patch is not a waterproof repair for the garment underneath. Stitch holes and the garment's own construction still matter. For loop-equipped bags, the removable format may be more valuable than the surface texture.
Use 3D embroidered patches selectively for broad lettering rather than a crowded family crest. On a letterman jacket, chenille patches may suit a large letter, with a separate embroidered patch carrying names and dates. Different jobs can deserve different constructions without making either one inferior.
Size and border specs for custom military patches Chicago families order
Choose dimensions from the placement, not from how large the artwork looks on a laptop. A roughly 3-inch-wide design can be a useful starting point for some jacket or bag placements, but it is not a universal military standard. Measure the usable space and keep the patch clear of pocket openings, seams, and zippers.
For a cap, start by measuring the front panel's usable width and height rather than copying the jacket size. A patch that fits across the front while flat may wrinkle or stand away from the crown when attached. The Custom Patch Size Guide: How Big Should Your Patch Be? helps turn that placement check into a usable specification.
Keep the lettering that matters
Family names, unit references, and memorial dates often compete for the same small space. Set a hierarchy: the main name first, the central symbol second, and supporting words only if they remain readable at actual size. A minimum letter size cannot be promised without considering the font, material, spacing, and contrast.
- Print the design at its proposed dimensions and read it at arm's length. This is a layout check, not a guarantee of stitched detail.
- Replace tightly packed decorative lettering with a simpler font before enlarging every element.
- Move a long dedication onto a backing card if keeping it on the patch would make the main emblem too small.
- Confirm which details will be simplified in production artwork rather than assuming the original file will transfer unchanged.
Merrowed crests versus shaped edges
Merrowed crests have a wrapped thread border that works well on suitable circles, ovals, rectangles, and uncomplicated shields. A detailed silhouette may need another edge treatment because tight notches and sharp internal corners are not friendly to every border process. The right border follows the shape instead of fighting it.
For the budget version, a simpler outline can reduce complications without changing the message. For the premium version, keep a custom contour only if the silhouette contributes something people will notice. Compare the edge options in Merrowed vs. Hot-Cut vs. Laser-Cut Borders: What’s the Difference? before treating a shaped edge as an automatic improvement.
Backing is where a sensible patch can become the wrong purchase
An attractive patch still needs a compatible attachment. We ask different questions for nylon shells, wool coaches' jackets, denim biker vests, and thin polos because heat, needle holes, and patch weight affect those garments differently. A backing choice should never be hidden inside a general premium package.
Sew-on is often the practical route for denim and substantial woven garments, provided the placement and garment construction allow it. Sewing can also puncture a weather-resistant layer or catch a lining where you did not intend. If a jacket has a membrane, insulation, or a difficult lining, ask a garment professional before attaching anything.
Iron-on needs a heat-compatible garment
Iron-on that peels after a dryer cycle is not always evidence of a badly made patch. The adhesive may have been applied with insufficient heat or pressure, the fabric may have had an incompatible coating, or the care routine may exceed what the attachment tolerates. Heat-sensitive nylon shells are not the place to experiment.
Check the garment label and patch application instructions together, and do not guess at a universal iron temperature. If either instruction rules out the proposed method, choose another attachment. How to Iron On a Patch the Right Way (and Make It Last) explains the application checks without making every fabric an iron-on candidate.
Hook backing and a complete hook-and-loop set are different
A bag with an existing loop panel may only need hook backing on the patch. A plain jacket needs a compatible loop field installed if you want the patch to be removable. Measure existing Velcro panels carefully and check corner shape, because exposed hooks can catch adjacent fabric.
- For an existing loop panel, specify its usable dimensions and request the appropriate hook-backed patch.
- For a garment without a panel, ask whether the quote includes a separate matching loop piece and plan its installation.
- For a display board, identify the board surface before paying for wearable attachment features.
- For multiple garments, confirm whether separate backing versions affect the order specification or minimum.
The Patch Backing Options Explained: Sew-On, Iron-On, Velcro® & More guide is useful for mixed family orders. You may need one design with different attachment plans, not one backing forced onto every recipient's clothing.
Three Chicago family scenarios and where to spend the money
Chicago weather matters through the garment people actually wear, not through a special city-specific patch formula. A patch attached to a winter shell faces different problems from one saved in a reunion album. The following are planning examples, not customer stories or reported order results.
A family reunion with denim jackets and tote bags
Start with one embroidered crest, strong contrast, and a standard outline. If everyone can accept the same artwork, that common design keeps the comparison straightforward. Spend first on readable wording and sound attachment, not on a busy background that disappears behind the main emblem.
A small reserve can cover a late RSVP or a family member who wants a keepsake, but decide that quantity before ordering. If the tote fabric is light, check whether a heavy patch makes it sag. The less expensive, lighter construction may be the better result.
A memorial patch for jackets and a display case
Here, spelling, date accuracy, and the relationship between the name and emblem deserve the most attention. Woven construction may help if the dedication must remain compact, while a larger embroidered version may provide the preferred traditional texture. Neither choice excuses unreadable supporting text.
Consider separating the display presentation from the wearable patch. A card can carry a longer dedication without shrinking the lettering on every garment. That is often a more useful premium detail than adding another decorative thread color.
A removable morale patch for bags and veteran riders
For loop-equipped bags, budget for the correct removable backing before deciding between embroidery and PVC. For riding vests, check the intended placement and garment thickness instead of copying a backpack specification. The biker and motorcycle club patches hub covers another format where layout and placement strongly affect the order.
A single family graphic can become two sensible products: a compact removable bag patch and a larger sewn vest patch. Quote them as separate specifications so their dimensions and attachment are clear. Trying to make one physical patch serve both jobs can cost more in compromises than it saves.
Military imagery needs a careful artwork check
A family reunion or morale patch is not automatically approved for wear on an official uniform. Confirm current branch, unit, and command requirements through the appropriate official source before planning uniform placement. A custom patch order does not provide uniform authorization.
Supply an authorized reference for any insignia, unit artwork, or other controlled graphic you want reproduced, and confirm that you have the necessary permission. Do not rely on a small image found in a search result as the final specification. It may contain incorrect details, poor resolution, or an outdated version.
- Check names, ranks, dates, abbreviations, and punctuation with the designated family or organization representative.
- Identify the intended direction of flags, animals, arrows, and asymmetrical symbols rather than allowing an accidental mirror image.
- Confirm the exact colors and references needed; a subdued personal patch and an authorized uniform item are different projects.
- Leave sensitive personal information off the design unless sharing it is intentional and approved by the relevant people.
Use Custom Military and Morale Patches: What to Know Before You Order as a preparation guide, then resolve any authorization questions with the organization involved. On the production side, one clear reference and one final approver reduce conflicting revision requests.
Ordering and lead time: work backward from your Chicago event
Give us the date the patches must be in your hands, not just the parade, reunion, or presentation date. A box delivered on Friday does not help if the jackets must reach a local sewing shop on Wednesday. Include time for inspection, attachment, sorting, and any onward mailing to relatives.
An order timeline has separate parts: artwork preparation, mockup review, revisions, approval, production, and transit. There is no reliable universal arrival promise without the current specifications and destination. Ask for the production schedule and shipping plan for your order before approving it.
What to send with the quote request
- Send the best available artwork and the exact wording. A vector file is helpful when available, but a clear reference can start the review.
- State finished width and height in inches, quantity, preferred material, and intended border.
- Name the garment and placement. Include a close photo of the fabric, panel, or cap when compatibility is uncertain.
- Specify sew-on, iron-on, or hook-and-loop backing, including whether a separate loop piece is required.
- Provide the delivery ZIP code, required in-hand date, and any time needed for local sewing or family distribution.
- Ask for a budget option and an upgraded option with their differences itemized. Keep the essential artwork and comparison quantity consistent.
The Artwork File Guide for Custom Patches: Vector, PNG, JPG and More explains what to provide if your only reference is an older patch or a saved image. You can organize the request through the free mockup quote form. A clear brief is more useful than sending several conflicting screenshots with no final dimensions.
What approval should cover
GetUSAPatches provides a free digital mockup before production and produces only after approval. Review spelling, layout, dimensions, border, orientation, colors, and the accompanying backing specification. A digital mockup shows the proposed design; it is not a physical sample and cannot fully demonstrate texture, flexibility, or screen-to-thread color differences.
If the exact color relationship or construction feel is critical, ask what additional verification is available and how it affects cost and timing. Do not treat silence from several committee members as final approval. Put one person in charge of sending the confirmed version.
We ship nationwide from Corona, CA, to all 50 states, including Illinois. Transit timing depends on the selected service and delivery address, so confirm it separately from production time. If relatives in several states need individual packages, clarify the distribution arrangement rather than assuming split shipping is part of the quote.
Inspect and attach the patches before distribution day
Open the shipment early enough to review it before handing out garments. Count the pieces, check the approved wording and orientation, and compare the backing with the written specification. Look at the full batch rather than judging everything from the top patch in the box.
Check that borders look consistent and that the smallest important lettering is readable as produced. Some visual variation between a screen and physical thread is expected, which is why the approval specification matters. If something appears wrong, photograph the issue clearly and contact the supplier before altering the patches.
- Position a sew-on patch with the garment lying naturally, then check the placement while the garment is worn if practical.
- Keep pockets functional and avoid unintentionally stitching through a lining or multiple garment layers.
- Follow garment and patch care instructions together. Do not assume an attachment tolerates every wash temperature or dryer setting.
- Remove hook-backed patches before laundering when the garment and patch instructions call for it, and protect exposed hooks from snagging other fabric.
For home installation, How to Sew On a Patch: A Step-by-Step Guide covers the basic process. Dense wool, leather, insulated jackets, and awkward cap panels may justify professional attachment. Include that expense in the original budget rather than discovering it after delivery.
A final decision rule: buy the feature you will actually use
Choose the budget specification when a simple, readable patch meets the garment and event needs. Choose the premium specification when you can point to a useful difference: finer lettering, a needed removable backing, a particular surface, or a presentation detail the family values. If nobody can explain the upgrade without using an adjective, ask for a clearer comparison.
For most mixed family orders, the strongest starting point is one clear design, measured placement, and an attachment plan for each garment. That leaves room to spend on the part people will notice and use. More construction is not always better construction for the job.
Related guides and product starting points
- Start with embroidered patches for a traditional thread finish, then compare woven or printed construction if the lettering or illustration needs another approach.
- Read Custom Military and Morale Patches: What to Know Before You Order for military-specific planning questions.
- Use How Much Do Custom Patches Cost? What Drives the Price to build a like-for-like quote comparison.
- Review Custom PVC Patches for Rescue Teams in Chicago: Backing and Size Guide for additional panel, size, and attachment considerations relevant to removable patches.
Keep the final approved artwork, dimensions, backing description, and order details together for a possible reorder. Next year's coordinator should not have to measure an old jacket and guess which construction was supplied. A short, accurate specification saves more trouble than a folder full of unlabeled mockups.


